Category Archives: Articles

Living Full-Time in a 2013 Subaru Forester PZEV

Tristan’s note: This writeup and pictures are from Adam, an SUV RVing viewer who reached out to me wanting to share his rig, a 2013 Subaru Forester PZEV. His website is In Adam’s Shoes, and he blogs there about his travels. Head on over and subscribe if you want to follow his adventures. He’s also on Instagram (@adamtheplant).

***

Adam's 2013 Subaru Forest PZEV
Adam’s 2013 Subaru Forester PZEV. Click for the larger version.

On the outside

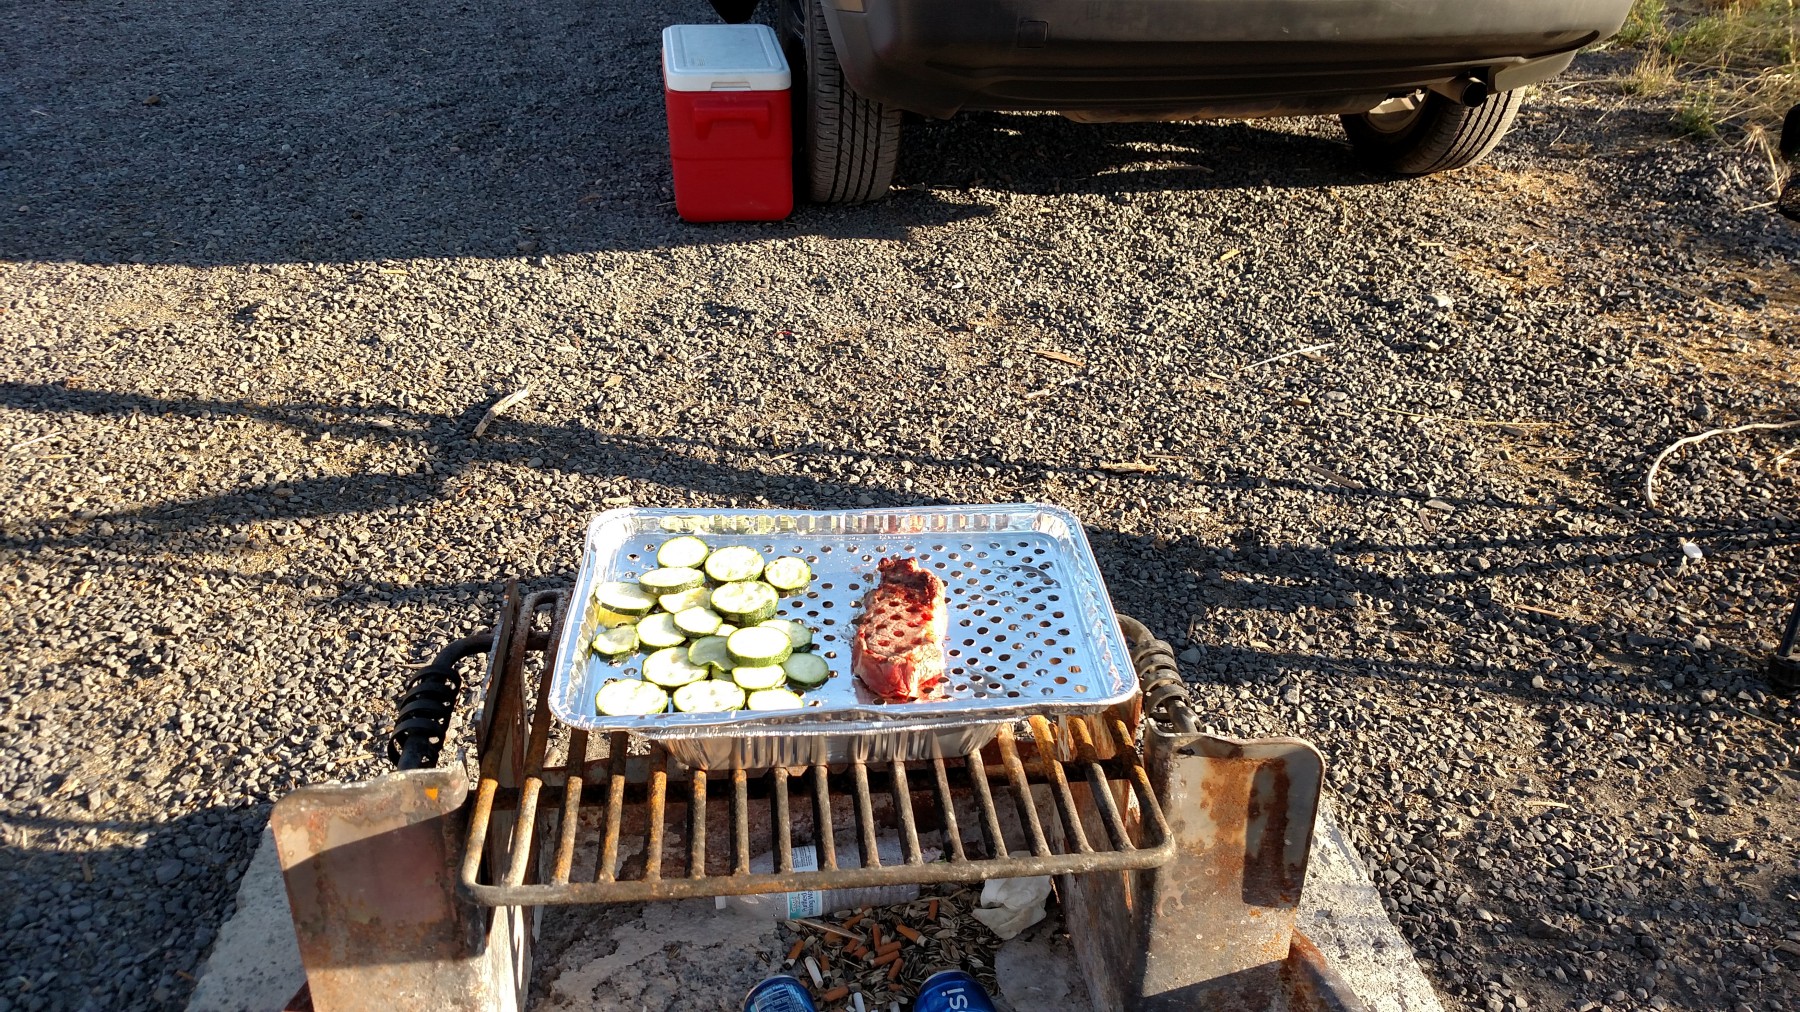
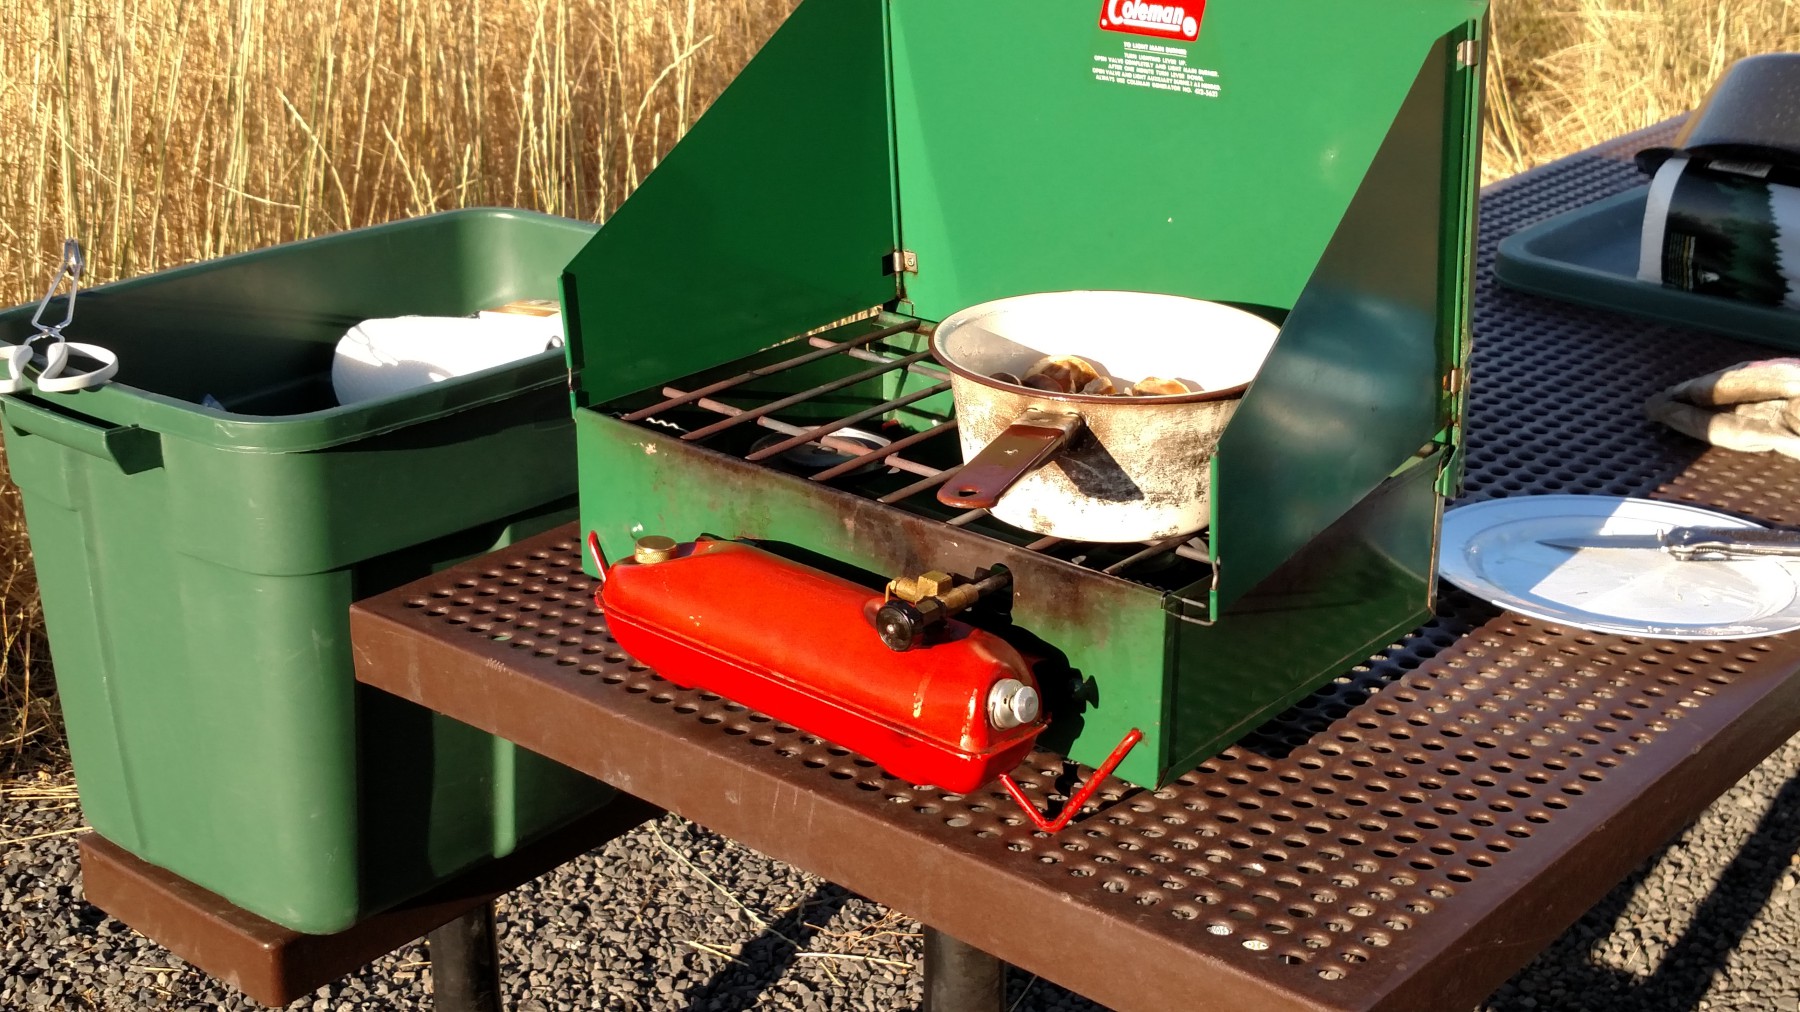
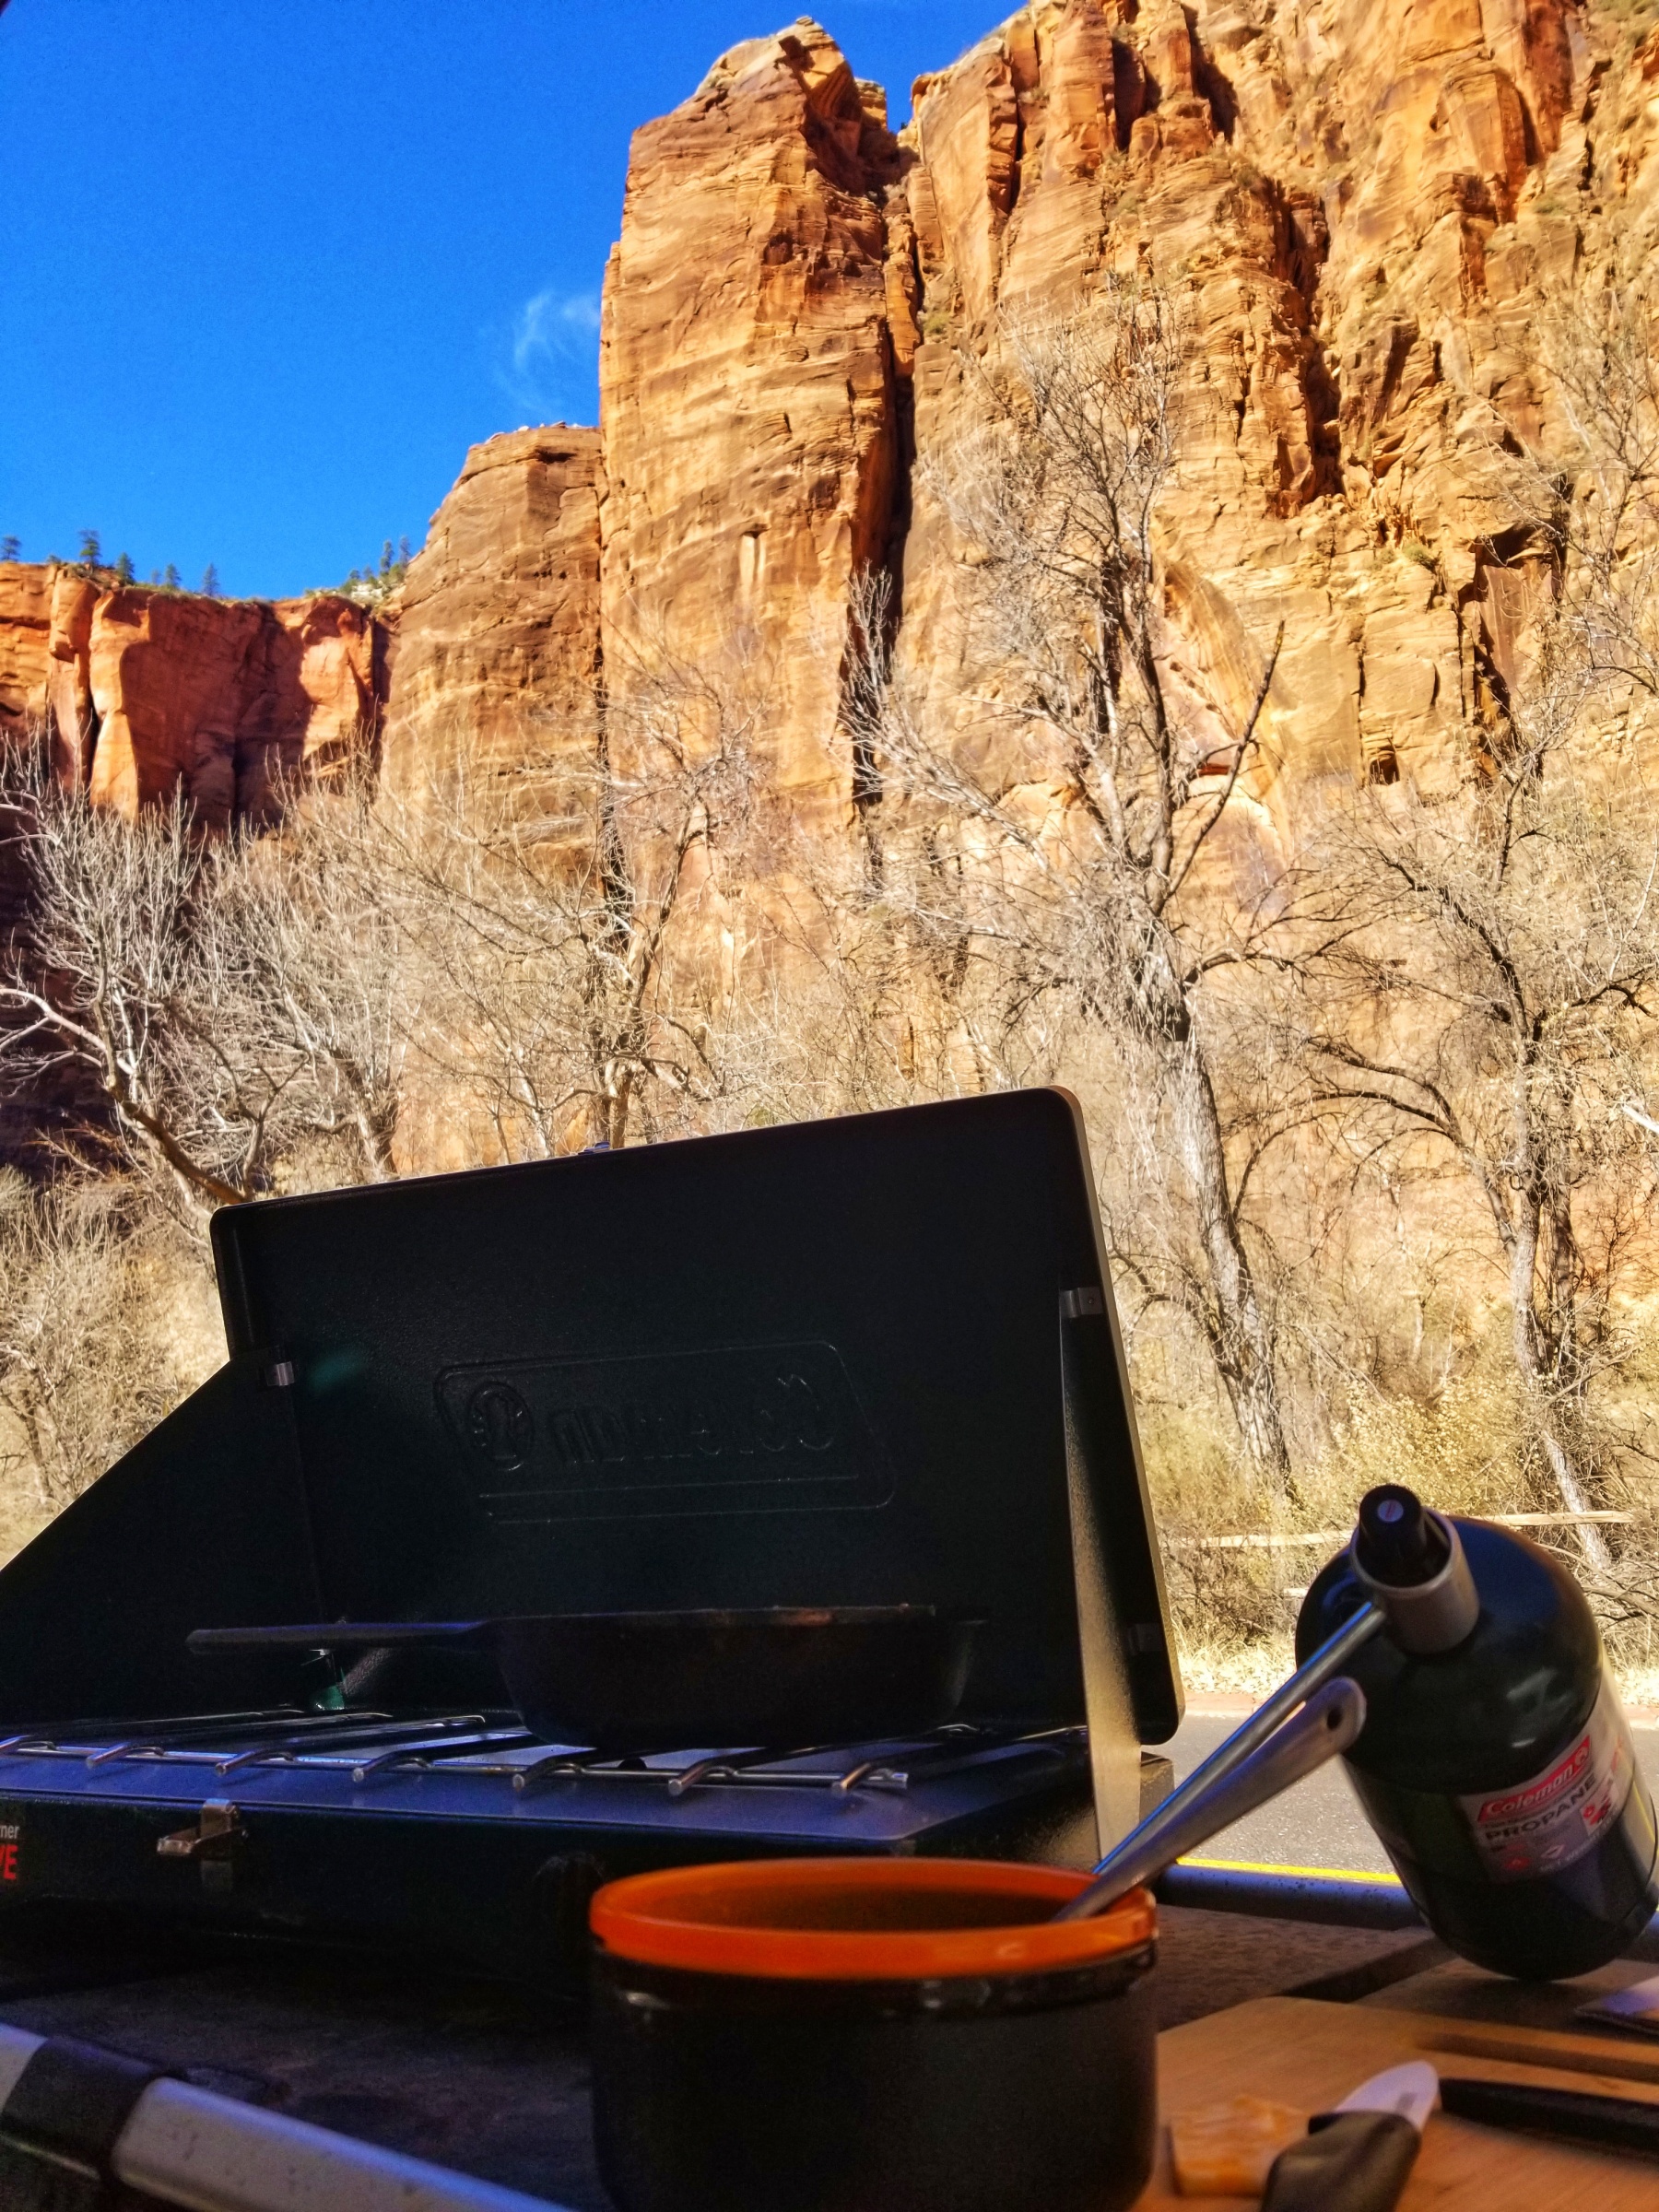
Adding a cargo basket to my hitch was one of the best ideas I have ever had. That, and the addition of a storage box on the back. The storage box is not only weather/water resistant, which works great for storing the gear I don’t use as much as others (also the clothing that is out of season), but it also doubles as my kitchen counter! It provides me with enough space to have my dual burning stove, water jug, and cutting board all atop the box, and I still have the remaining cargo basket space for additional items if I go full chef-mode.

A trailer hitch cargo carrier on the Subaru Forester
A trailer hitch cargo carrier on the Subaru Forester. Click for the larger version.

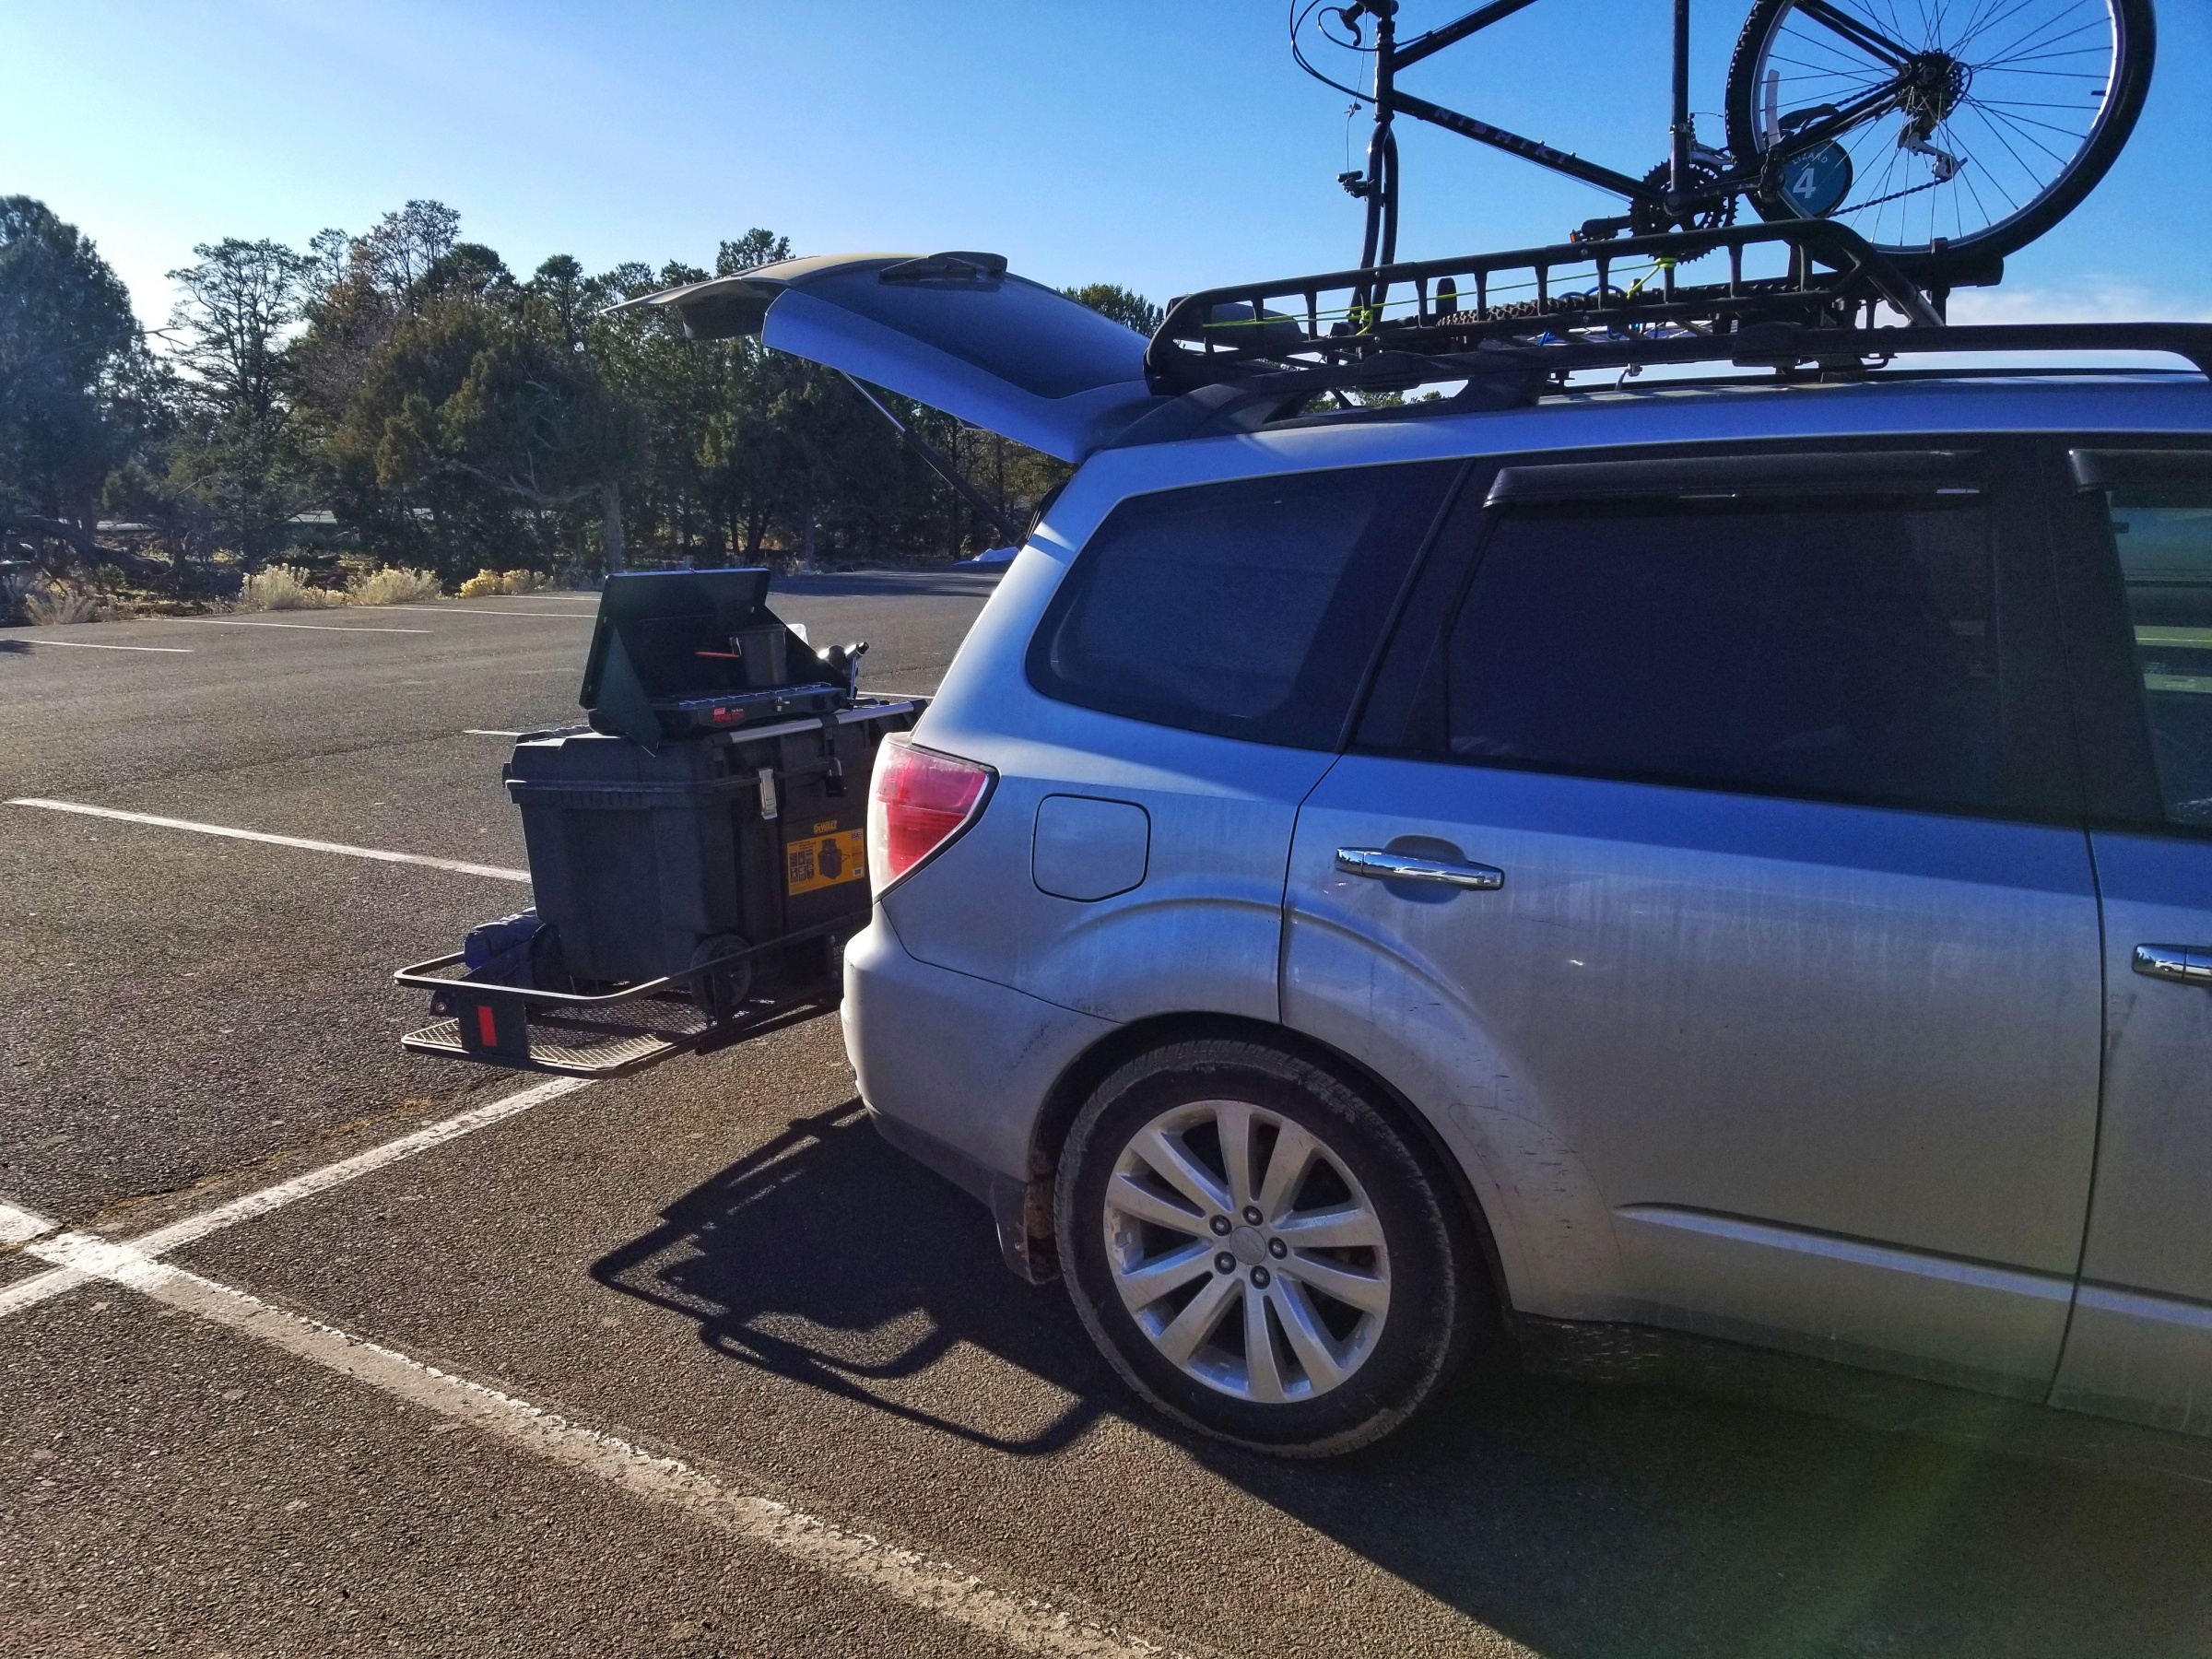
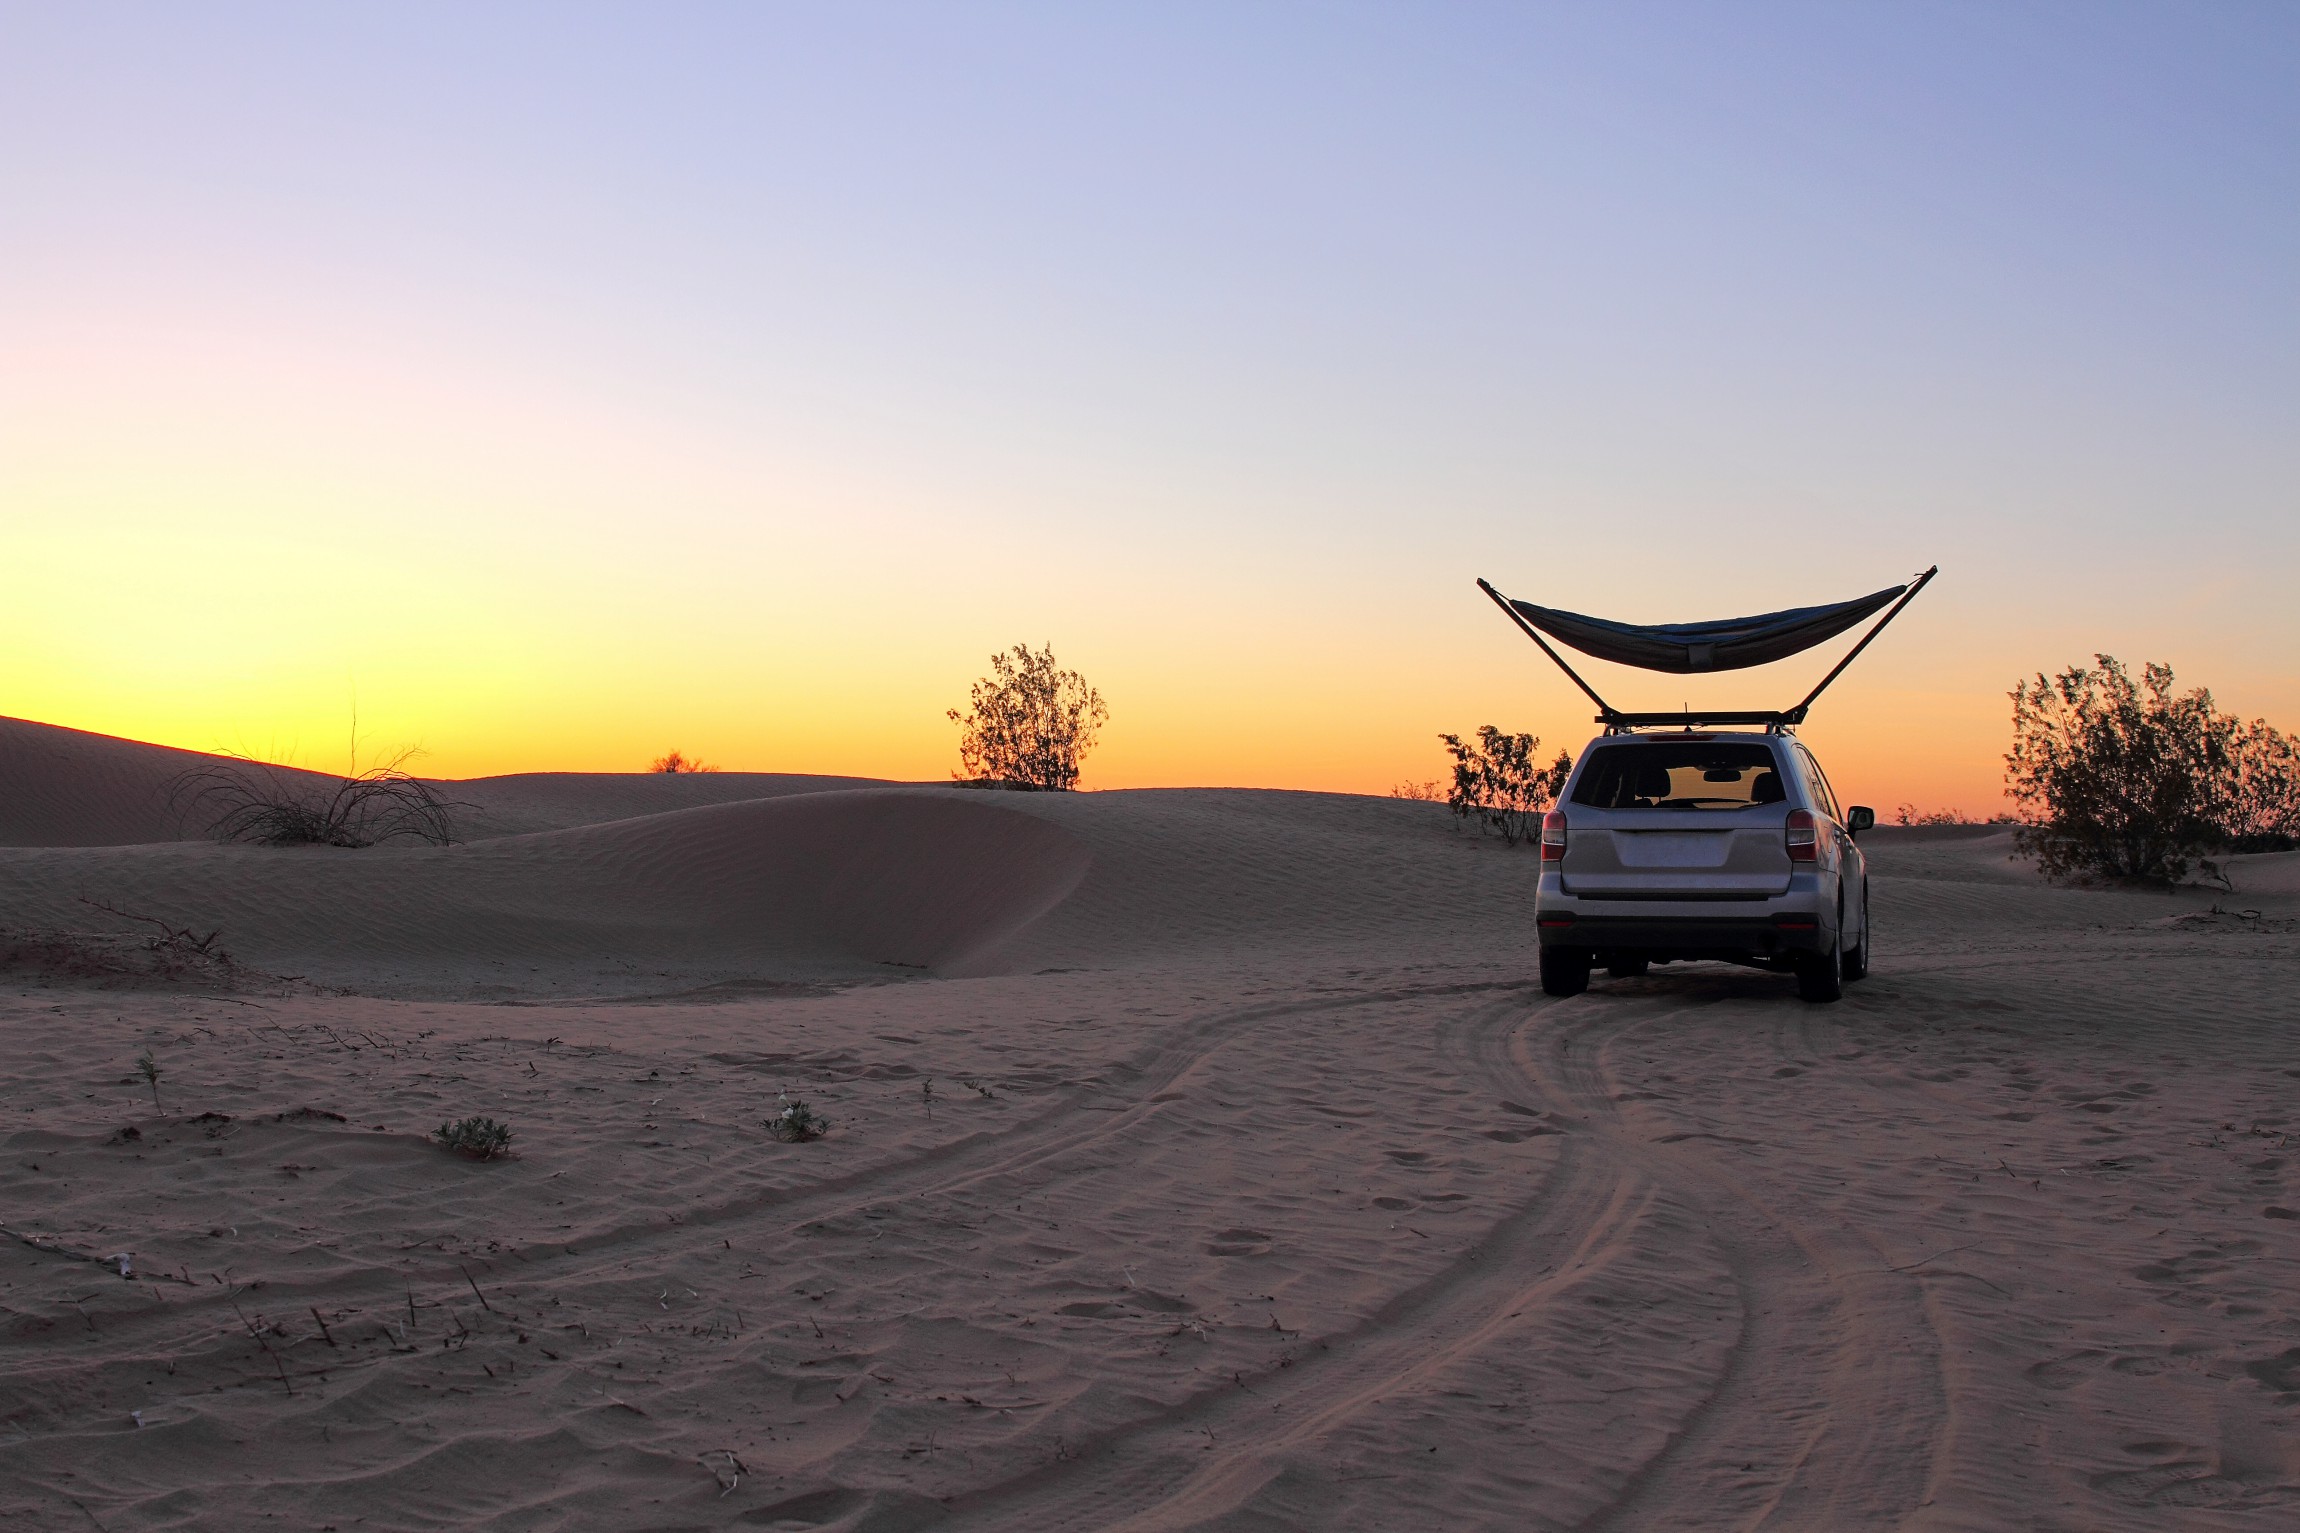
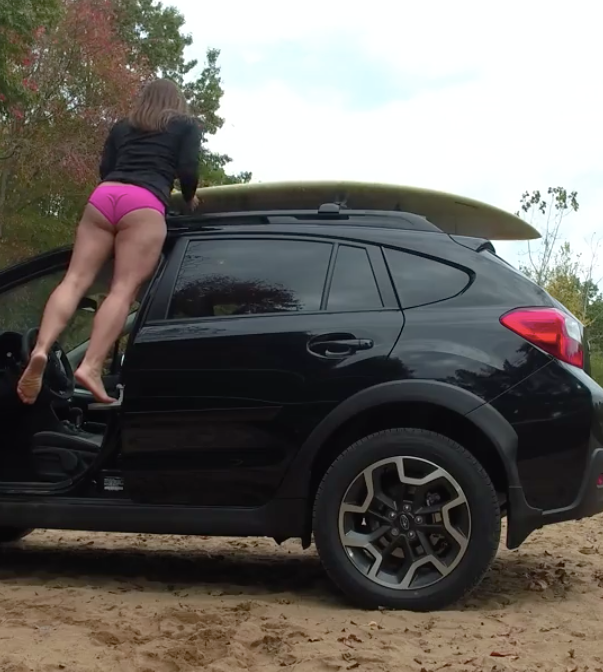
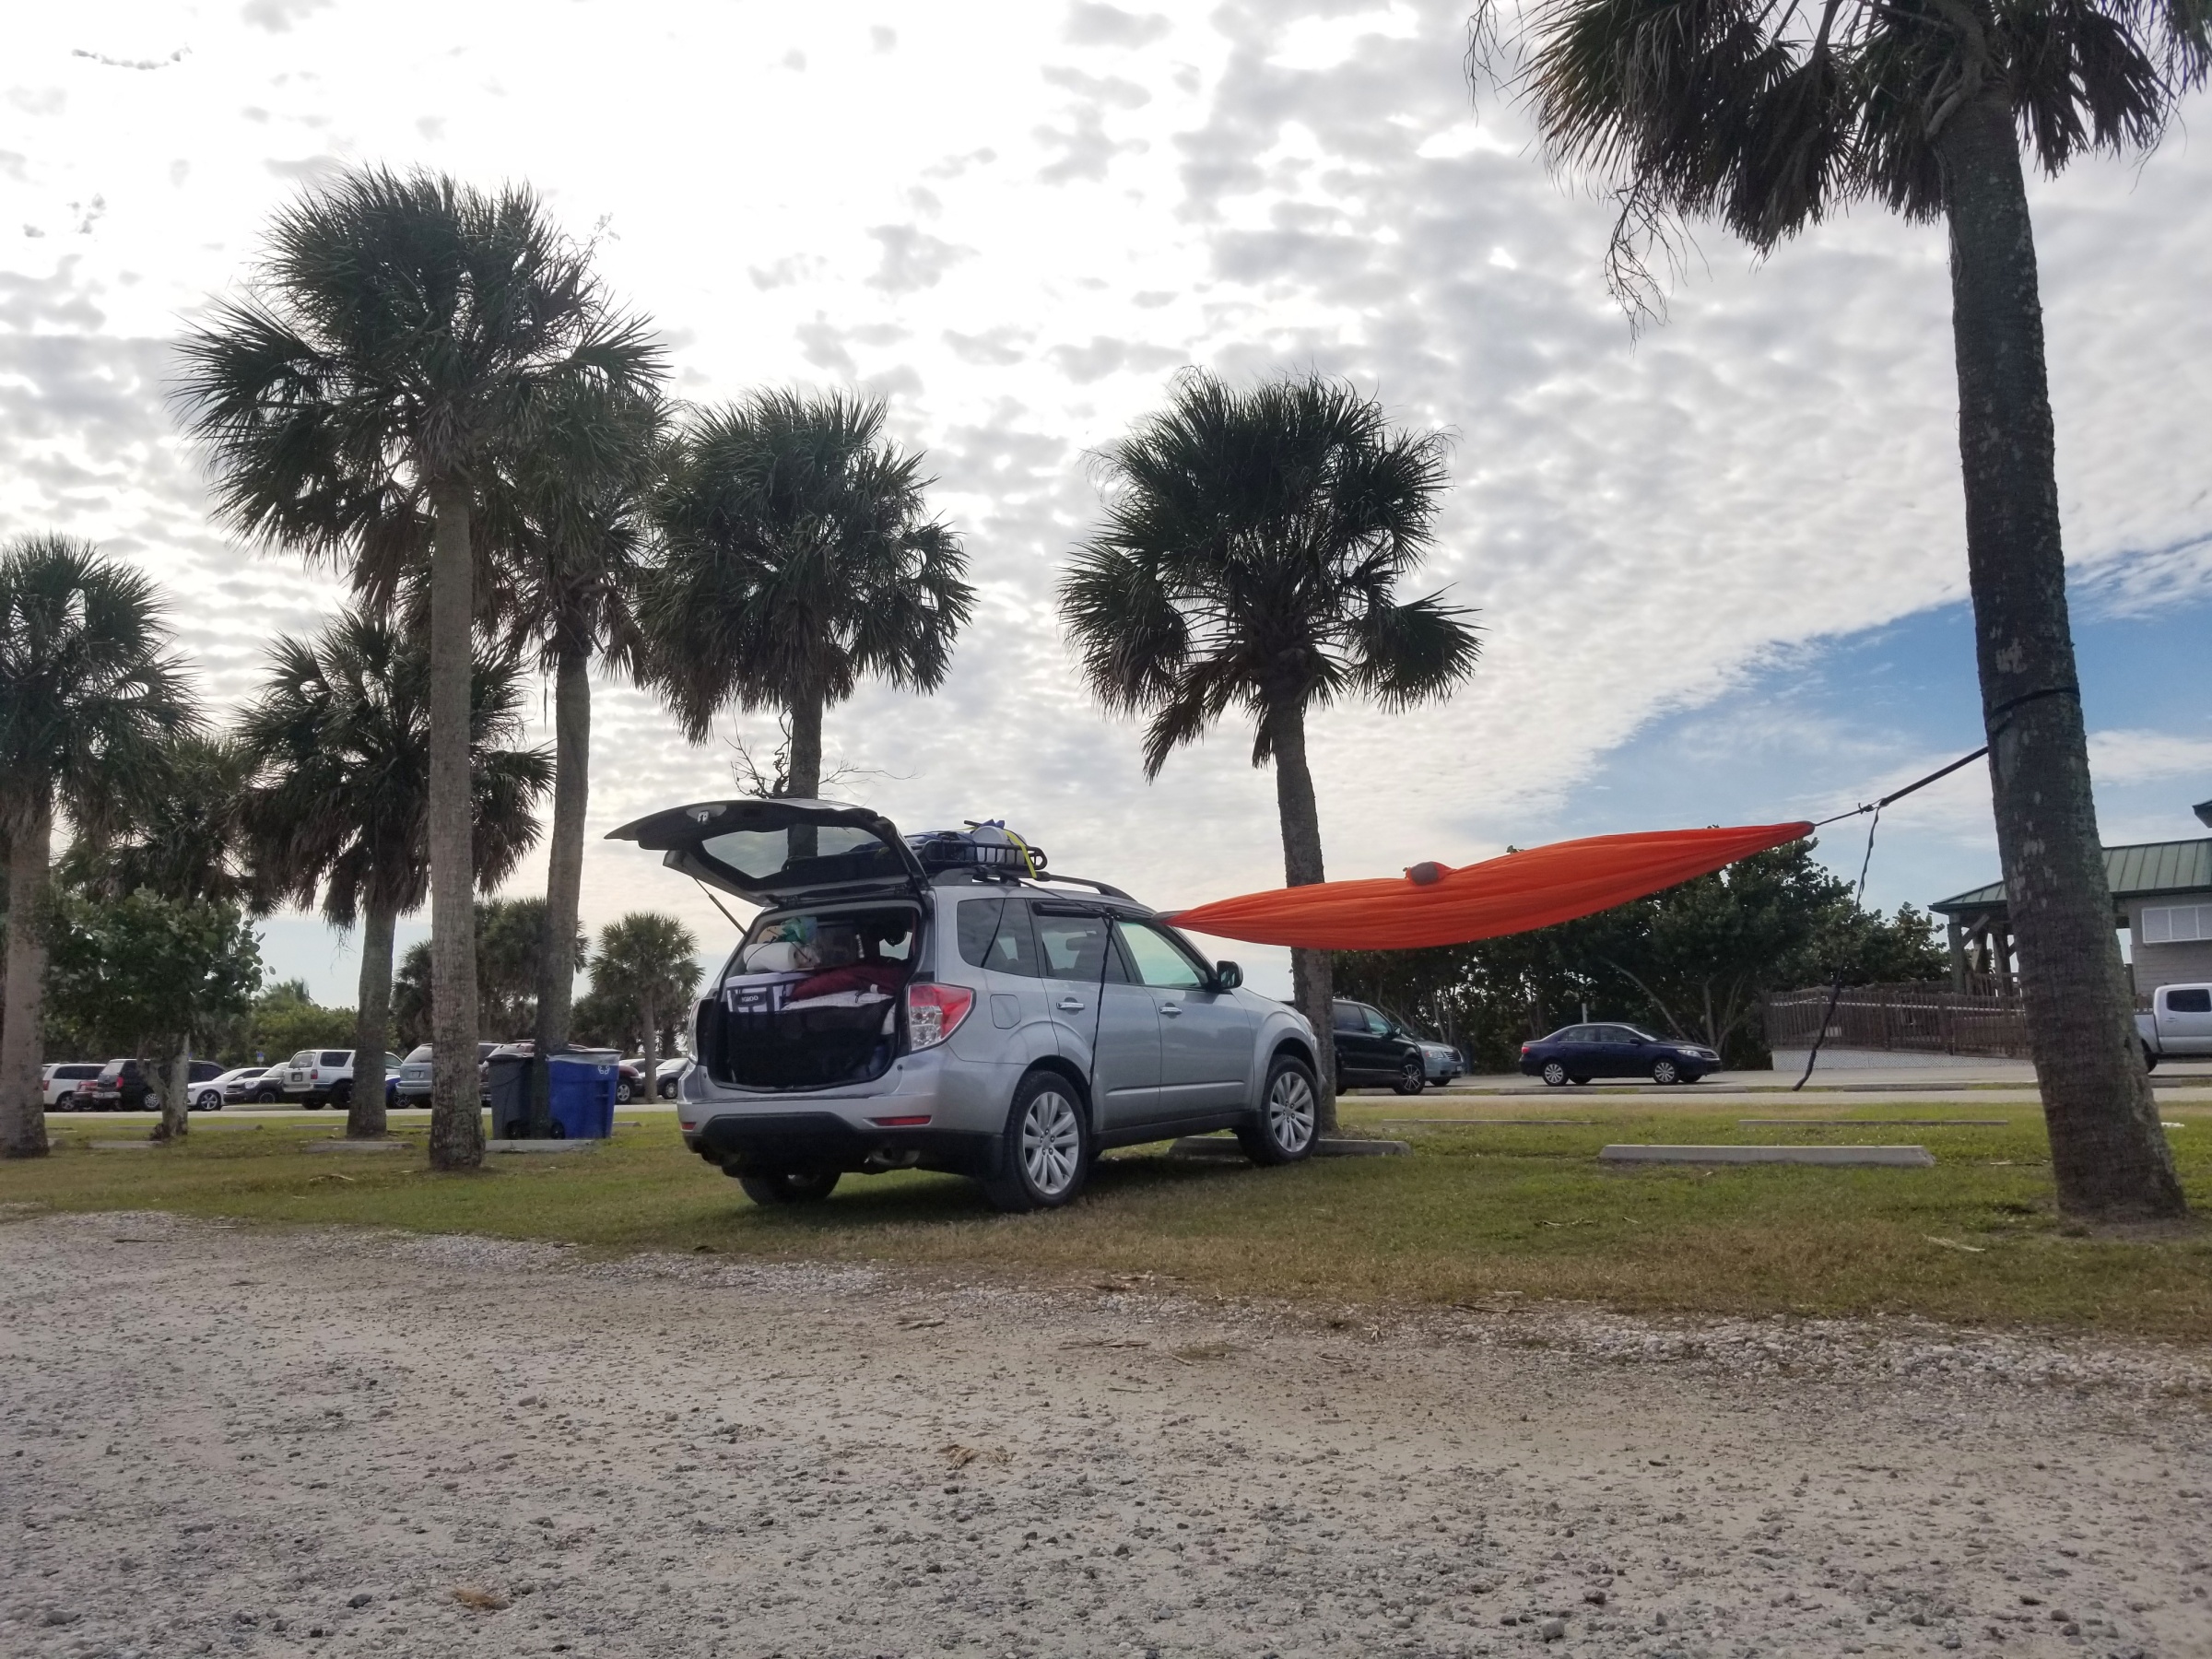
The cargo basket on my roof also used to be full of extra gear, but after noticing the drastic changes in MPGs, I decided to rearrange things and leave that space free. Now, my rooftop cargo basket holds my bike and bike tire when they are not in use, and since I have a panoramic sunroof in my vehicle, it is nice to be able to stand up through the sunroof and have a place to set things down (like my dinner plate), while I get a bird’s eye view of the sights before more (or at least I can see above the crowds that gather at specific places).

On the inside

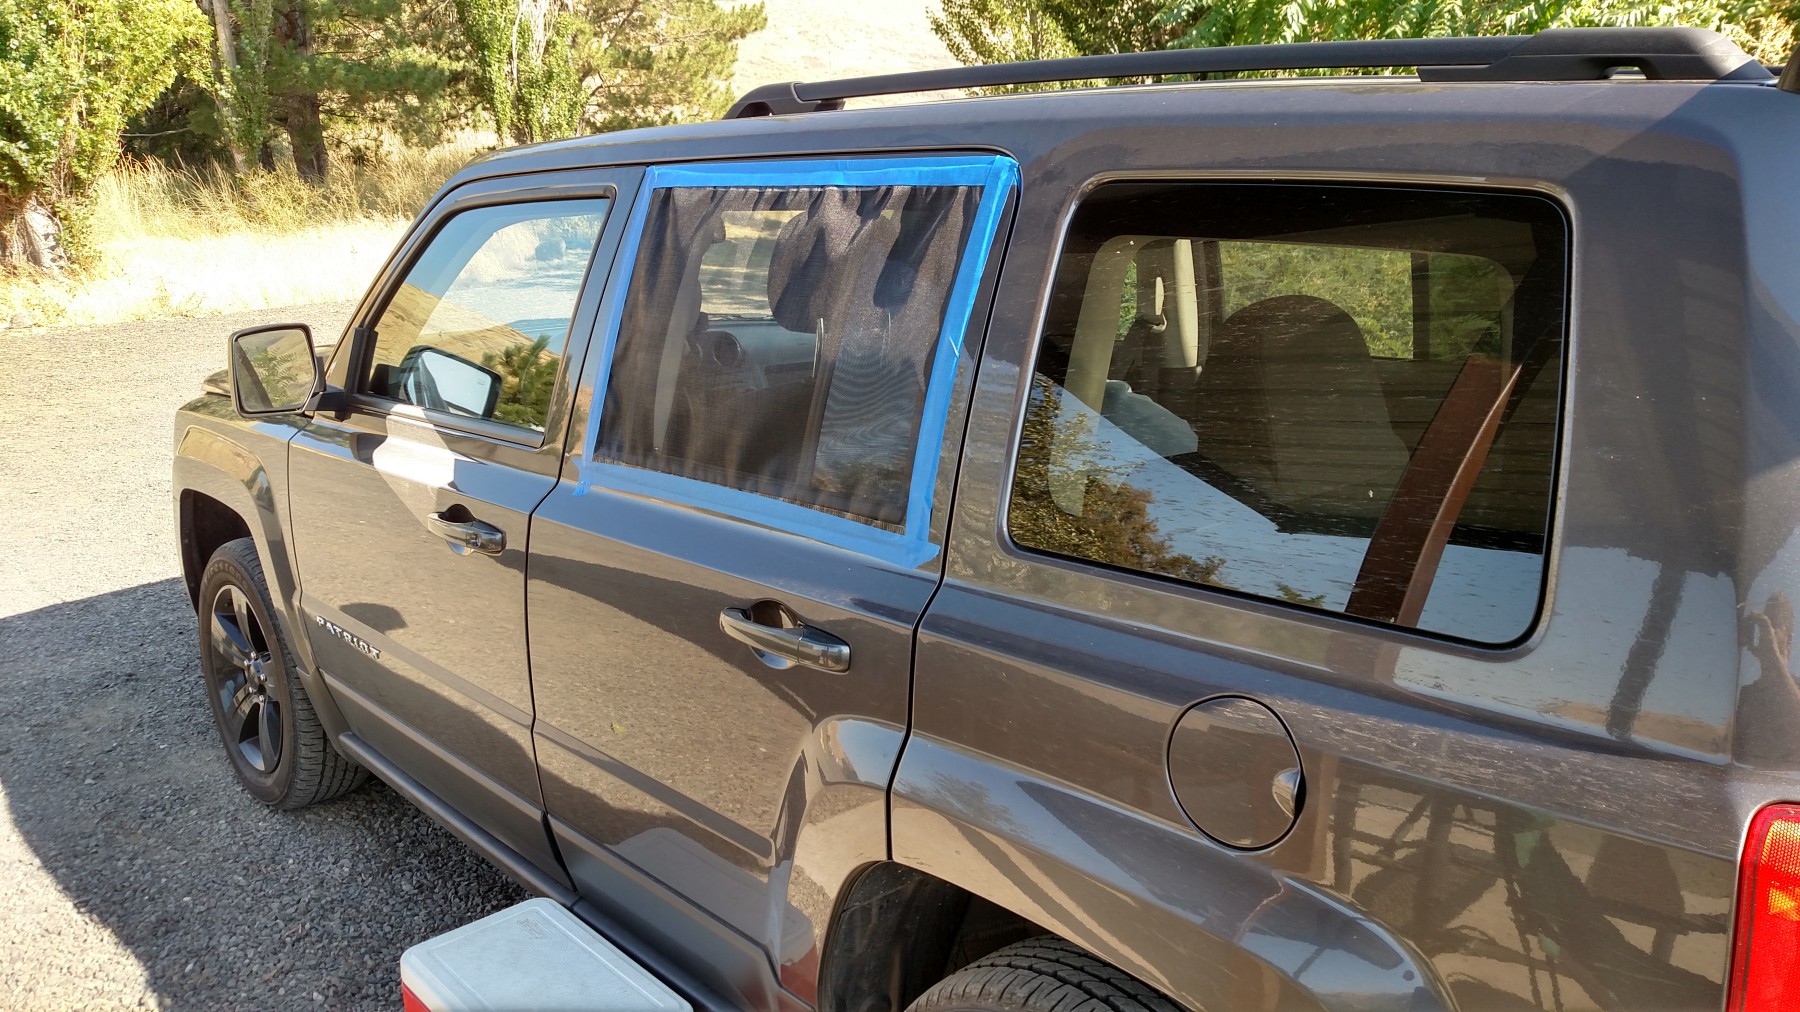
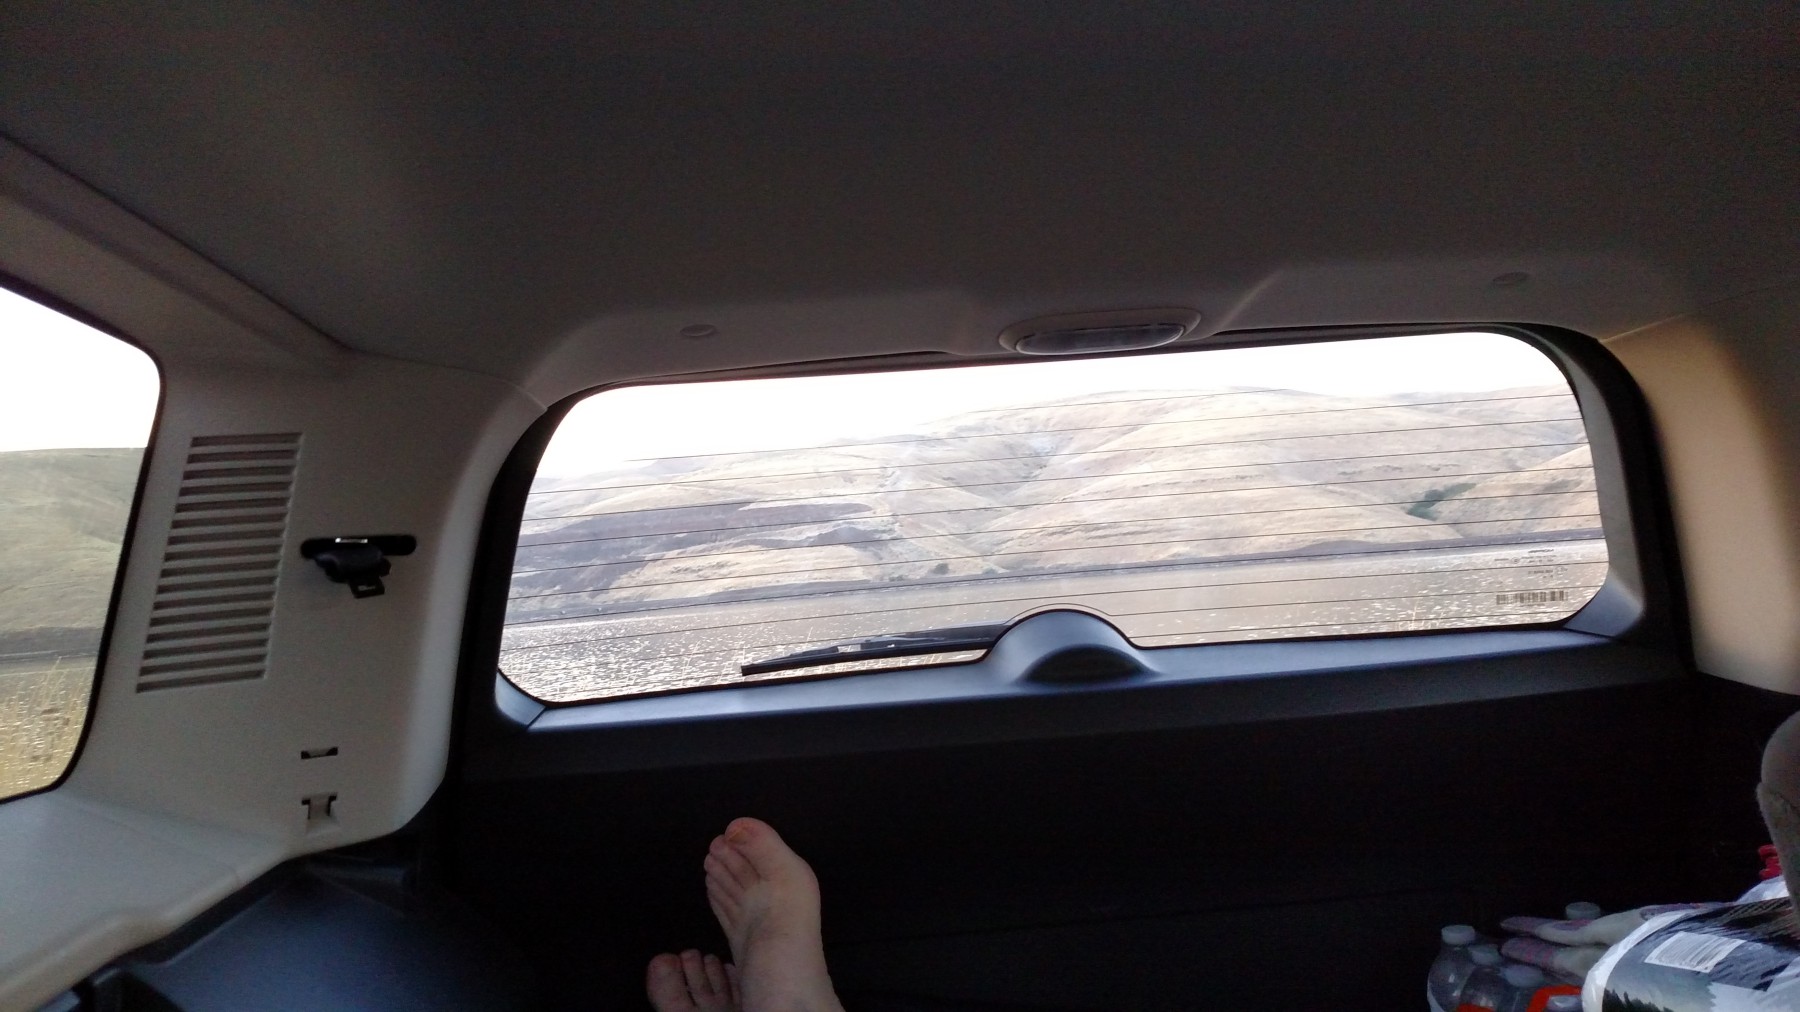
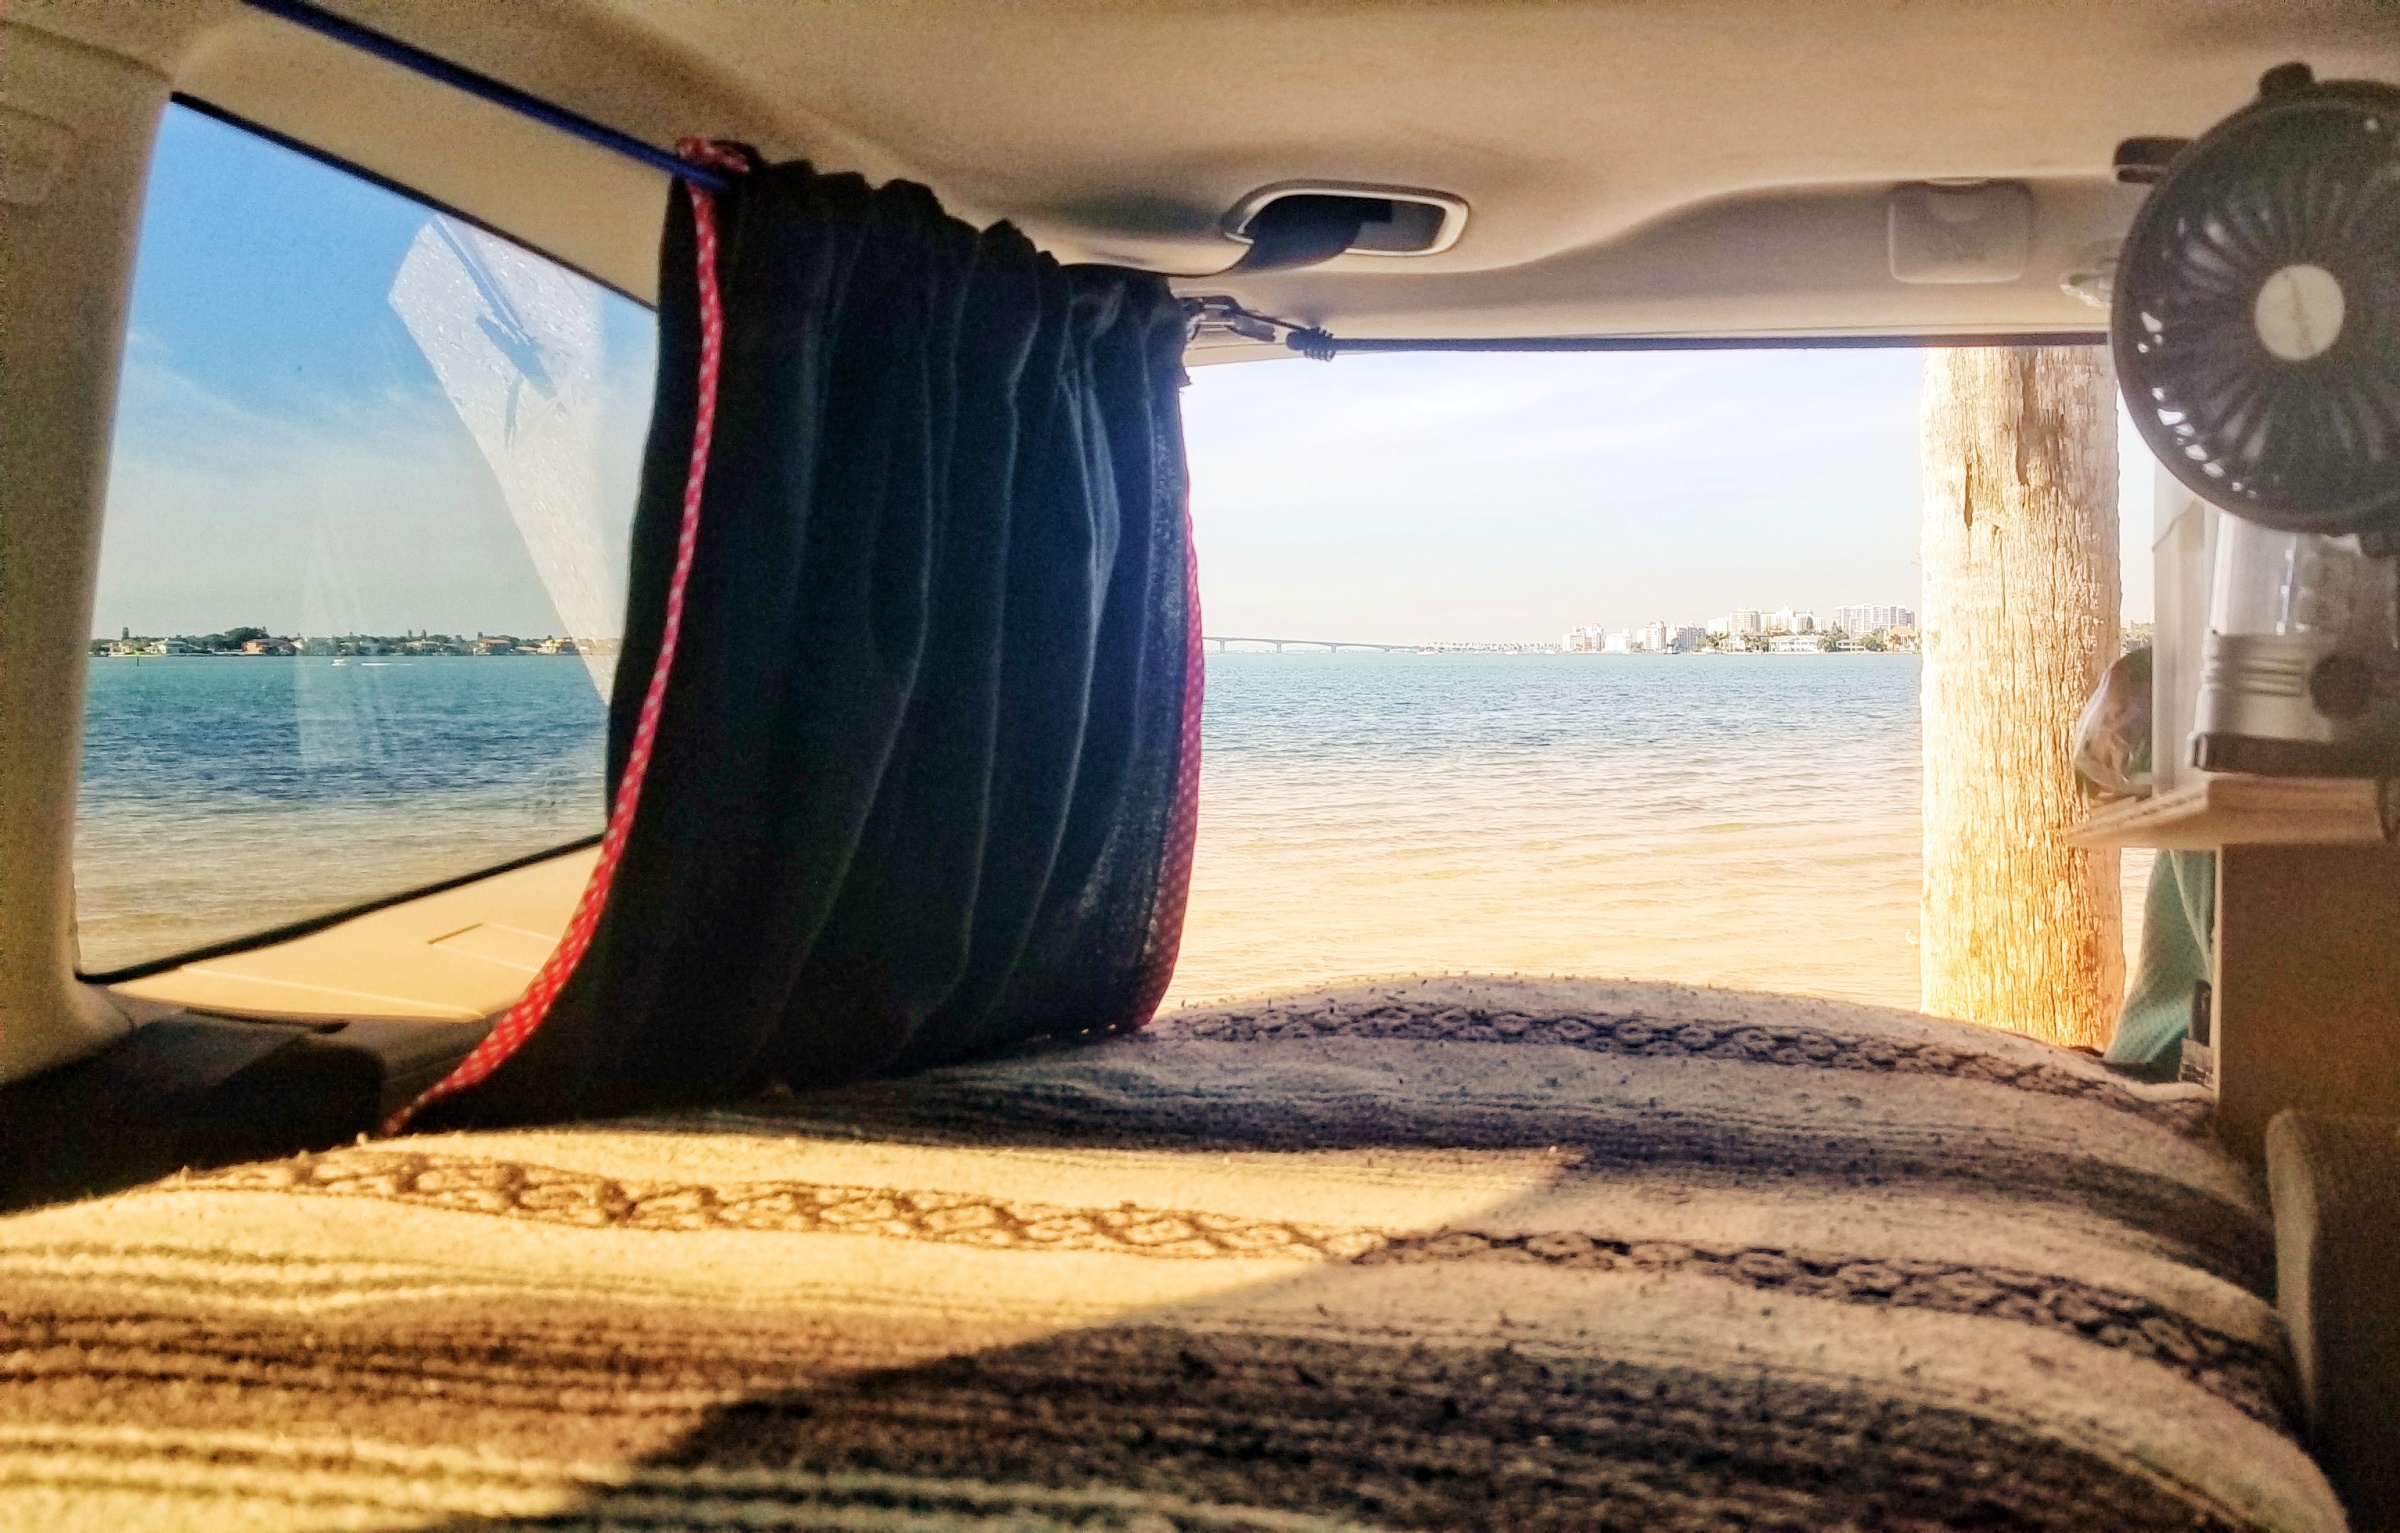
Simple (but quite important) piece first. I made curtains that run the length of my back windows. For these, I simply cut an airline blanket (most of the time they are black, and work quite well as a blackout curtain) and sewed some “belt loops” to one side of the strips. Then, from the back of my vehicle where the utility loops are, I ran a bungee cord up to the front “oh-sh*t” handles. This allows the curtains to go up a couple inches past the front windows, blocking all viewing points from the outside-in (when I have my front window cover up as well).

Curtains in the Subaru Forester. Click for the larger version.

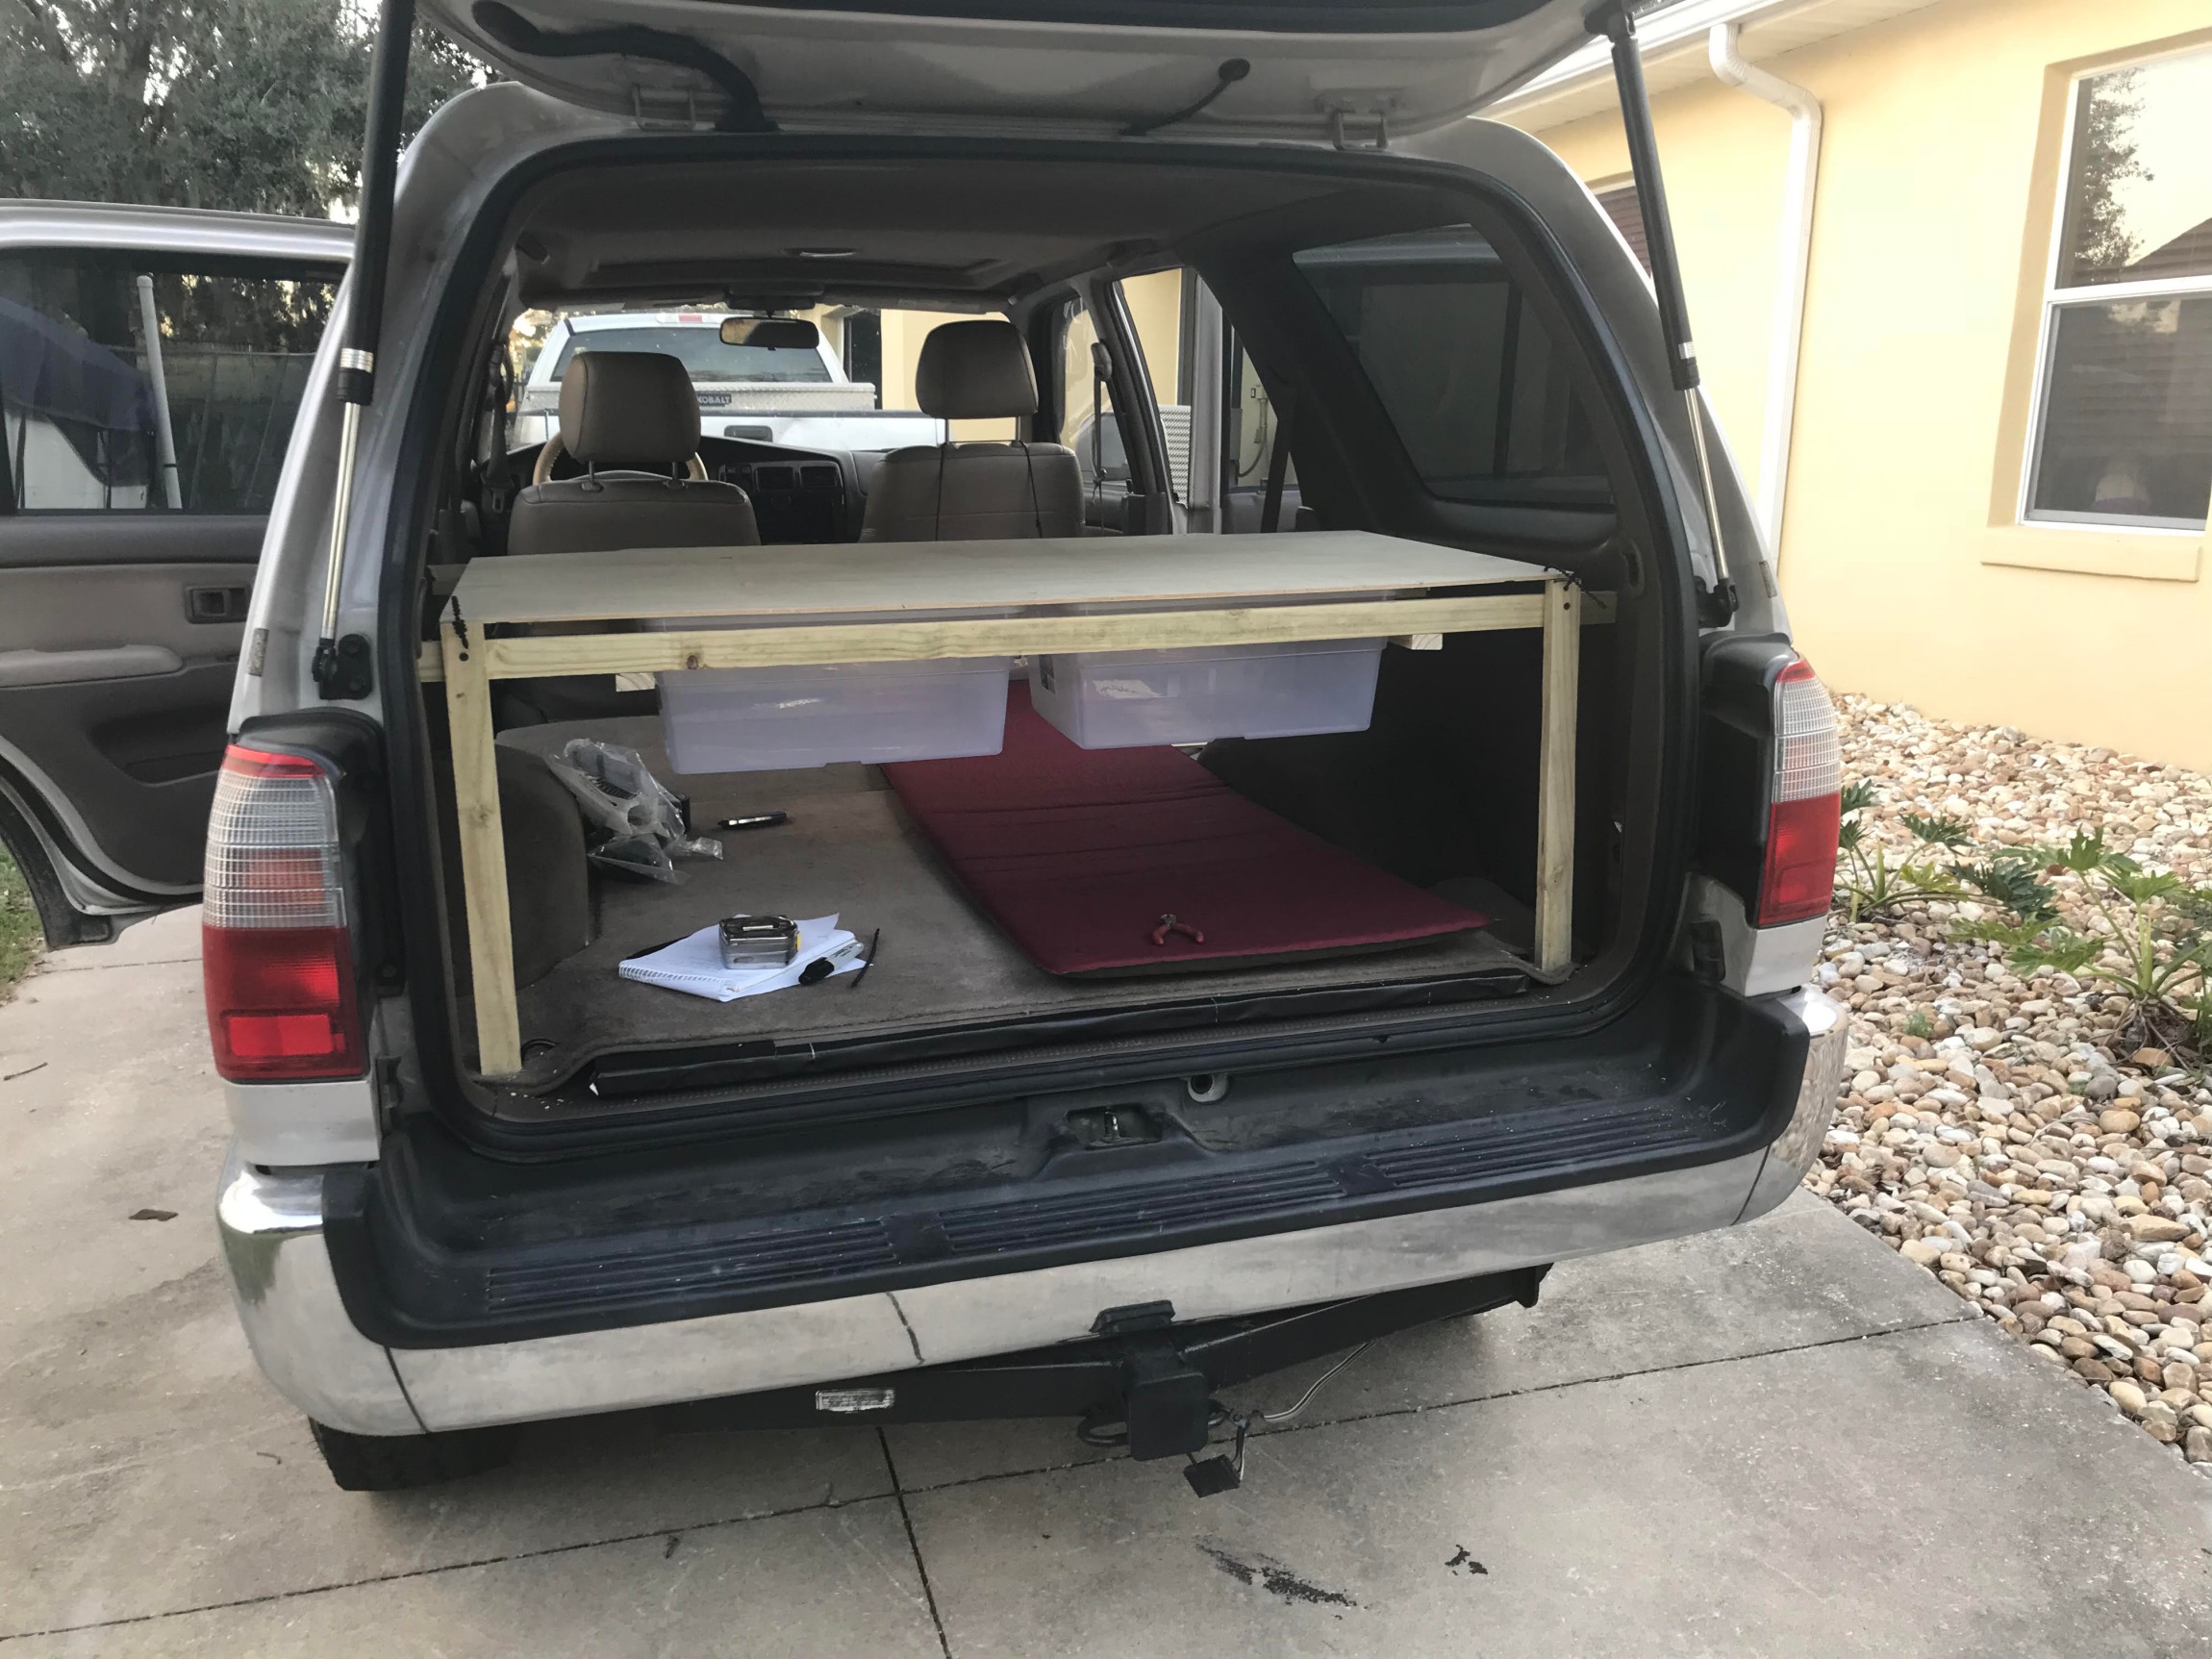
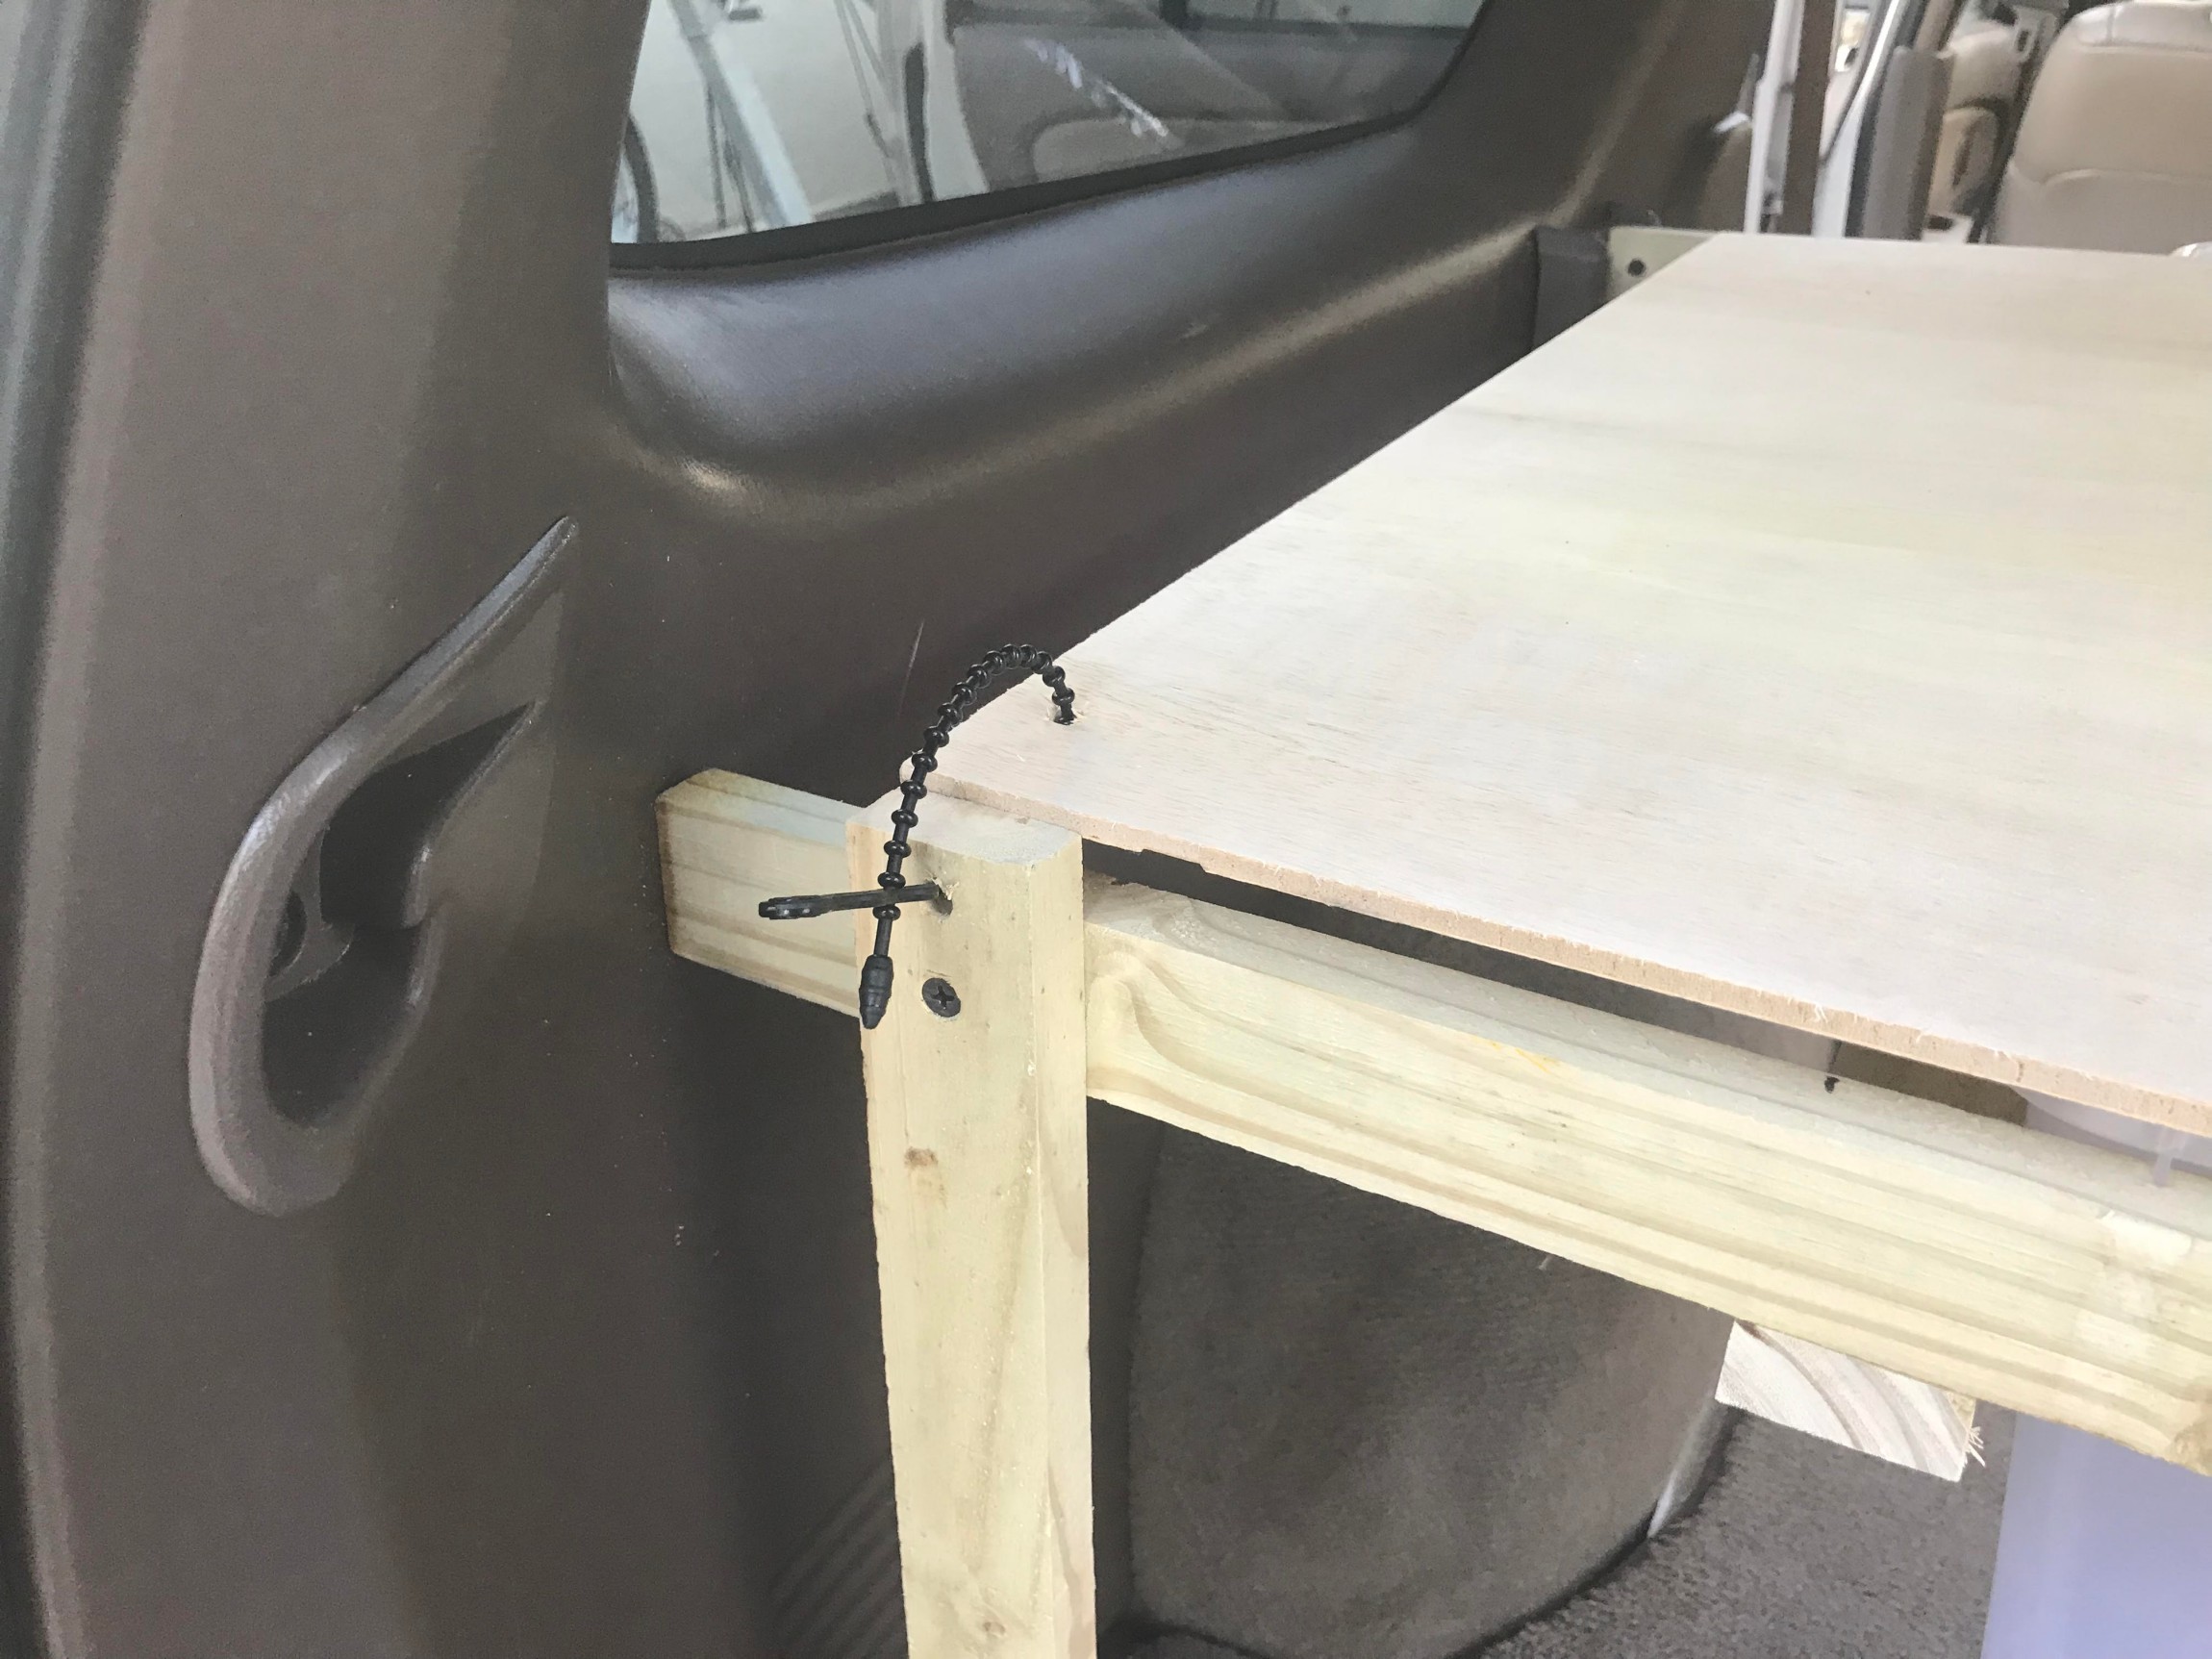
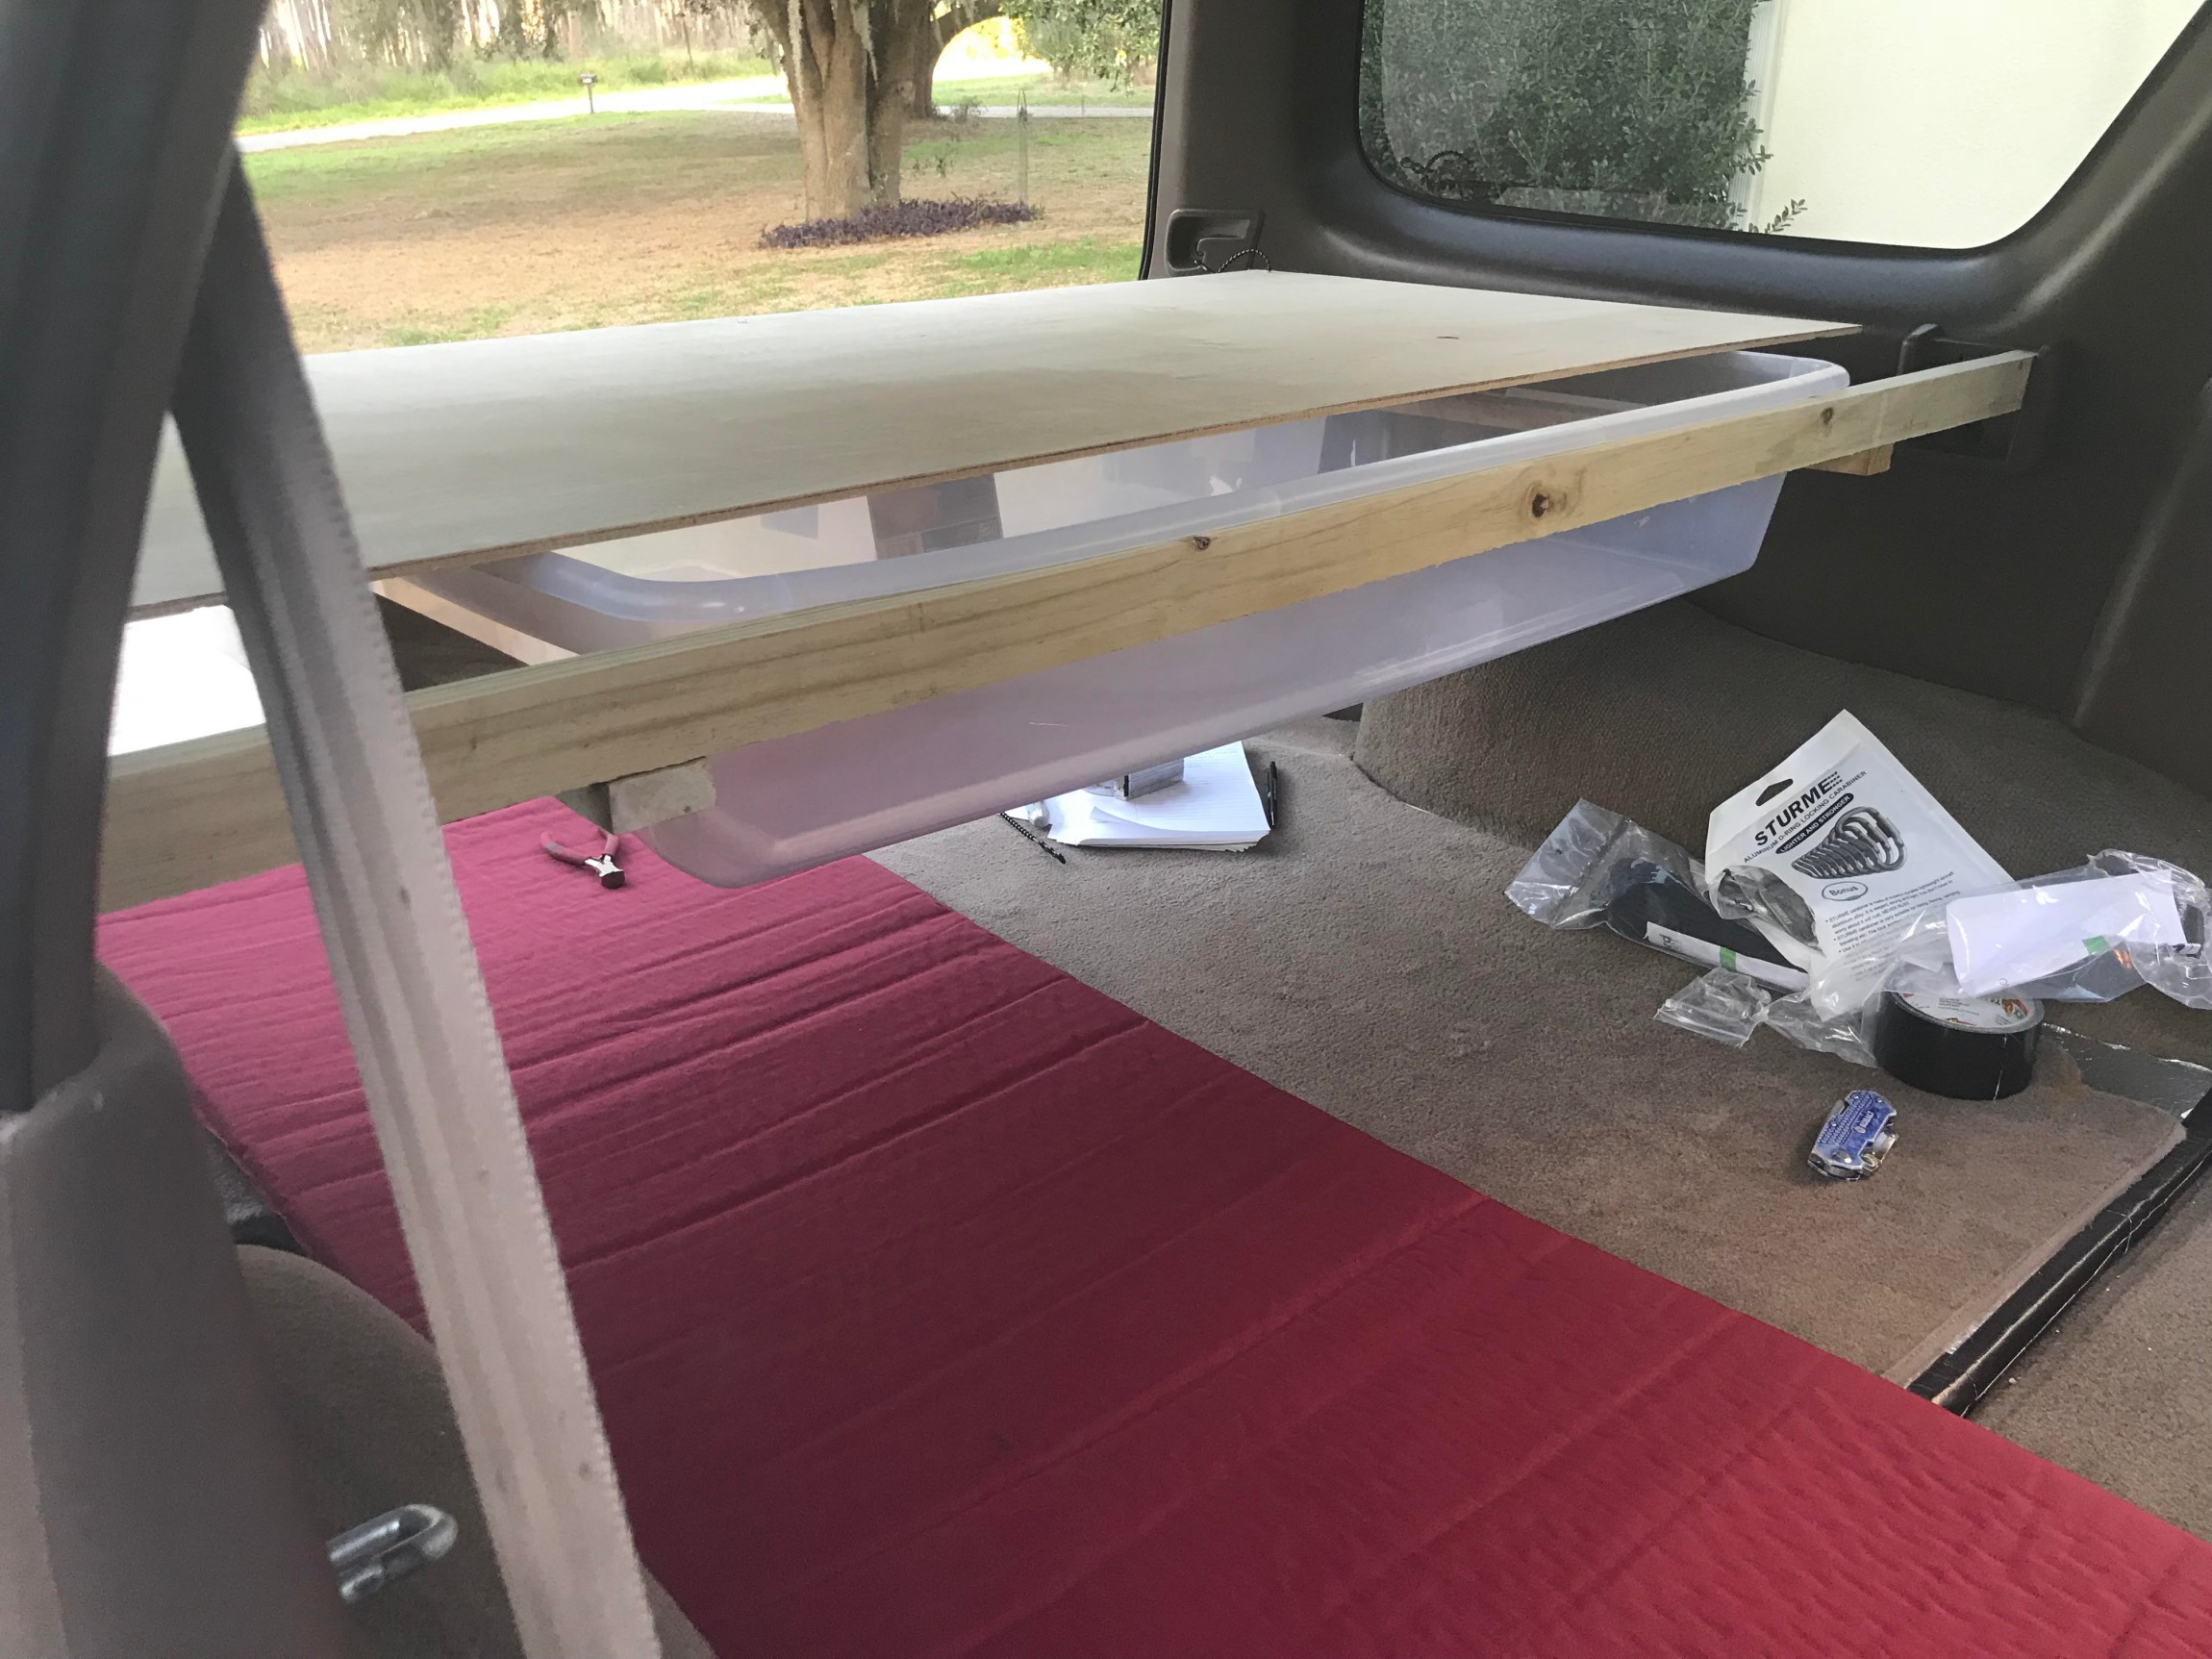
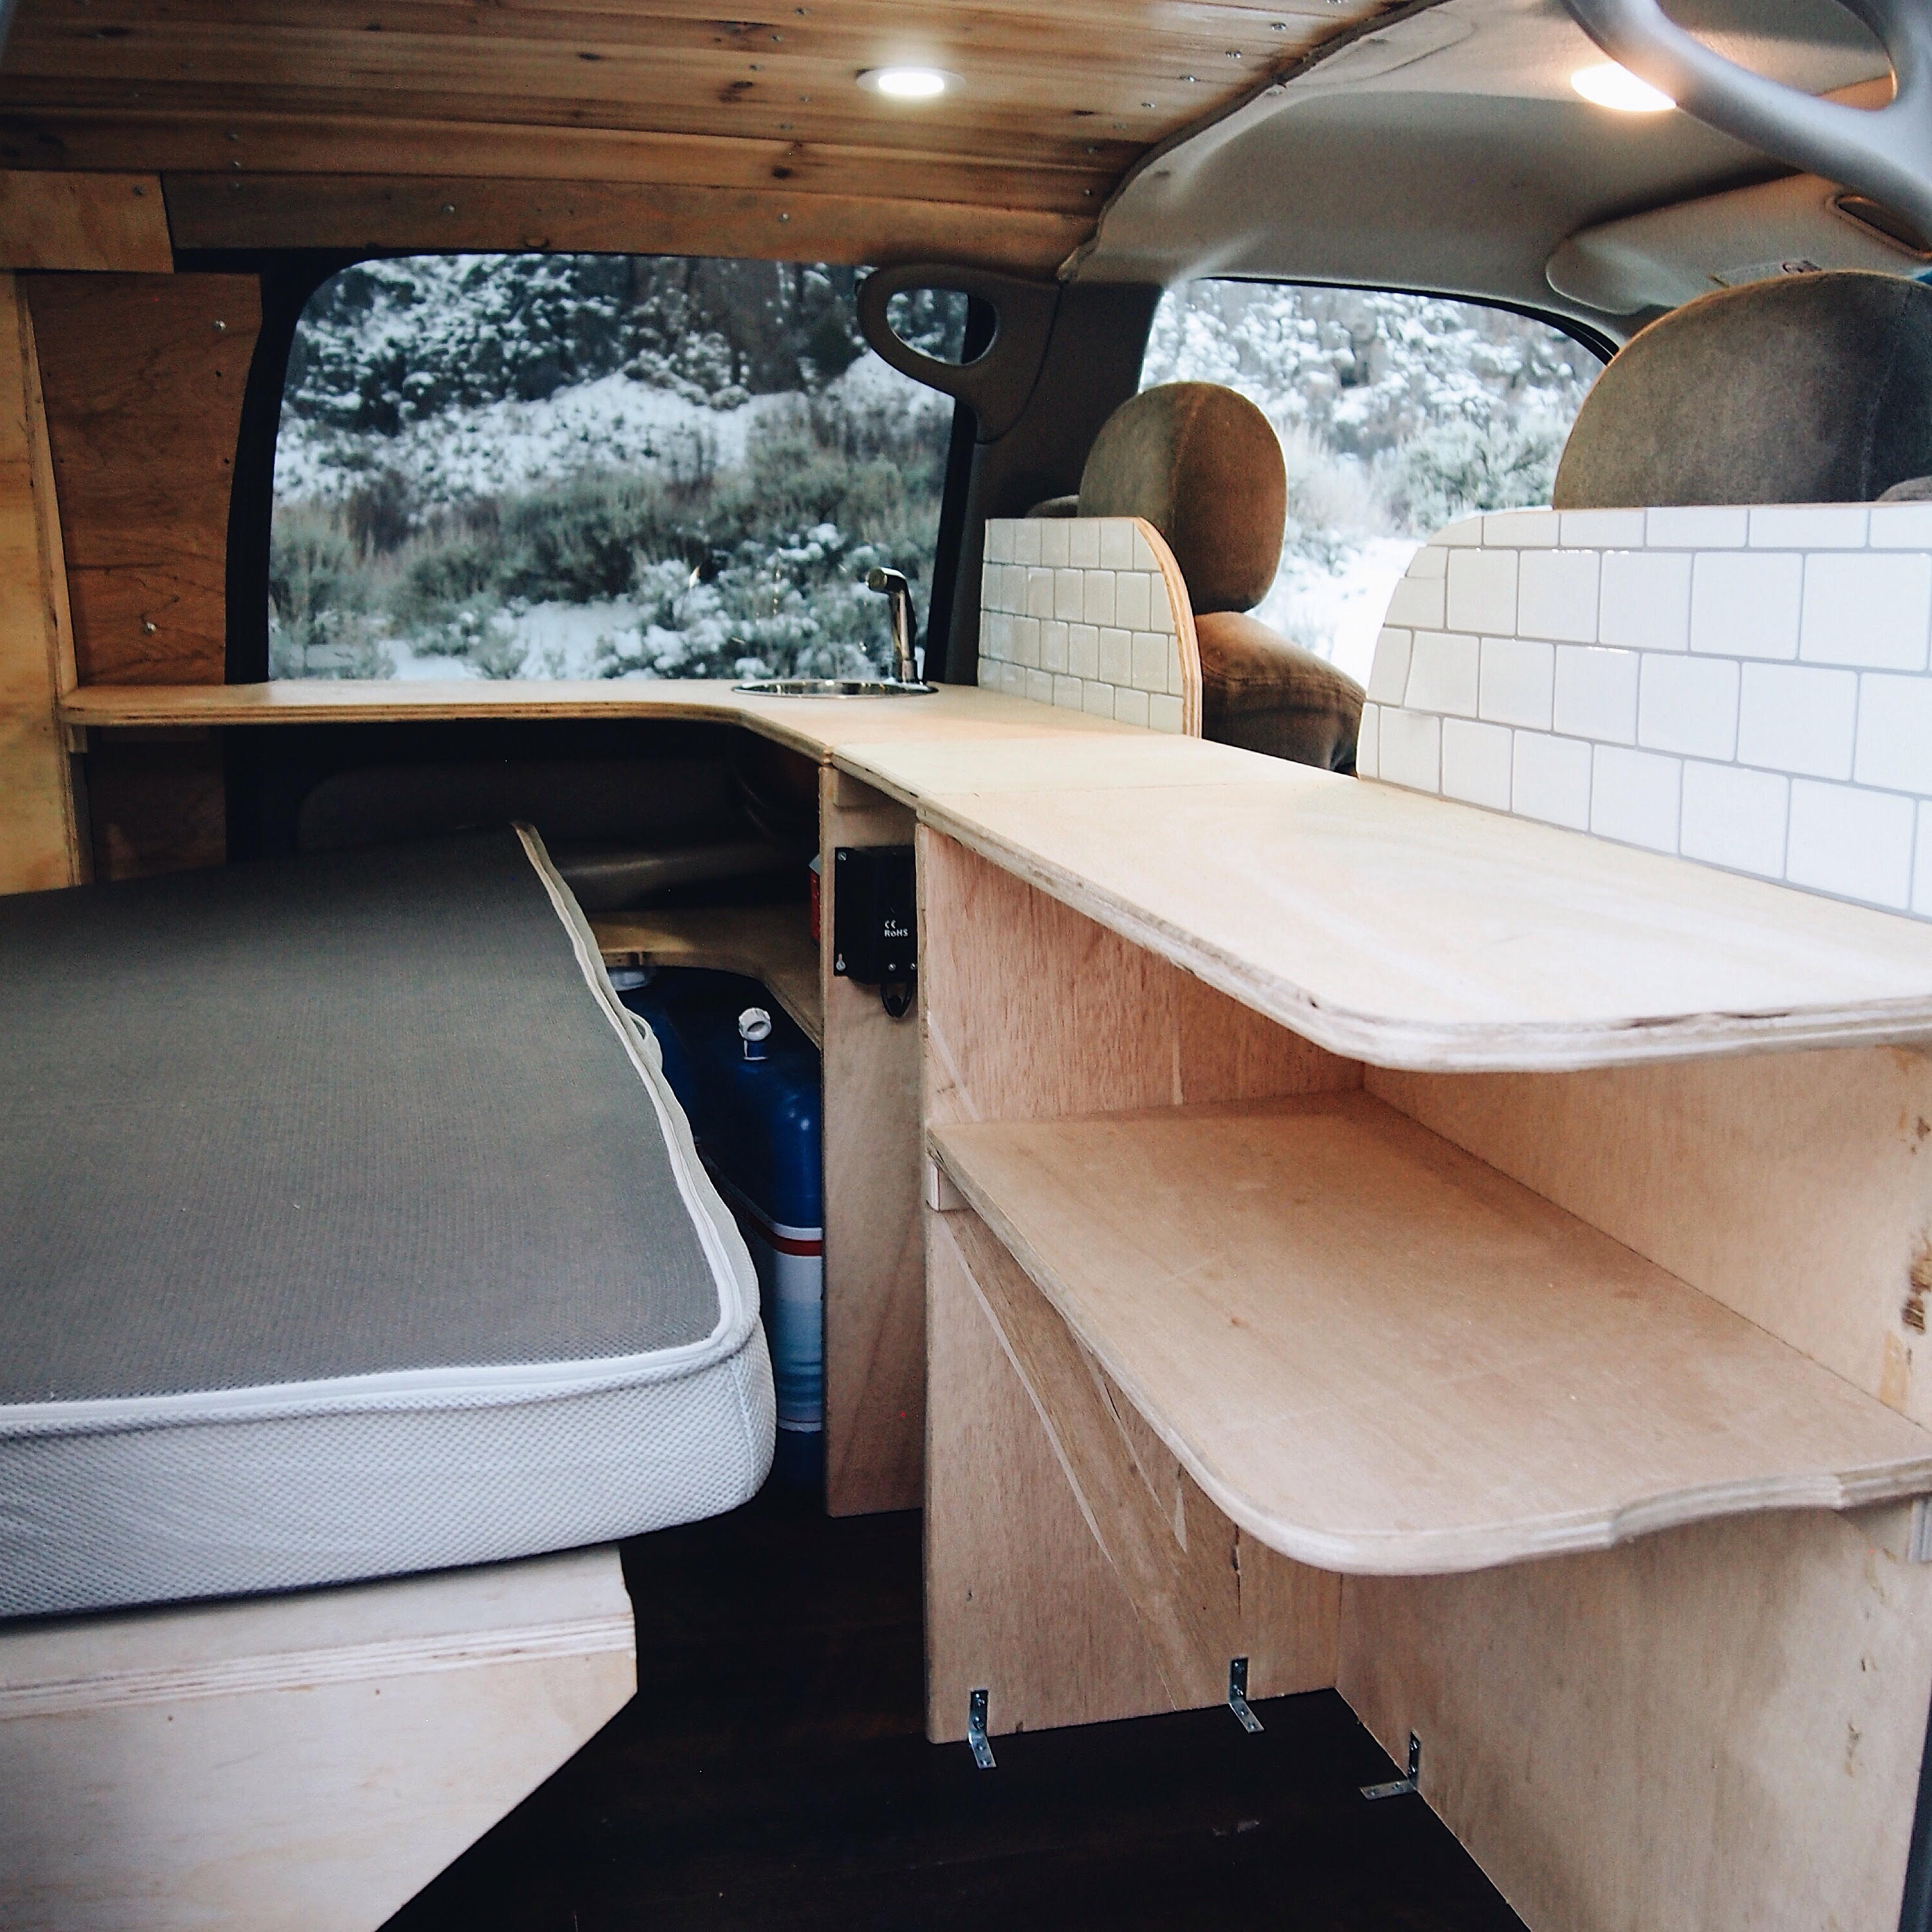
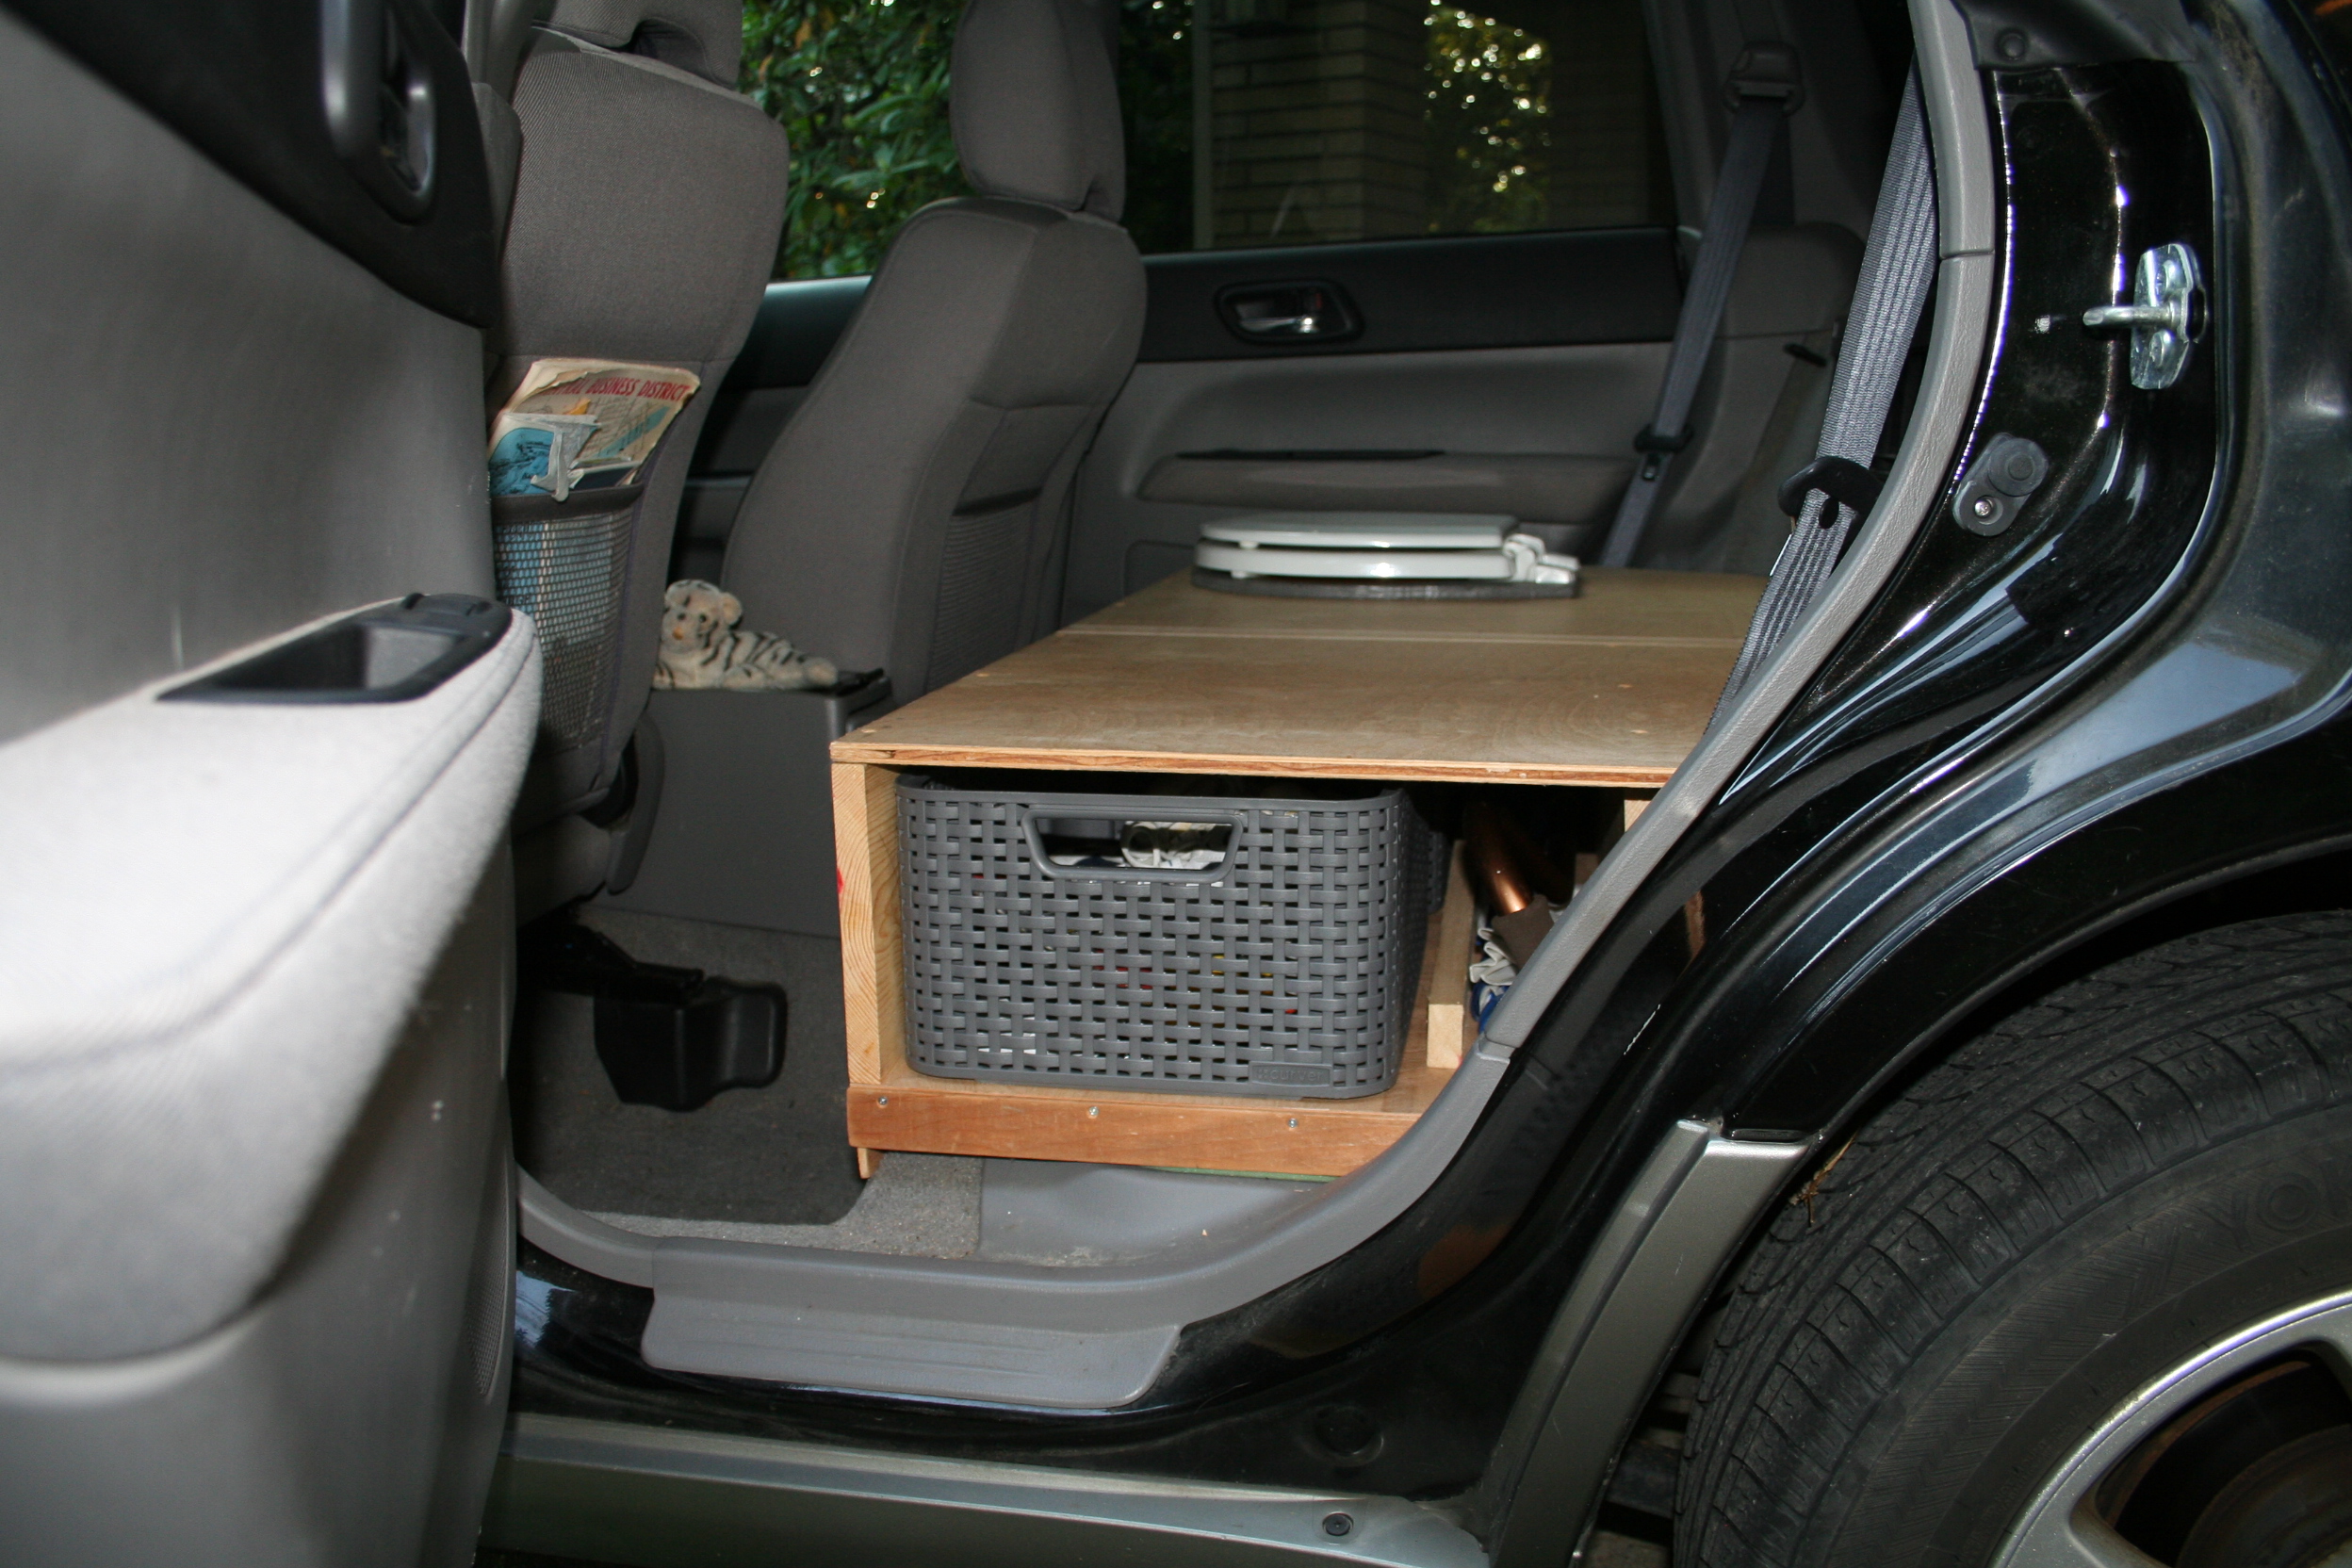
I decided to build a storage shelf for the inside of my car, but it was not very well designed to store a ton of things. The top part of my storage shelf works as my bookshelf, and has a drawer that really holds everything (the loose items). Doesn’t everyone, everywhere, have a junk drawer? And the bottom has a platform for my cooler to rest, and an old milk crate with another basket inside where I store my foods that don’t need a cooler, and my extra mason jars and containers. The entire shelf is lofted with 2x8s to give myself storage underneath it as well. This is where I keep my kitchen cleaning supplies, coffee, AeroPress, boiling pot, and some other random kitchen supplies (tea, seasonings, can openers, etc.).

The camping platform and storage setup inside of the Subaru Forester. Click for the larger version.
The camping platform, bed, and storage setup inside of the Subaru Forester. Click for the larger version.

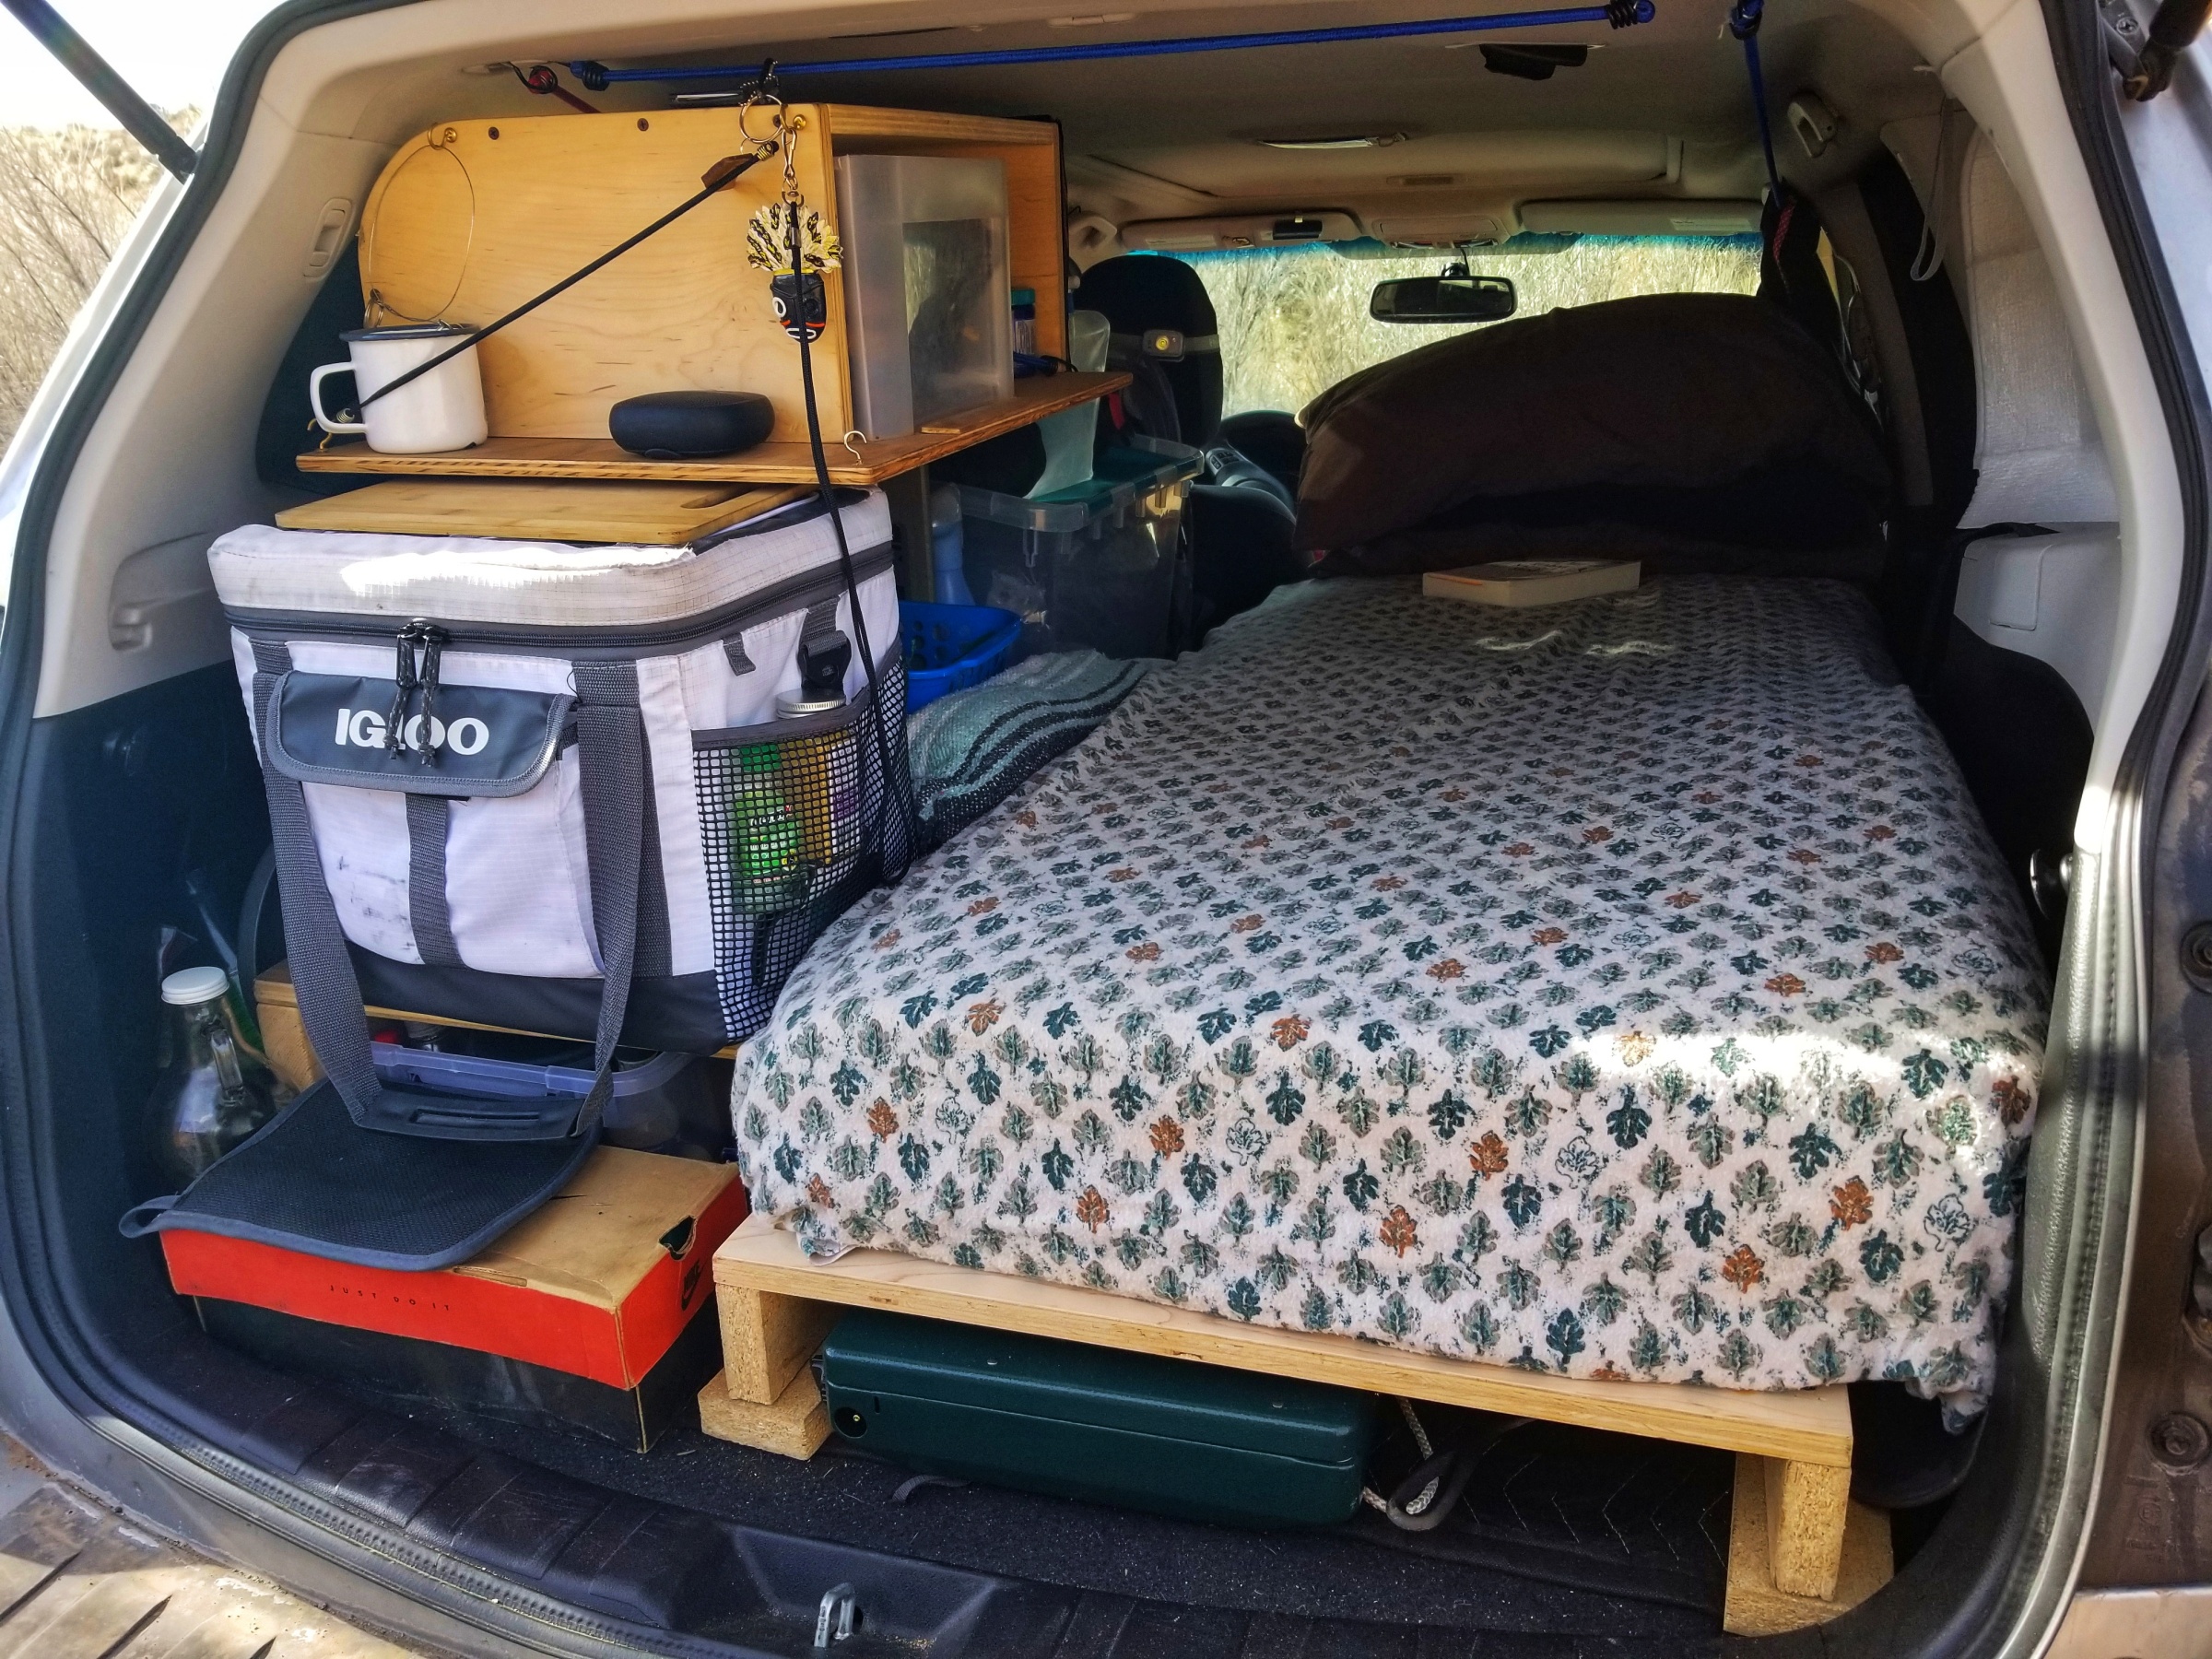
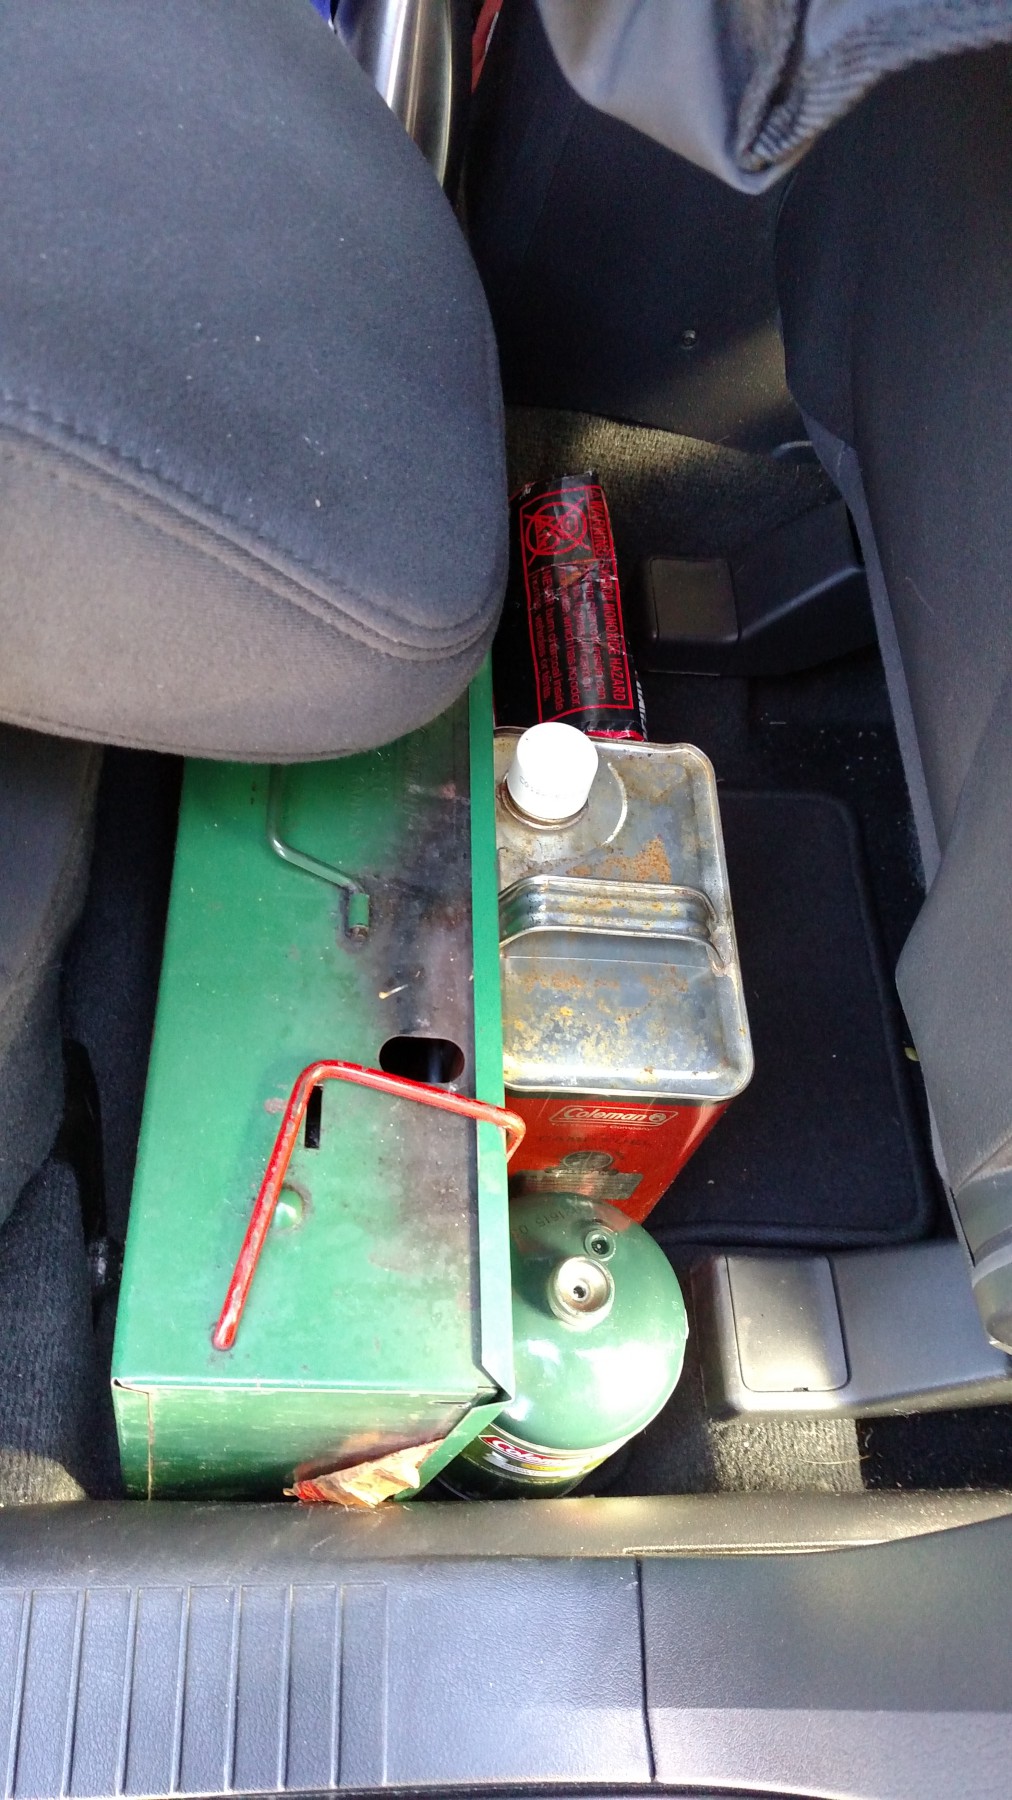
To the left (between the wall of the car and the storage shelf) is where I keep my propane bottles, plates, bowls, and extra kitchen supplies that isn’t regularly used (like my growler that was unfortunately empty for this photoshoot).

In front of this bigger container is where I keep my backpack that I use when in cities, or going into a café. It holds my electronics (cameras, laptop, chargers, etc.)

As you can see, in front (closer to the driver’s seat) of the storage shelf I have a couple big plastic bins as well. The top bin holds my clothes that I regularly wear (hiking pants, shorts, socks, briefs, shirts, etc.), while the bottom smaller bin holds the clothes that may be needed, but not on a regular basis (rain gear, jeans, bathing suit, gloves, hats, etc.).
As for the footwell located behind the driver’s seat, that is where I store my shoes. There is enough room for my city shoes, hiking boots, camp shoes, and flip flops.

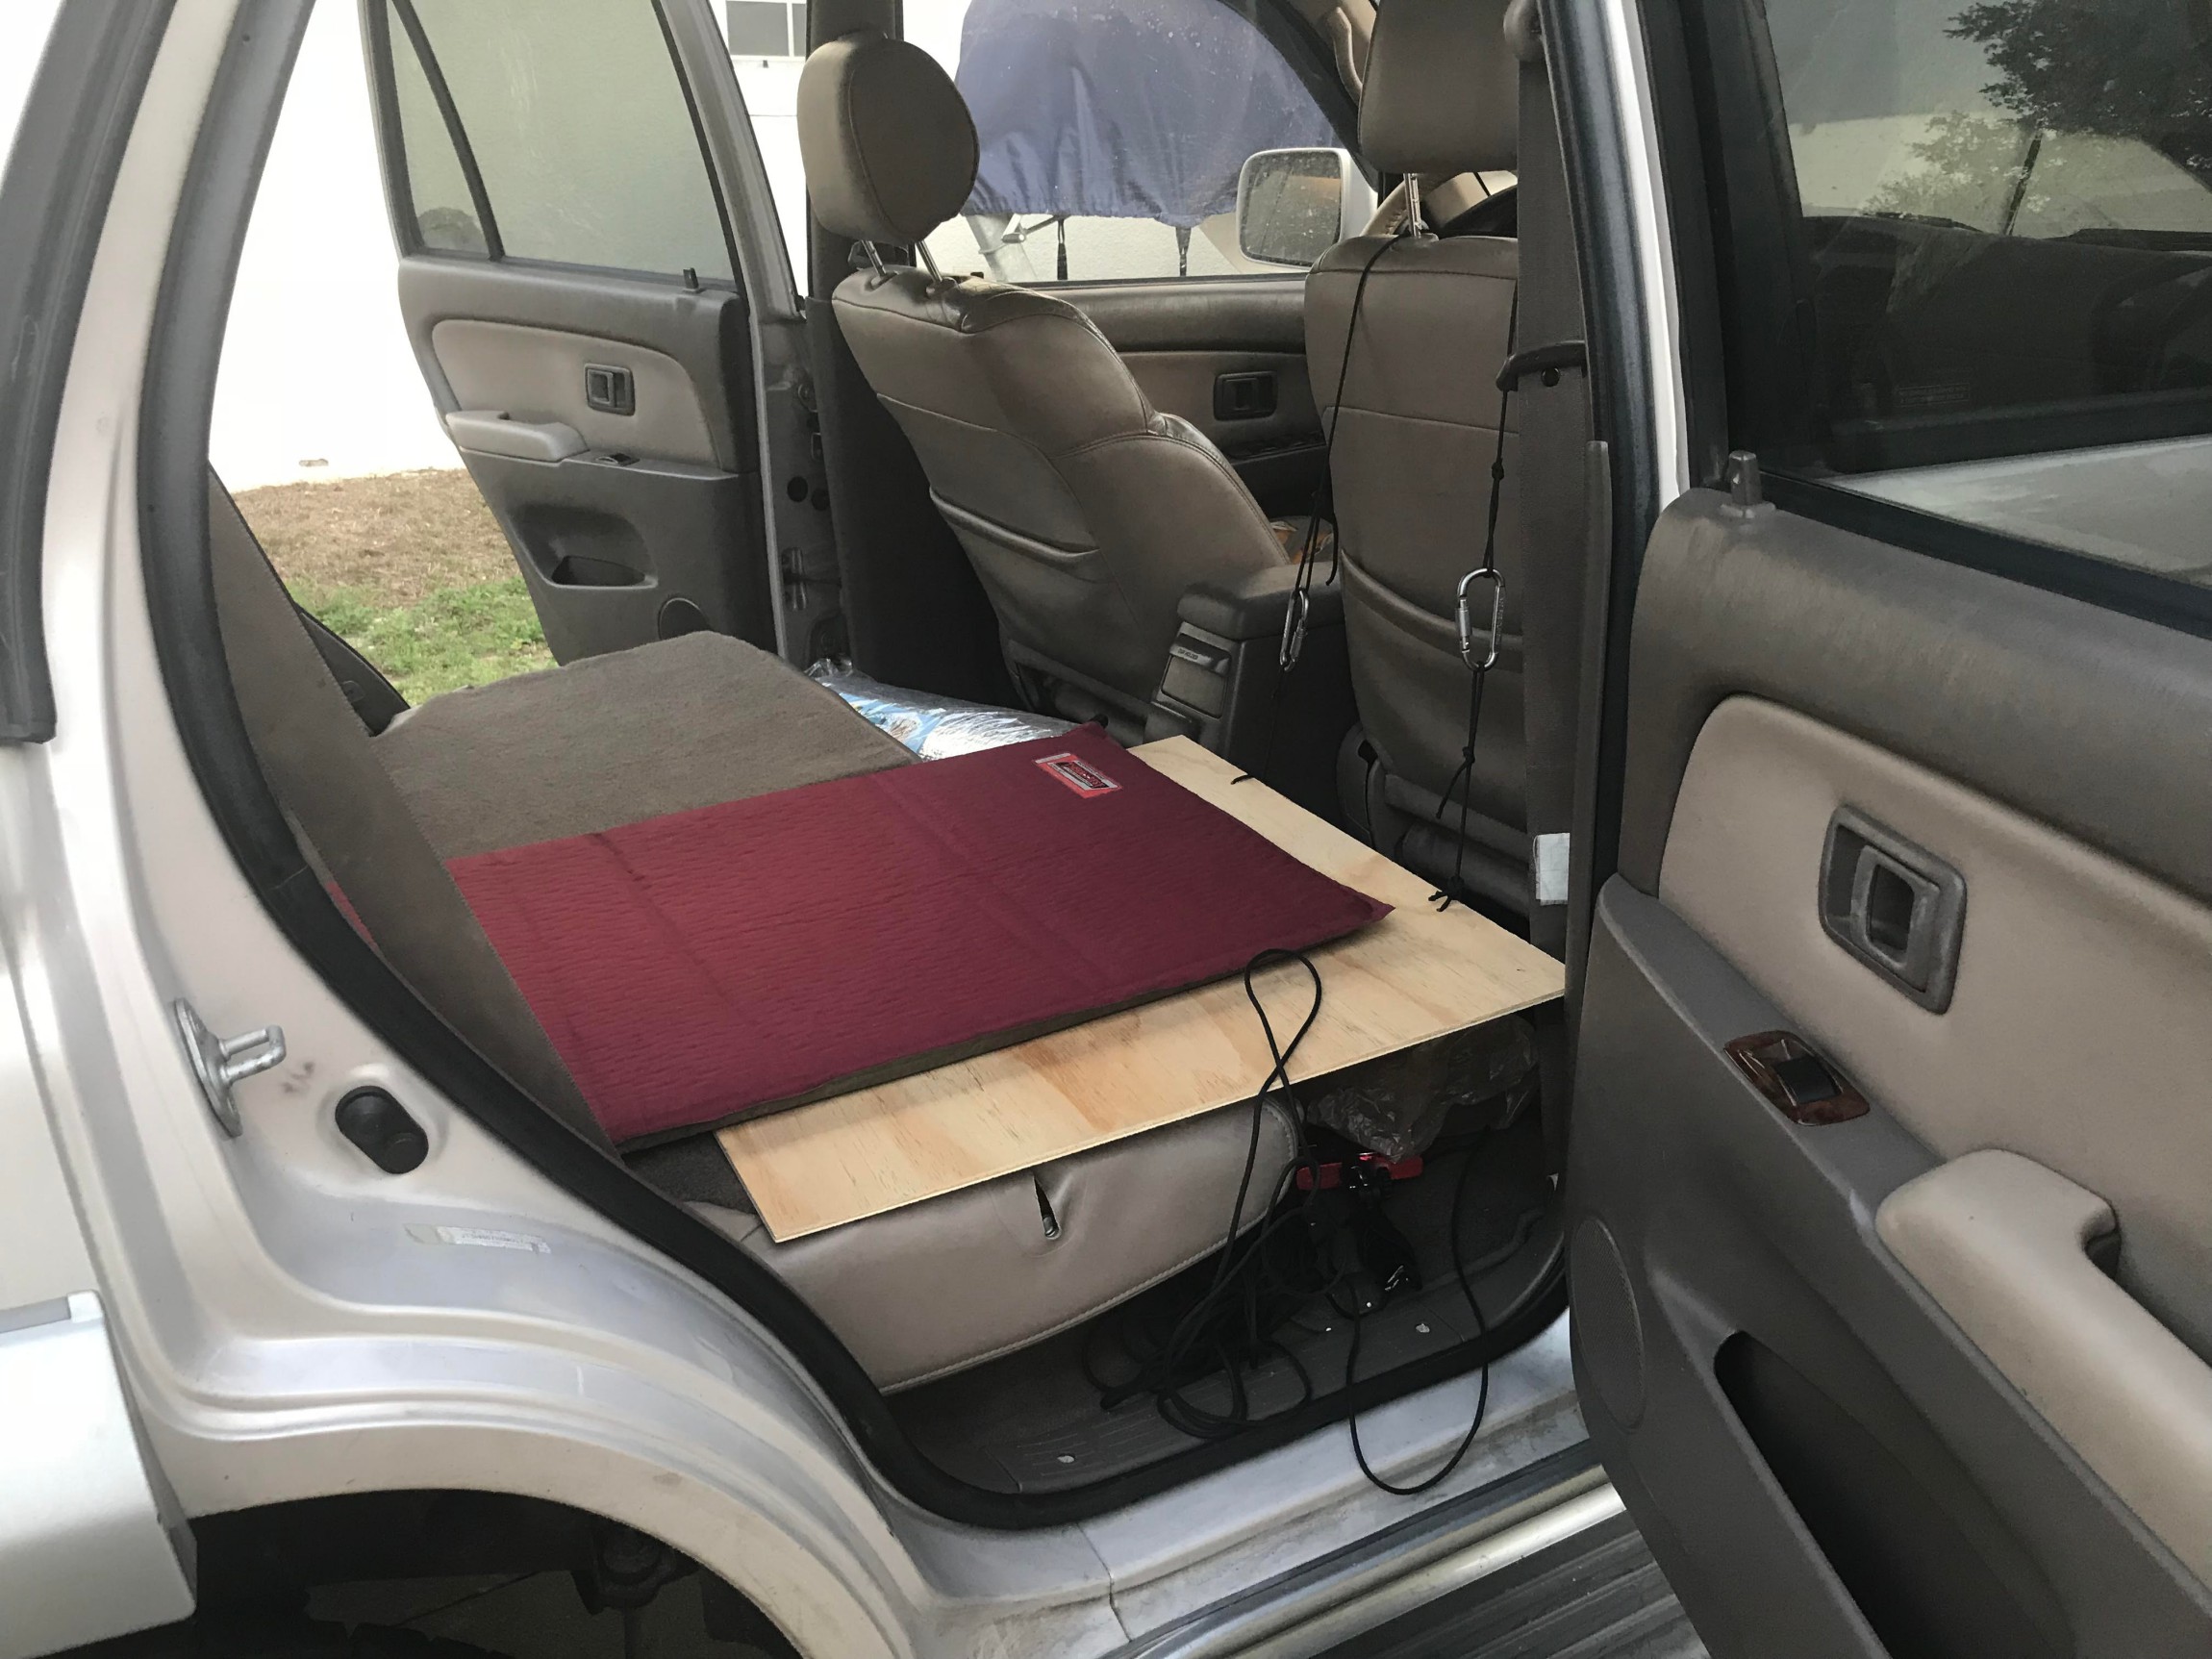
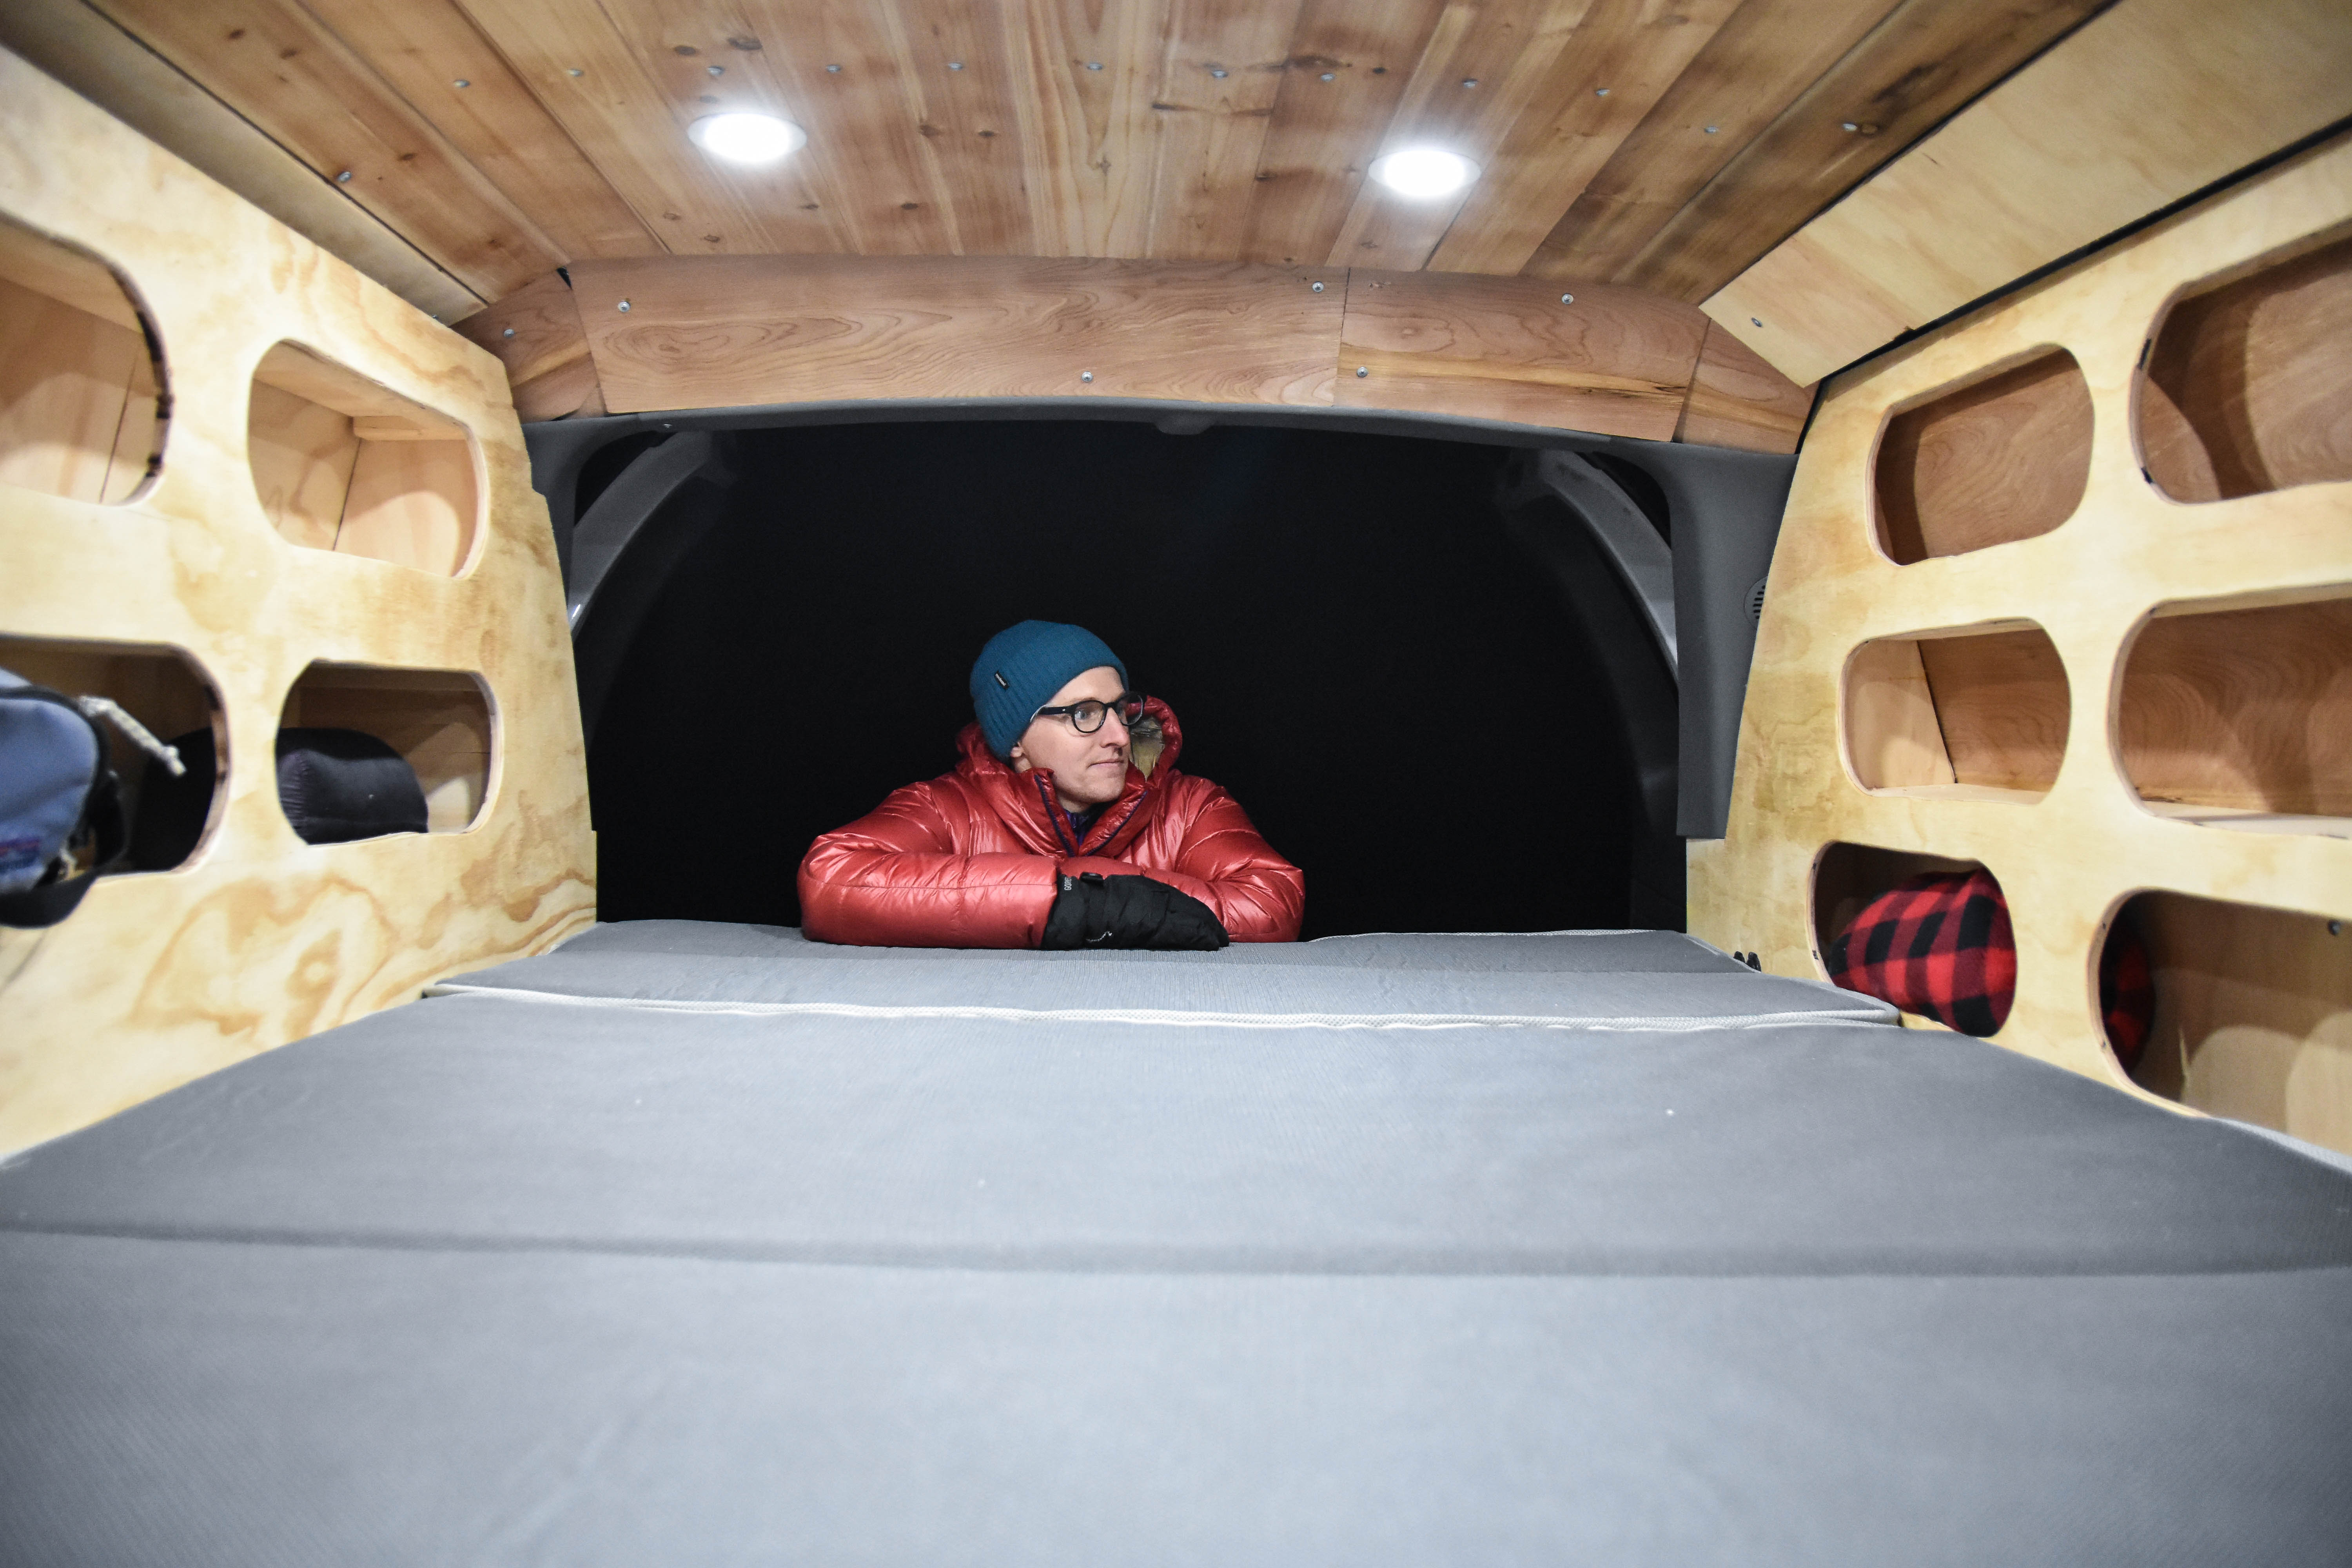
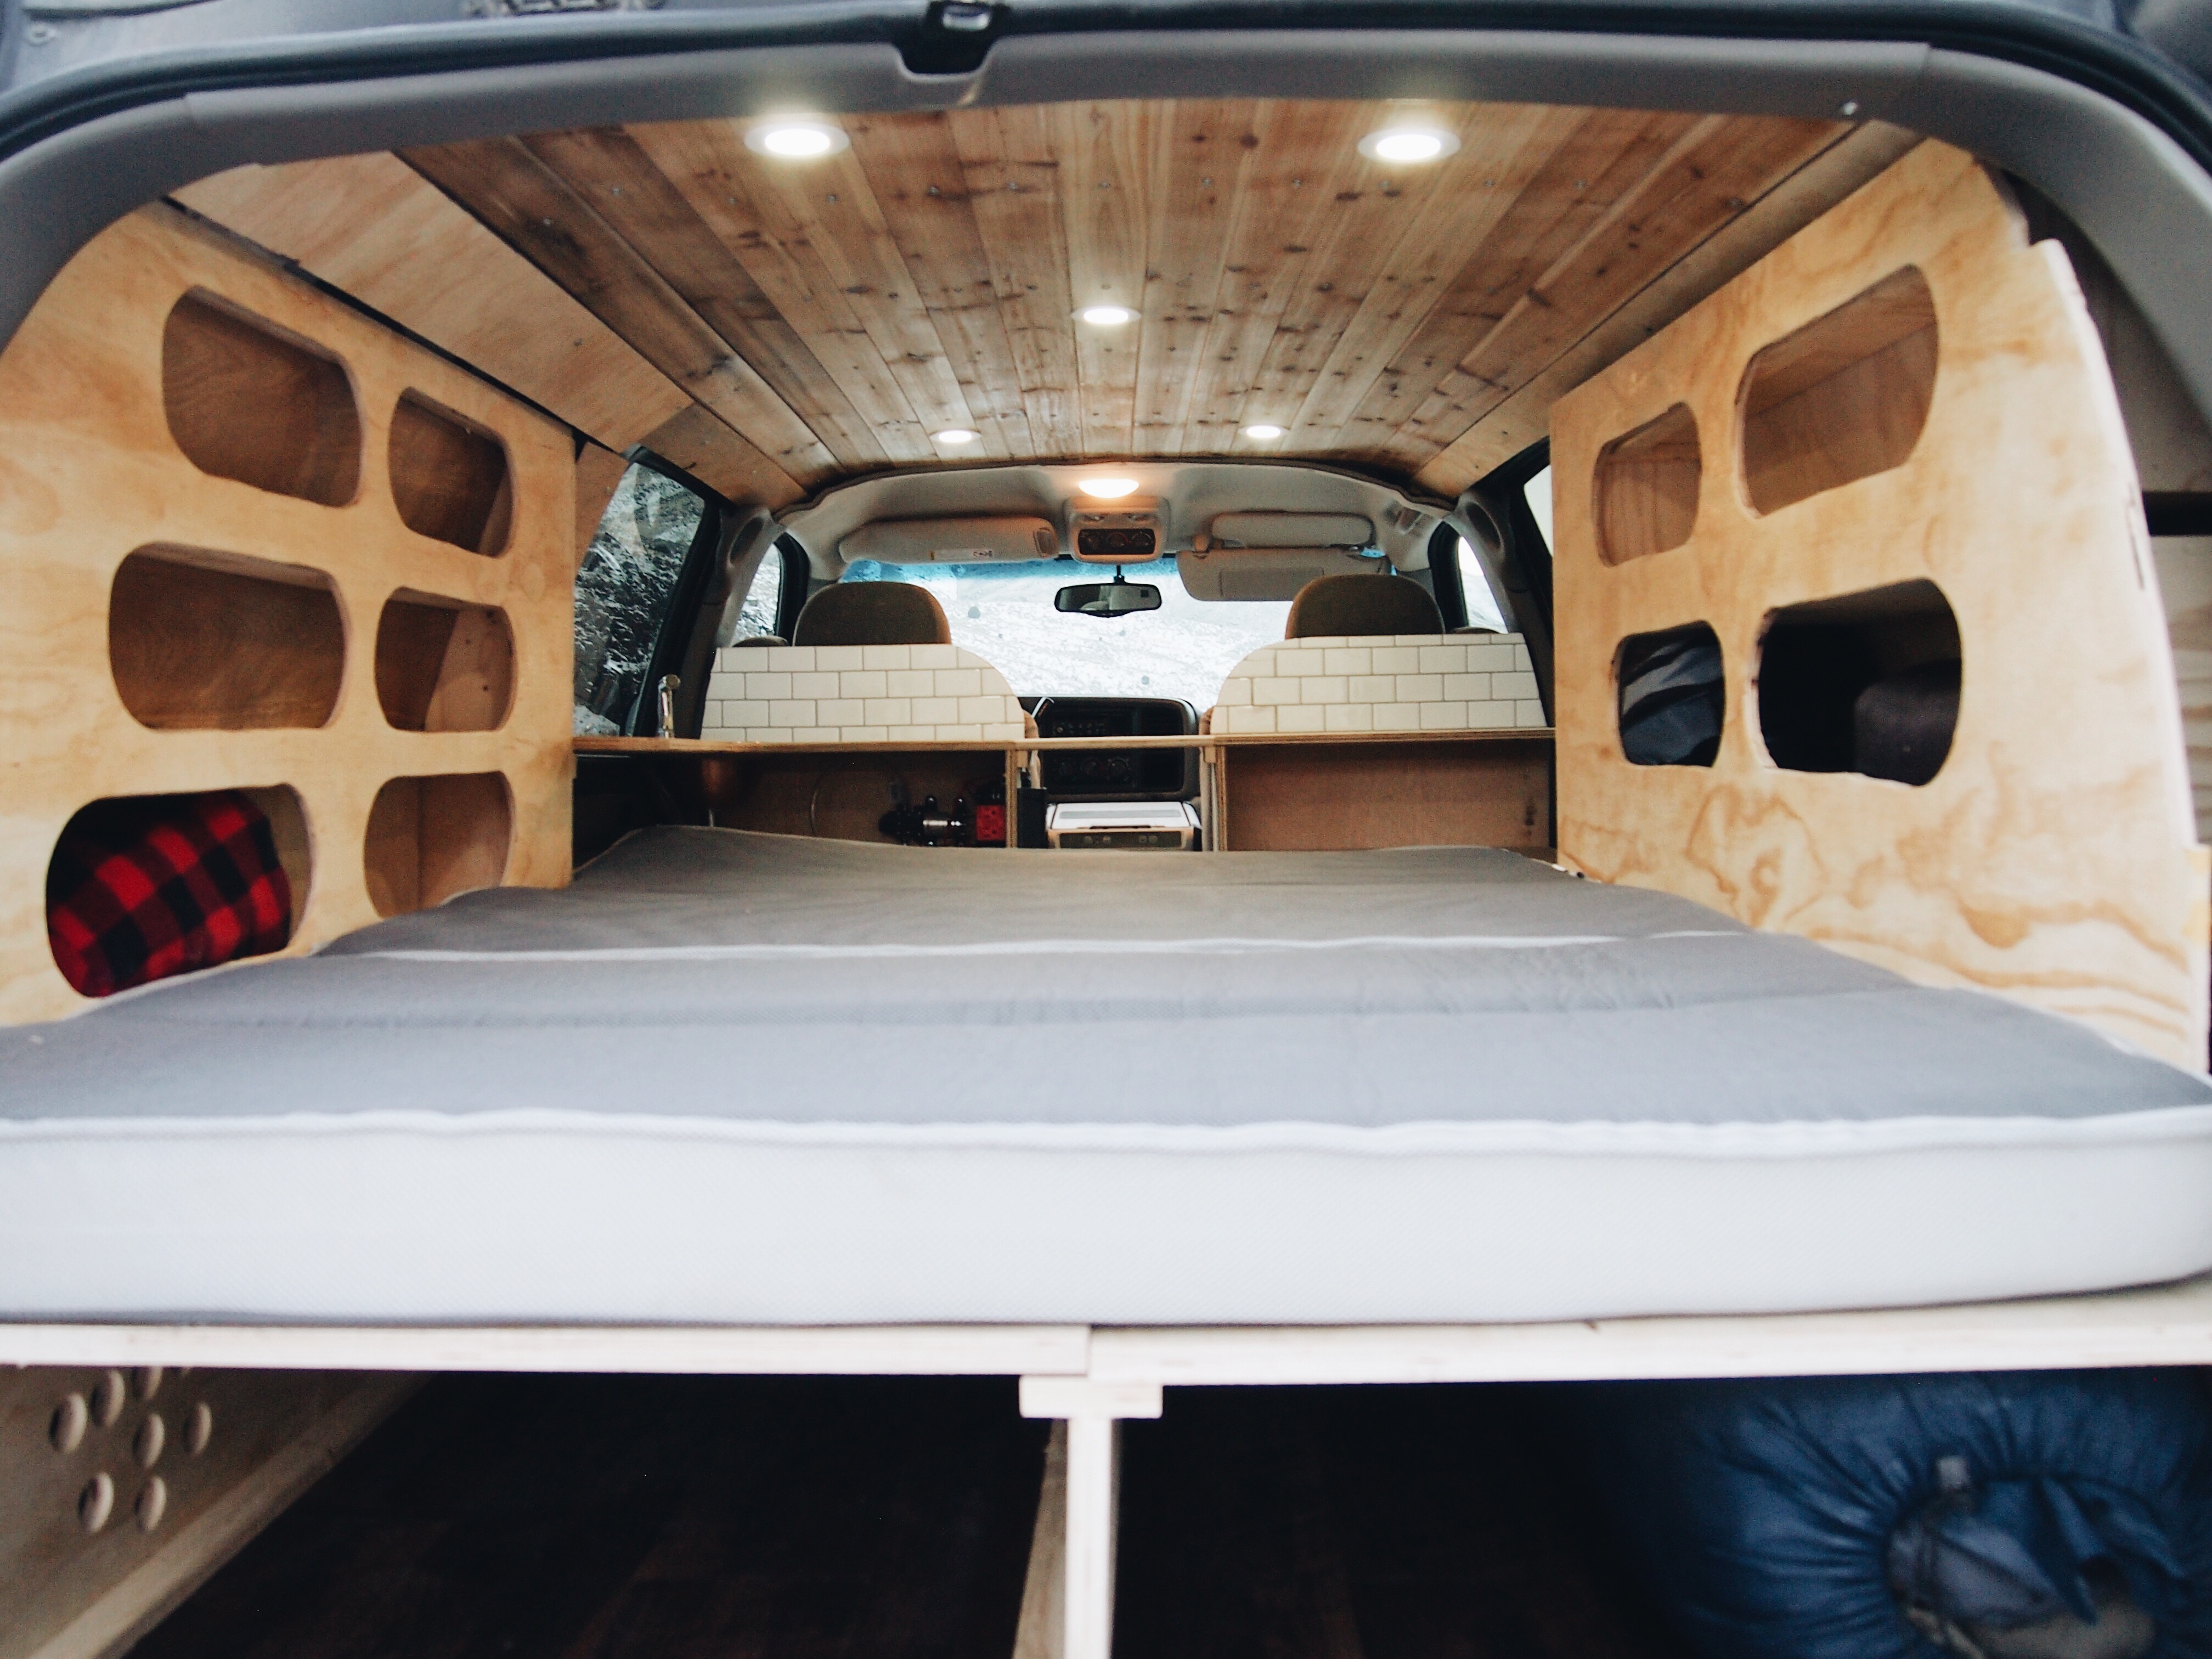
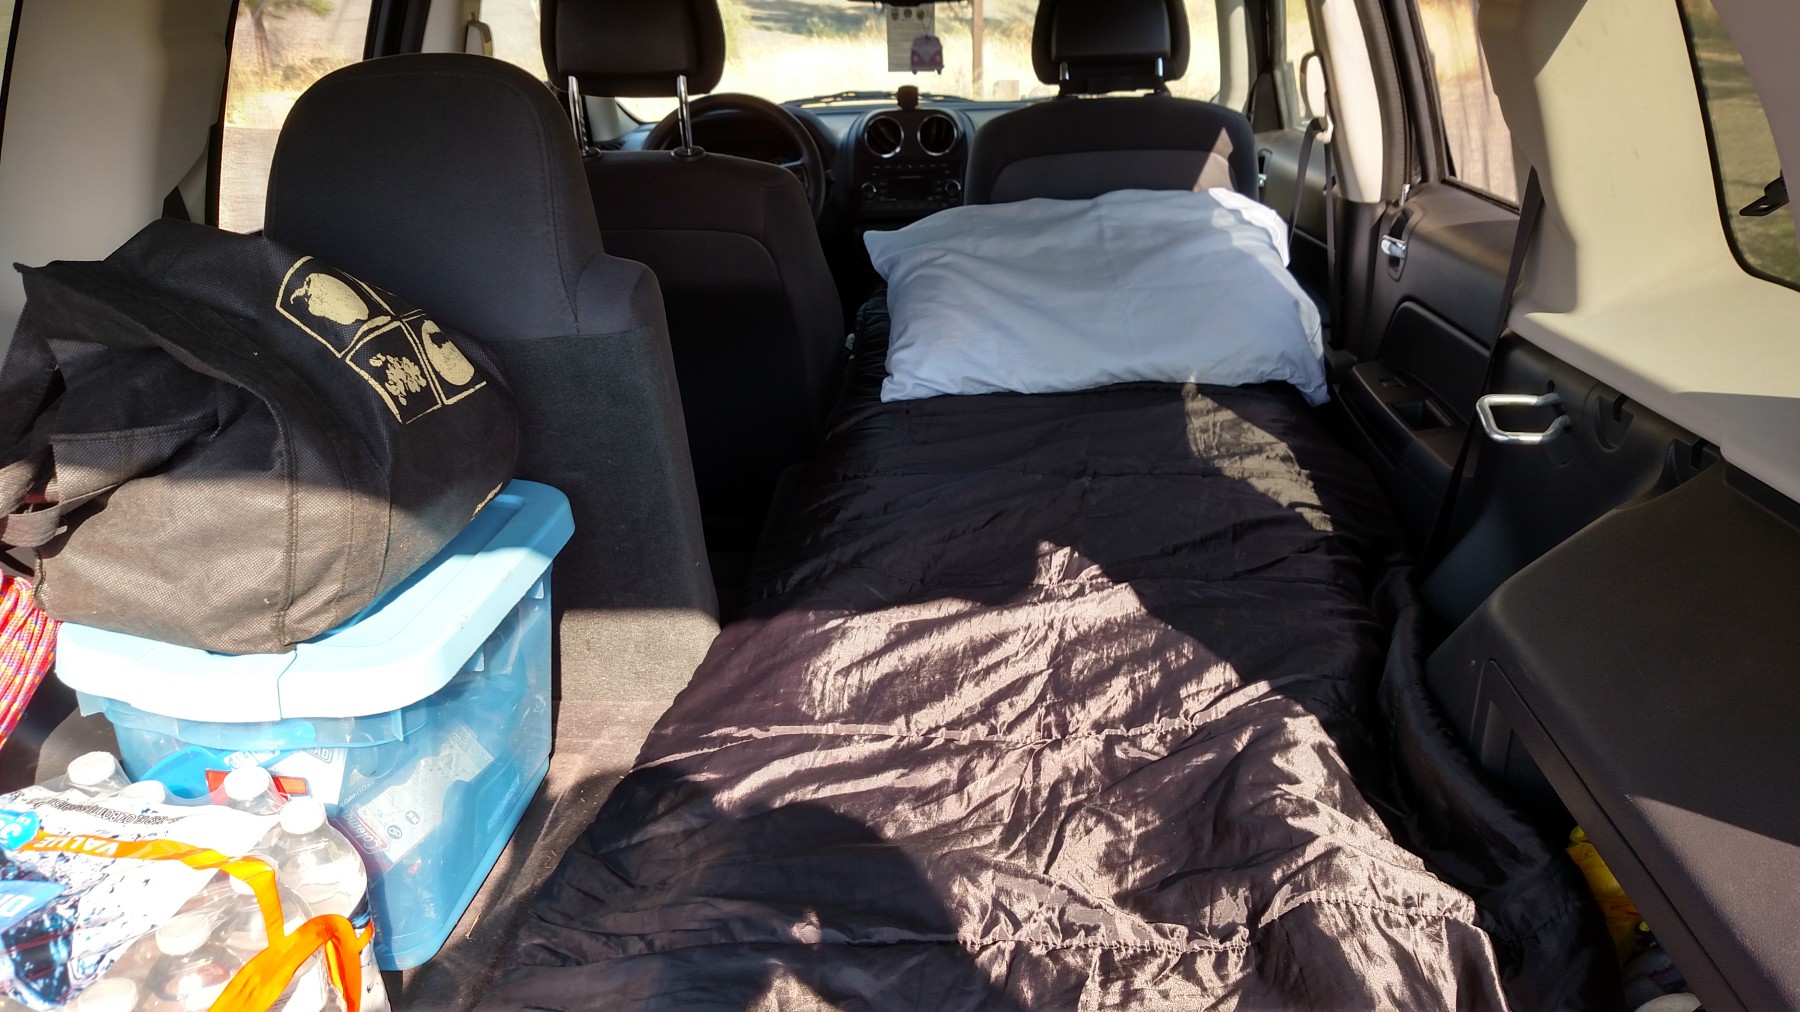
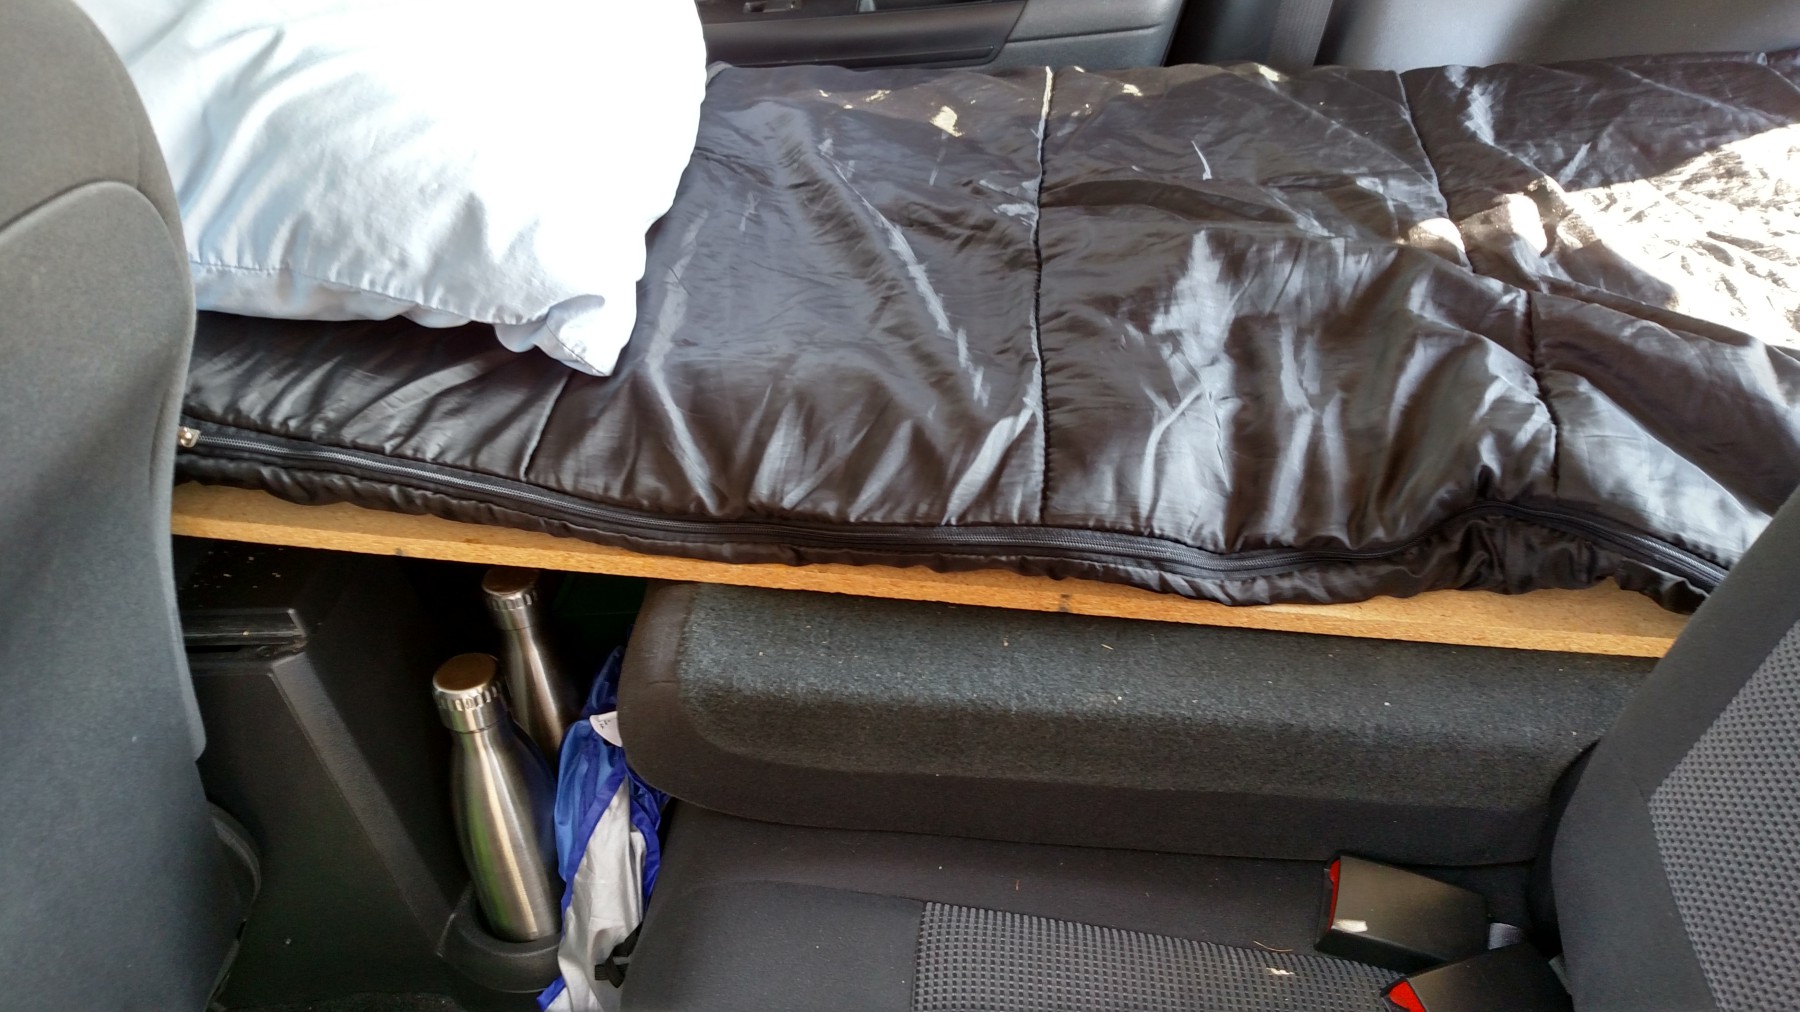
Now for my bed. It was originally constructed to being lofted as high as the storage shelves I built (8 inches off the back seats). Turns out, this severely limited my head space when in bed. So, after a few months, I removed the 2x8s that ran the length of the bed, and replaced them with a couple blocks at the foot of my bed just to keep it even (the front of the bed rests on the back of the back seats (since Subaru back seats do not come out, or lay flat, I had to add the blocks to may the bed level). But thankfully, this unevenness actually created under-bed storage as well. Beneath my bed is a small folding table, my dual burner stove, cast irons, and bigger kitchen utensils (tongs, wooden spoons, spatulas, etc.).

Beneath the head of my bed, where the footwell is (behind the passenger’s seat) I have a medium sized utility gear box (holds ratchet straps, bungees, zip-ties, etc..) and on top of the gear box I have a 40L dry bag where my dirty laundry gets placed (since the drybag is air-tight, it also keep the smell and dirt contained), and some small boxes of detergent.

Inside both back side doors I have a no-see-um screen cover for my back windows, so I can sleep with my windows cracked, or open and not have to worry about insects.

I also somehow managed to get my longboard to fit across both footwells of the back seats but still leave enough room for the other items.

Cooking out on the road. Click for the larger version.

And finally, the front seat. In the shotgun seat I have a plastic box that holds my regular-use water bottles, travel and regular mug, sunglass cases, portable power packs, headphones, etc.. And in the footwell of the shotgun seat I have a small plastic container that holds extra electronics (power converter, wall adapter, camera mounts, etc.). On top of this smaller box is where I keep my bike seat (no one likes a wet butt, so I keep it out of the weather), microfiber rags (to wipe the windshield of humidity buildup), and it is also where I keep my window blinds for the front windows and windshield.

What I like about the vehicle

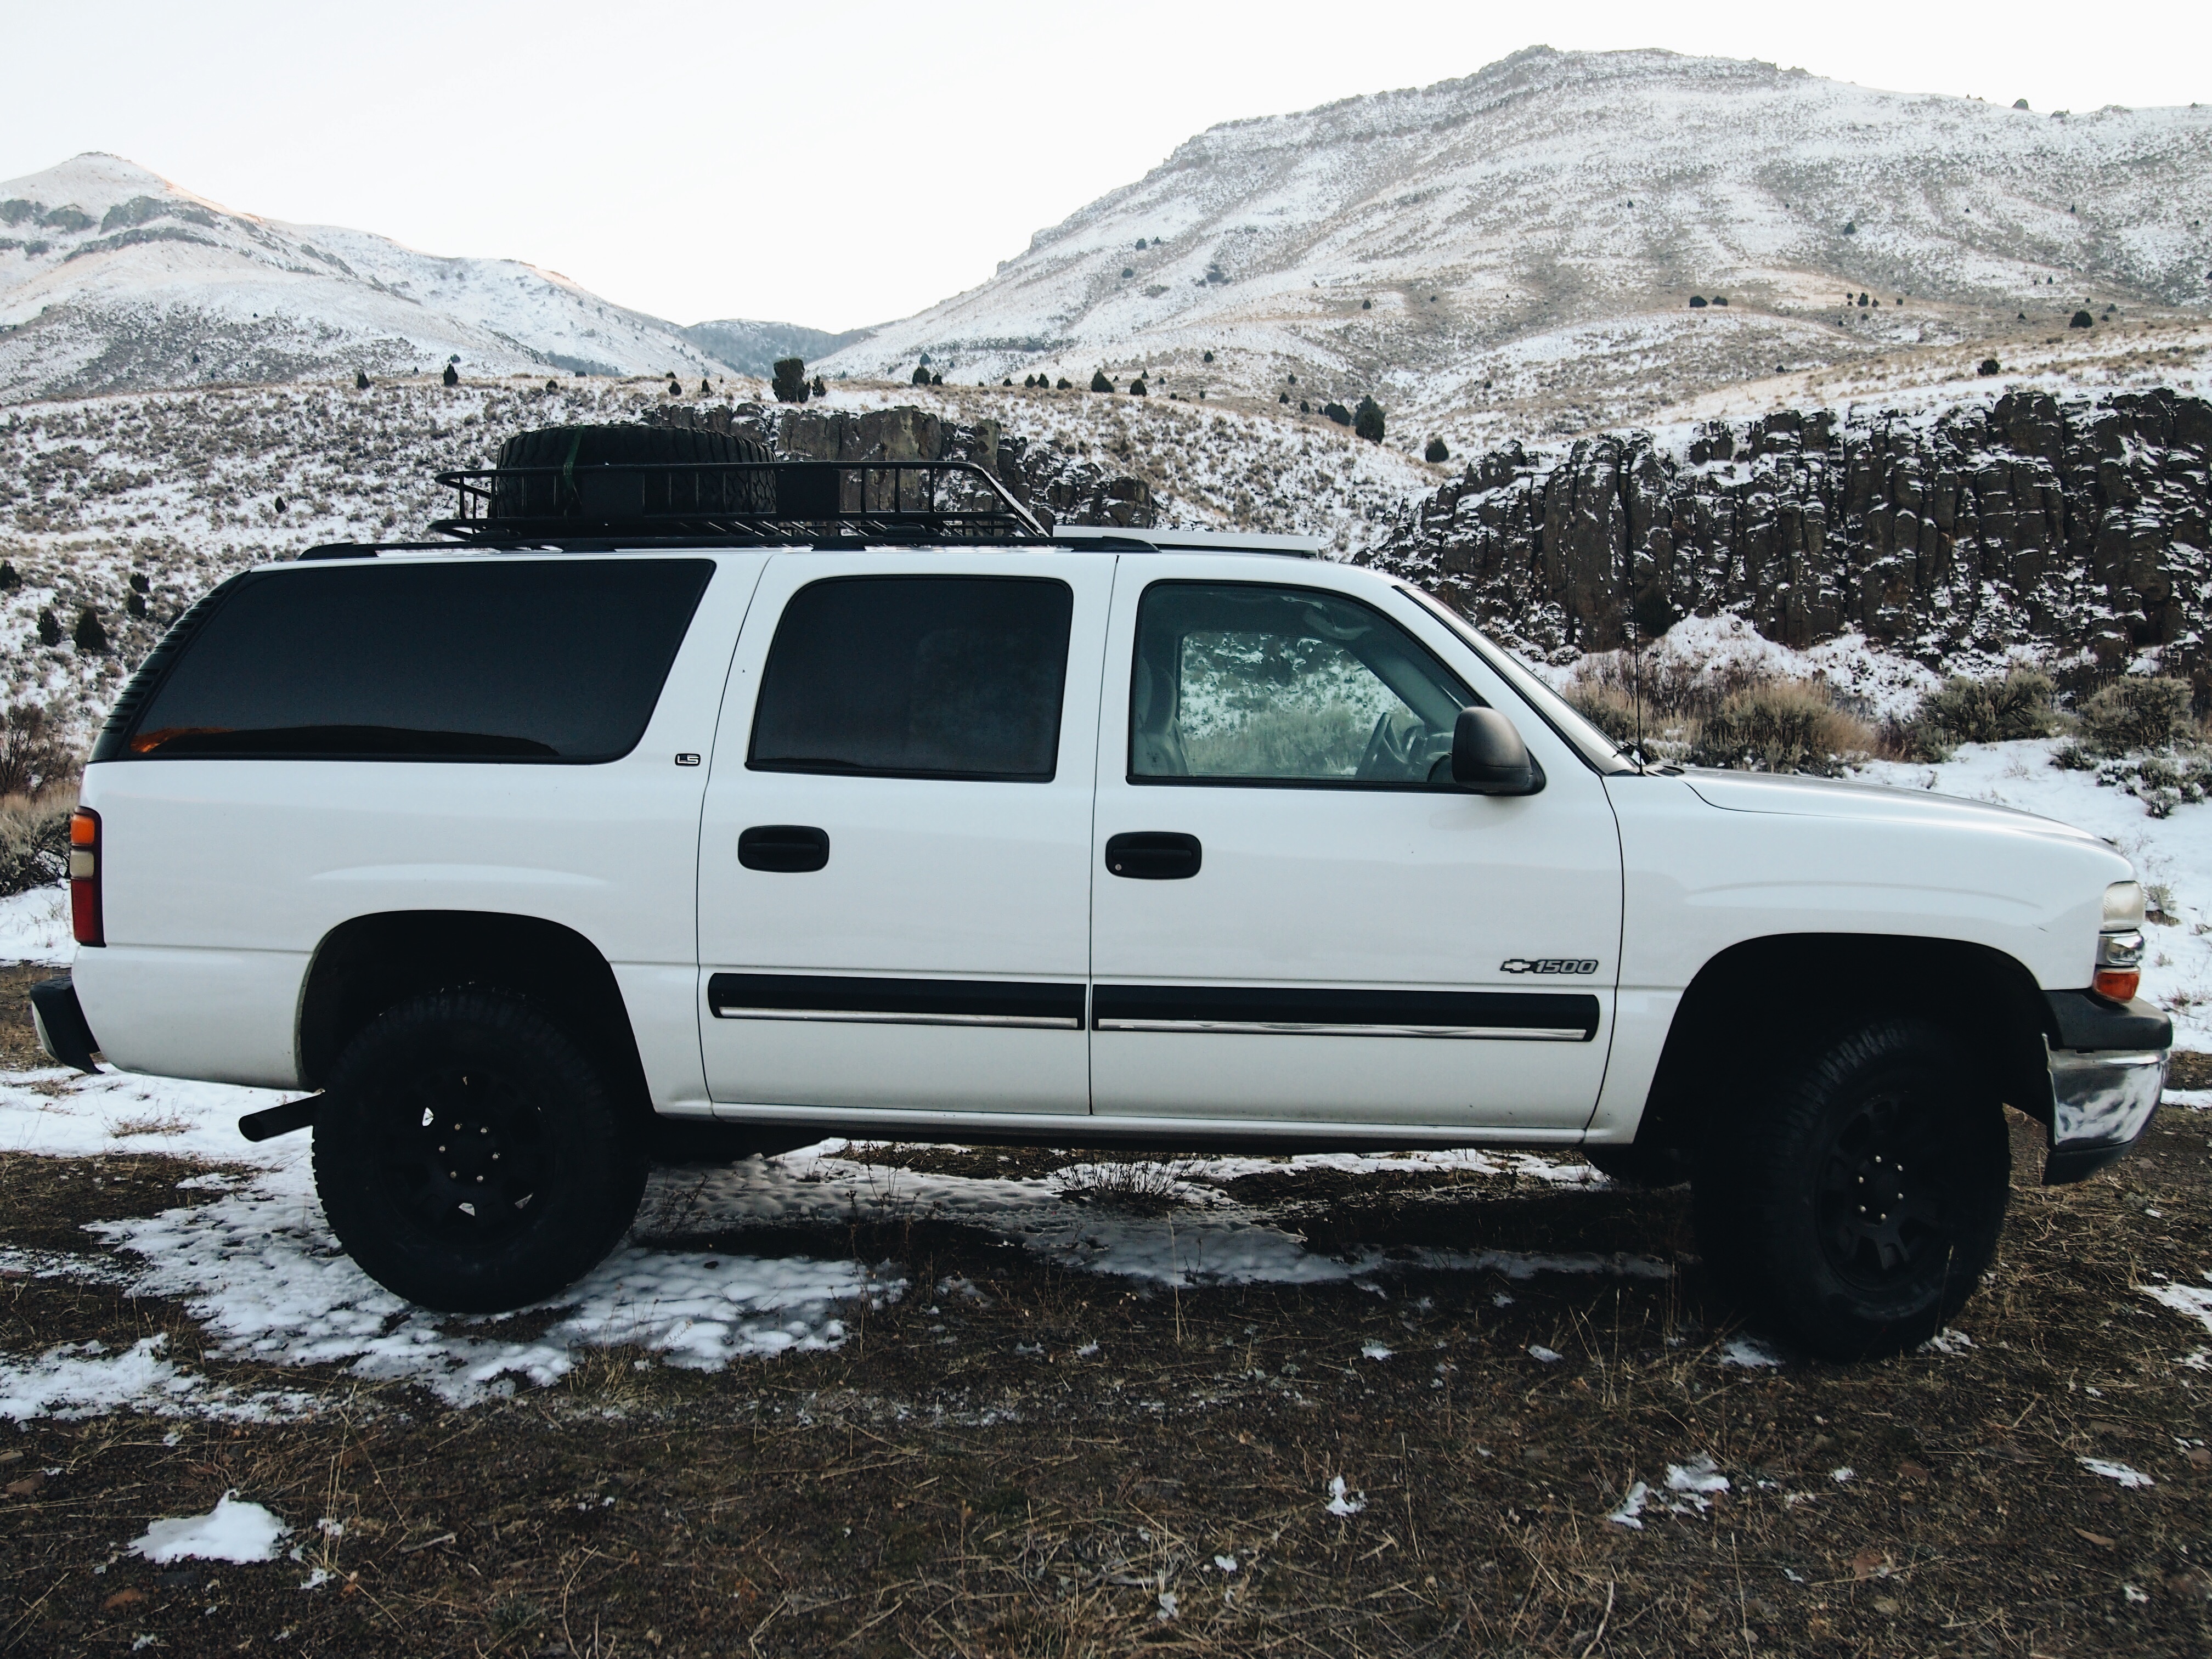
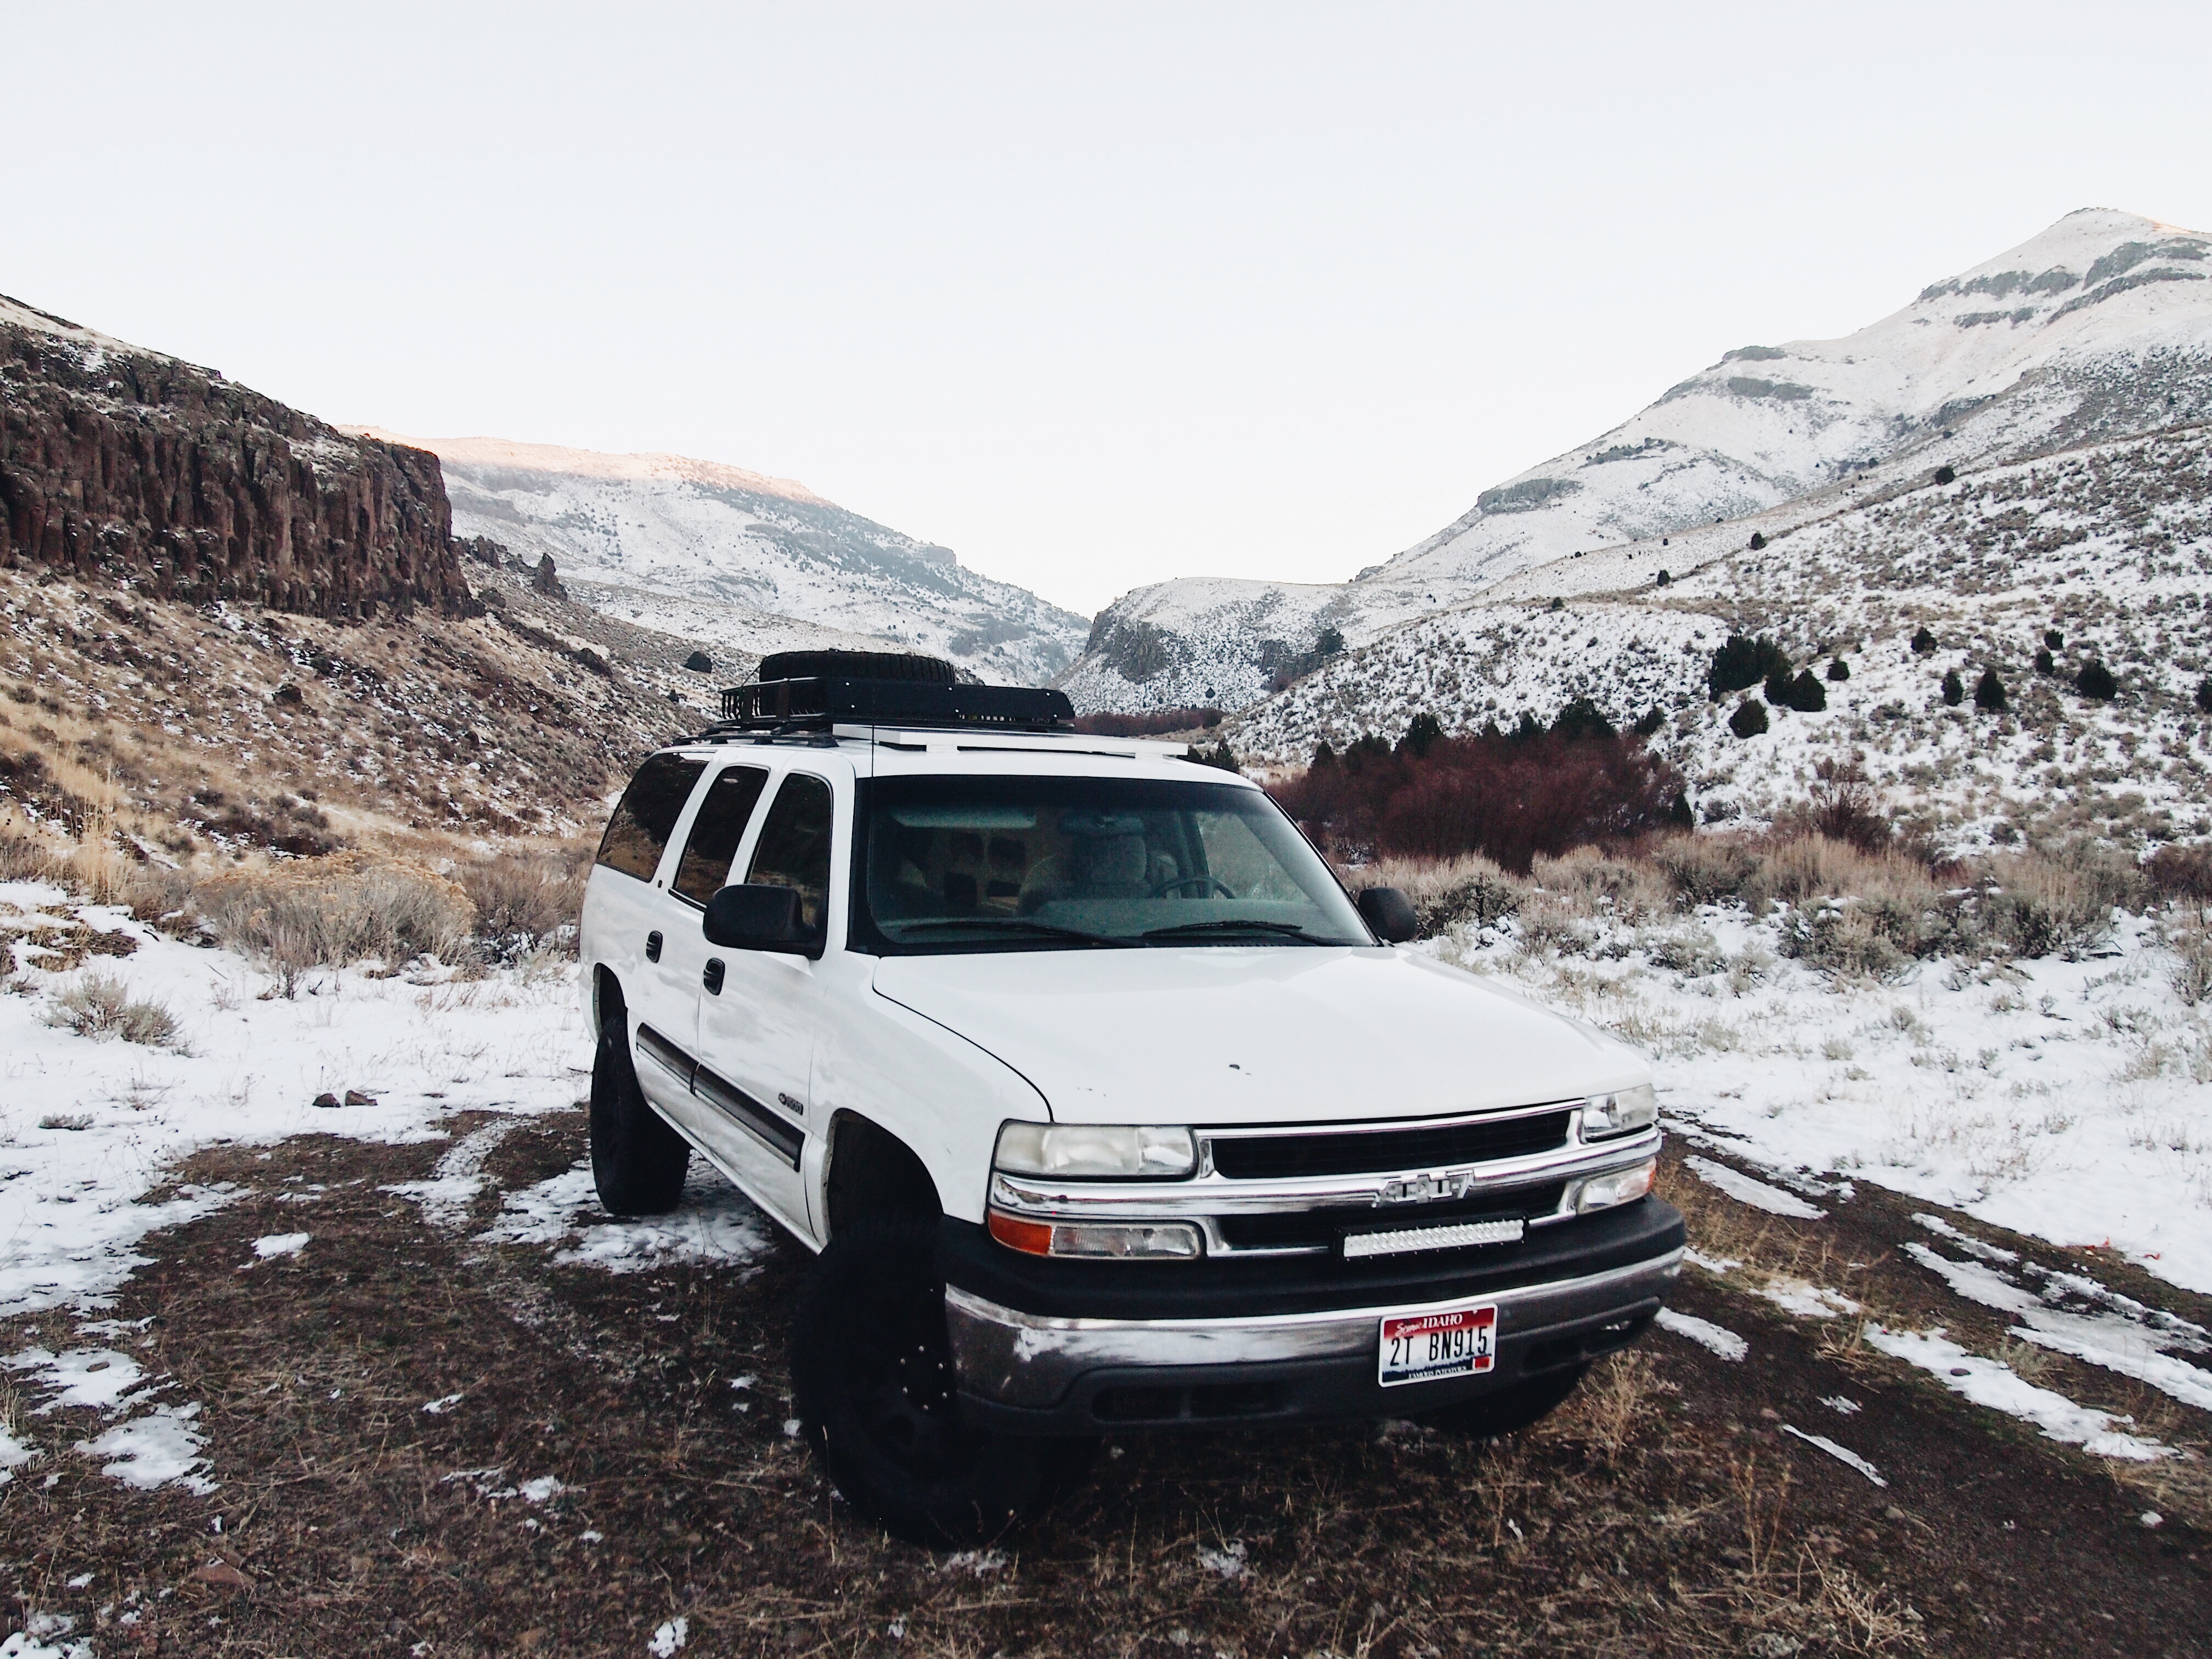
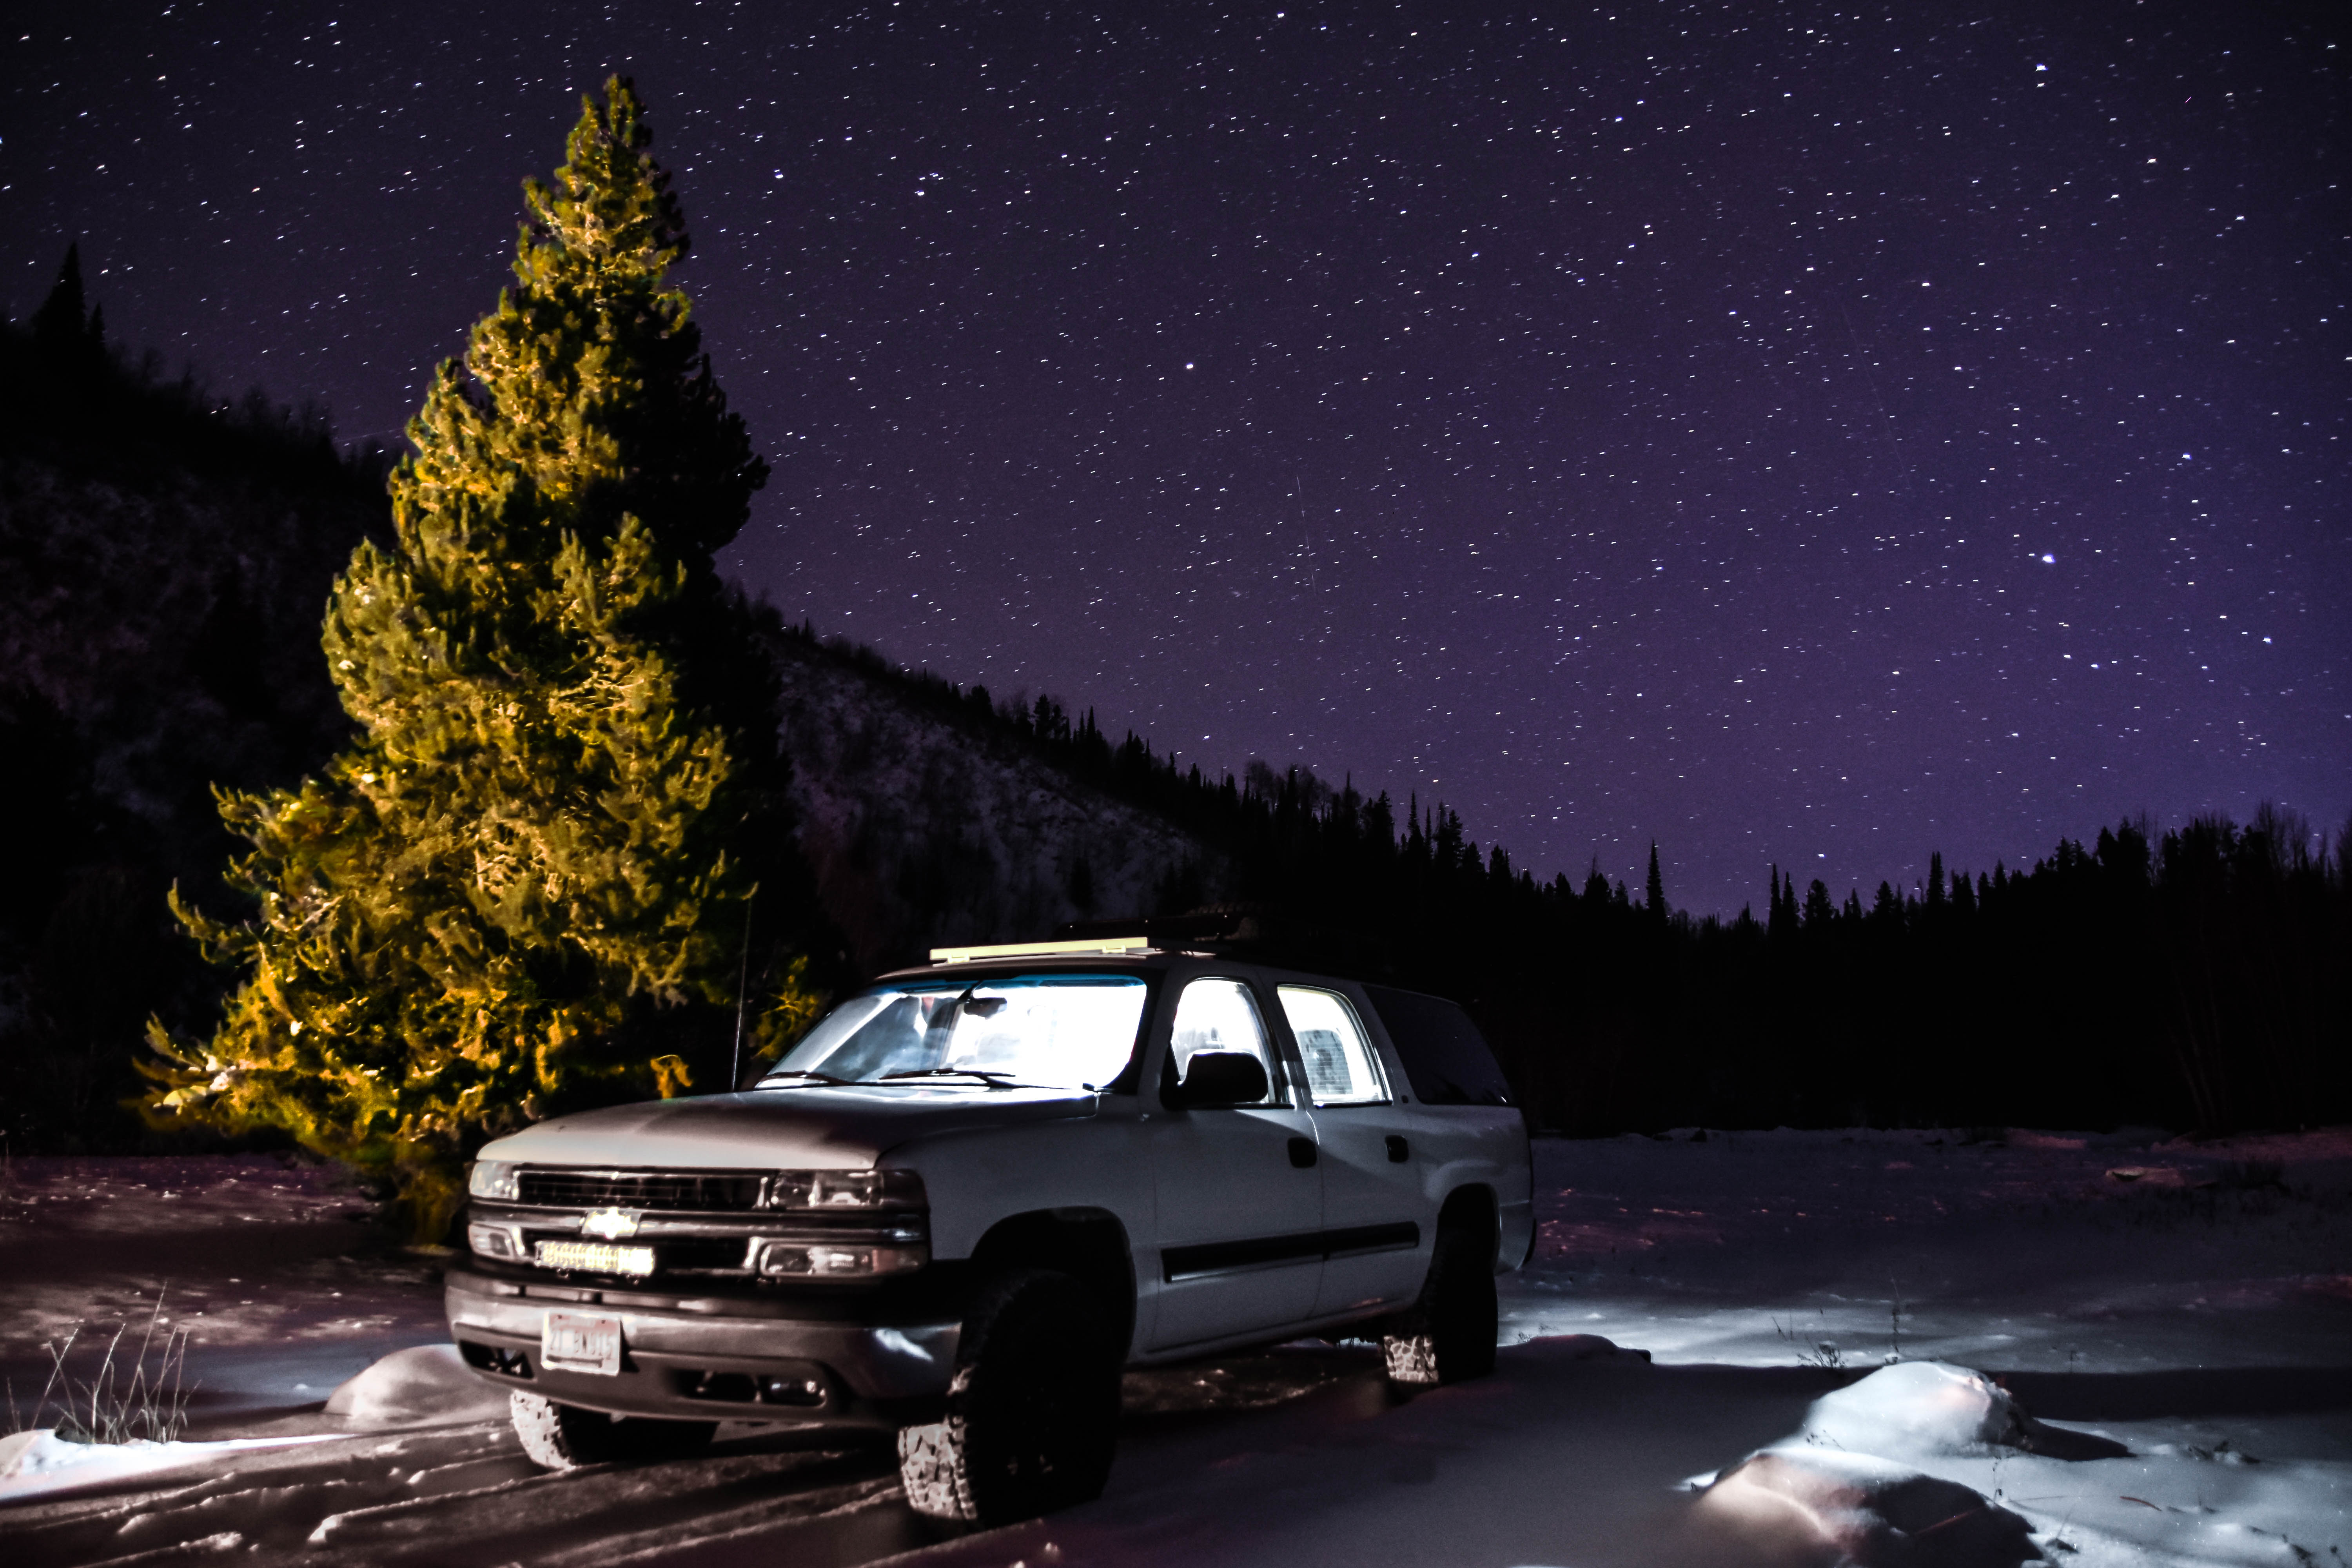
Being that it is an all-wheel drive Subaru, I have yet to have troubles going through even some of the toughest of terrains. Now obviously, I am not able to do any rock-hopping or anything along those lines, but my car (otherwise known as Sugar), has gotten me through feet of snow, ice, rivers, mud, you name it. I truly believe when it comes to beating Subaru off-road ability, it cannot be matched. The only modifications I have added to Sugar are all-terrain tires, and wind/rain guard you see on the hood and each of the 4 windows. Aside from that, this make has been a superb choice because of the panoramic sunroof that came with it; When laying in my bed, I am able to look out of my roof and see the star-scape above, or even just have some natural lighting if I choose to spend the day in bed. Also, Sugar is a smaller vehicle (as far as living out of, or overlanding goes), but that is a big bonus when looking at MPGs. I average 24MPG, with all my gear loaded up, and myself inside!

What I dislike about the vehicle

This is hard to write. Obviously the space is tight. Something with a bit more room would be fantastic so my external storages could be removed (reducing the tail-drag caused by the weight hanging off the back of my vehicle), or put to use for other items. I know that a larger vehicle comes with its own flaws (less MPGs for example), but the idea of having more space to move around sounds magical.

After deciding to convert to full-time travel, I knew I would have to make some big adjustments to my rig and how I took it overlanding.

Hanging out at the beach. Click for the larger version.

What I’d change

Over the last 15 months, I have made some significant changes to the setup of my interior. The biggest being lowering my bed to allow for more headspace. But for now, the only thing I have been bouncing around inside my head is the possibility of a small off-road trailer to pull along with me, instead of the cargo basket I currently have. Again, I know that a trailer adds its own share of complications (extended vehicle when looking for parking, eliminates stealthiness, etc), but more room is sometimes worth the added stresses.

Thanks again to Adam for sharing his rig with us, and again, check him out on his website and on Instagram.

I Just Started an SUV RVing Facebook Group

Just a quick announcement: Last night I finally created an SUV RVing Facebook group. The group is called… wait for it… SUV RVing. Here’s the link. Go ahead and join the group, post pictures of your setup, talk about gear, and ask questions.

It’ll also be a place for me to share behind-the-scenes stuff about projects I’m working on and other little updates that don’t warrant a video or blog posts by themselves.

It’s a private group, meaning that you’ll have to request to join. Unless you are obviously a fake account, I’ll approve you ASAP.

Again, here’s the link. Thanks!

Tristan

Why I Prefer Wearing Pants (Instead of Shorts) When I Hike

I get asked several questions each week about various aspects of camping, car camping, and hiking, and I think I’ll start posting my answers here to the blog. Shoot me an email if you have a question you’d like me to answer.

Here’s a question I received a few days ago:

So I was wondering if I could ask a clothing question. I notice you always wear pants even when it’s hot out and was wondering why.

There are a few reasons:

1. When I wear shorts and my legs sweat, the dirt/dust I kick up on the trail sticks to my sweaty legs and makes my legs super dirty. Pants keep the legs cleaner. The cleaner I am on my SUV RVing adventures, the less often I have to shower and use up my precious water supply.

2. The bottoms of the pants cover the tops of my hiking shoes and help keep pebbles and sand from getting into my shoes. Not only is it uncomfortable having dirt and rocks in your shoes when you hike, but they wear holes in your socks faster.

3. I can bushwhack or walk through overgrown vegetation without worrying about my legs getting scratched.


**UPDATE MARCH 17**

I got a great email from my friend and fellow SUV RVer Robert who had this to say about wearing pants while hiking:

“I too wear long pants primarily to prevent my legs from getting burned to a crisp by the sun which is inevitable at high elevations. They are also the ultimate mosquito repellent. But they’re uncomfortably heavy and hot for summer hiking. The solution? Pajamas! They’re super light, breathable, and cheap. You can wash them at night and they’ll be dry by morning. But can they take the kind of beating the backcountry will dish out? After nine days in the John Muir Wilderness one summer, walking for miles cross-country and climbing over high passes, I emerged with not one tear, not one thread out of place. Pack a second pair for sleeping in.”

Available at:

  • Walmart ($11.00, pants only; plaid)
  • Amazon ($21.90, full set; solid color)


More on Roof-Top Hammocks, Hitch Hammocks, and Roof-Top Tents

Roof-Top Hammocks

Last year I posted about the TrailNest, which is a folding metal contraption that you put on top of your roof so you can set up a hammock or two up there. Instead of a roof-top tent, it’s a roof-top hammock.

I recently got an email from Chris, the guy behind TrailNest, informing me that version 2 of the hammock stand is currently taking pre-orders. The original TrailNest was $349. Version 2 is $799. My first question to Chris was why version 2 is more than double the price of version 1, and here are the key points that justify the price increase:

  • The metal floor that you can stand on to get in and out of the hammock—which used to be an add-on accessory—is now included.
  • Shipping is now free.
  • The stand is now made from aluminum rather than steel, so it’s much lighter.
  • “We’re now using waterjet cutting and other CNC processes, so the deployment mechanisms and everything else are now much simpler and easier to use.”

The product is made in the US in a facility just north of Denver, Colorado. You can learn more about the product and pre-order it here. A 2-person version is also available for $1,299. Here are some pics:

TrailNest Rooftop Hammock Stand

While you can’t deny after looking at those pictures that it’s a cool product and looks like a ton of fun, my first reaction to this is that it’s now too expensive for most people. At $349, its certainly wasn’t throwaway money (for me, anyway), but it was something I could see myself trying out at some point. At $799, it’s getting into roof-top tent territory. This Smittybilt roof-top tent is $850, and it comes with bedding and an actual tent that provides complete weather protection. With the TrailNest, you still need to provide the hammock, underquilt, tarp, etc. For the price of the TrailNest, I’d want them to at least throw in a cheap hammock just so that you can use the thing as soon as you get it. (For example, here’s one on Amazon for $9.99 that includes carabiners, tree straps, etc. Why not just include something like that with your $800 purchase? I understand that TrailNest may want to be making and selling their own hammocks in the future, or that they want one made in the US instead of a $10 Chinese one, but still, I think a hammock should be included.)

All of that said, some people simply prefer sleeping in hammocks to sleeping in a bed. If that’s you, I can absolutely see the $799 price tag making sense. Even $799 is cheaper than a week’s worth of hotel stays is most places. But I’m just a little bit sad that it’s now priced high enough that I will never get it.

An Alternative

If that $350 price tag for a hammock-related accessory is still calling to you, check out the Hammock Mount by McClean Metalworks. I know I’ve written about it before here on the blog, but it’s just such a smart design that I wanted to mention it again as long as I’m talking about funky car hammock accessories.  While it doesn’t have the roof-top wow factor of the TrailNest, it’s half the price and is arguably more practical in that it’s easier to get in and out of the hammock and is easier to set up, not to mention easier to store when you’re not using it.

McClean Metalworks hitch-mounted hammock stand

(McClean Metalworks, if you read this, I’d love to review one of these for real if you’re willing to send me one. I’m going on a monthlong road trip in a couple of weeks and can provide you with lots of action shots and would also probably make a video about it. Hint hint. Wink wink. Nudge nudge. Beg beg.)

A Quick Thought on Roof-Top Tents (RTTs)

If I had $2,500 burning a hole in my pocket, I’d get a hard-sided RTT to try out. Probably this one. But I don’t have $2,500 burning a hole in my pocket and probably never will. So that leaves me with options like the aforementioned $850 Smittybilt RTT or something like the Tepui Tents Ayer Sky 2 Tent ($1,050). That Tepui RTT is particularly interesting to me because it’s being sold at REI. REI has coupons a couple of times a year for 20% off a single item, and it apparently works on Tepui RTTs. So that’d knock the price down to $840. That’s still more than I’d want to spend on something like this, but what I would consider doing is buying one for $840 (or around $880 after tax), using it for a summer, and then selling it again for $700 or $800. I’d be willing to take that much of a hit on one just to have had the experience of trying it out. Indeed, my fiancée and I are thinking about using some of our wedding money to get one so we could try it out on our planned honeymoon road trip.

(Yes, another option would just be to buy it from REI and then return it using their rather liberal return policy after I’ve tried it out, but that’s kind of leaves a bad taste in my mouth if I never had the intention of keeping it in the first place. Taking advantage of a company’s return policy like that is bad karma.)

Anyway, I just wanted to share that as a viable option for other people who are interested in trying out a RTT but don’t want to permanently sink $900 into one and don’t have any RTT rental places near them.


This blog post contains Amazon affiliate links.

Two Interesting New Products for SUV RVers, Vandwellers, and More

I occasionally check Kickstarter to see if there are any products that I think would be interesting or useful to those of us who spend time traveling and sleeping in our vehicles. For those unfamiliar with the site, Kickstarter is basically a way for people with ideas for products to raise money so that they can put those products into production. They do this by pre-selling the product before it’s been produced. If you back a project on Kickstarter, you pay the money and then can expect to get the product in 3 or 6 months or whenever it’s ready after being produced. (See the note at the end of this article.)

One of the products currently raising money on Kickstarter is called the Moki Doorstep. It’s a piece of metal that attaches to your car’s door frame to give you an extra step to make putting things on or taking things off of the roof of your car much easier. Here are some pics:

The Moki Doorstep
The Moki Doorstep
The Moki Doorstep
The Moki Doorstep

It costs $30. This product could be great for those of us who put cargo boxes, kayaks, skis, or solar panels on the roof of our vehicles. Check the Moki Doorstep out here on Kickstarter. There’s also a great video showing how it works, which I’m embedding below (though you may not be able to see it if you’re an email subscriber to the blog).

The second Kickstarter product I wanted to share is a bit silly but still, er… interesting. It’s called The Car Pool. It bills itself as “The world’s most portable toilet for men.” It’s basically a long tube. One end gets hooked up to an empty plastic bottle, and then the man pees into the other end. Here’s a pic:

The Car Pool
The Car Pool

To me, this product seems completely unnecessary for most people. If you’re a guy, it’s already not that hard to just pee into a wide-mouthed bottle. The one instance in which I could see it being useful is if you have limited mobility. Then maybe something like this could make a difference for you. But hey, if you think you’d like it, by all means get one and let me know how it goes. One Car Pool costs $19 to $25, depending on which tier you back the project at. There’s a dumb video that shows off the product, but I don’t want to embed it here. If you’re interested, go to the product’s page and watch it there.

What do you guys think of these products?

—–

Note: Backing a product on Kickstarter does not 100% guarantee that you’ll get it. You can learn more about risk and accountability on Kickstarter here.

A Storage Shelf Built Into a 1998 Toyota 4Runner

Last week I got an email from SUV RVing reader/viewer Galvain (Chasin’ Simplicity on YouTube) saying that he’d built a shelf in the back of his 1998 Toyota 4Runner. He then sent over some pictures and a video of his build and gave me permission to share them here. The shelf is based off of the one that I made in this video. Great job, Galvain! You can also check out his blog here.

Here are the pics:

Storage shelf build in the back of a 1998 Toyota 4Runner
Fitting the shelf in the back of the 1998 Toyota 4Runner
Storage shelf build in the back of a 1998 Toyota 4Runner
Adding bins and legs to the shelf
Storage shelf build in the back of a 1998 Toyota 4Runner
Adding a top to the shelf
Storage shelf build in the back of a 1998 Toyota 4Runner
Attaching the top of the shelf to the rest of the shelf with an adjustable cable tie
Storage shelf build in the back of a 1998 Toyota 4Runner
The shelf from inside the 4Runner
Storage shelf build in the back of a 1998 Toyota 4Runner
The plywood sleeping platform that goes over the gap where the head goes when laying down to sleep.

You can see Galvain talk about his builds (the plywood head platform and the shelf build) in his video here (click here if you can’t see it below). The shelf portion starts at 6 minutes 27 seconds.

An Amazing Sleeping and Camping Setup in a Chevy Suburban

I’m fairly active on Instagram (@suvrving). I go in every day and browse the hashtags for new photos relating to things I’m interested in: #vanlife, #overlanding, #homeonwheels, etc. The other day, while browsing new photos the #overland hashtag, I found the @SubOverland account. A family of 4 was traveling around the US in their 24-foot RV but then downsized to a Chevy Suburban to continue their adventures. This is not your typical soccer mom Suburban (not that there’s anything wrong with that). Here are some features and modifications of their adventure rig:

  • ​3-inch lift
  • Oversize tires
  • Complete solar setup
  • Off-road LED light bar
  • LED interior lights
  • Roof rack
  • Refrigerator/Freezer
  • Power inverter
  • Kitchen sink
  • Outdoor shower
  • Sleeps up to 4
  • Interior storage
  • Auto 4X4, 4X4, hi and lo transfer case
  • Limited slip differential

I was impressed with the pics I saw on Instagram and sent a private message to the account to see if I could repost the pictures here to the blog. Grady, owner of the account and the Suburban, messaged me back and gave me the go-ahead. So here are pics of a 4WD 2000 Chevrolet Suburban that’s been kitted out to comfortably sleep and house a mom, a dad, and two young kids. I can definitely see me getting a rig like this once I have kids. Add a roof top tent once the kids get a bit older and you’ve got separate “rooms” for the parents and kids. If you want a similar rig for yourself, Grady and the gang do beefed up Suburban and Subaru builds. Head on over to SubOverland.com to learn more and get in touch with Grady if you’re interested.

The modified 2000 Chevy Suburban from the outside
Another look at the exterior
The sleeping area with storage on the sides.
The sleeping area with storage cubbies on the sides
Grady demoing the sleeping area
Look at all of that under-bed storage!
Wood ceiling and lights
Sink
Sink
The desk/table surface
The kitchen/desk/table surface
The solar charge controller and 12v outlets
The solar charge controller and a couple of  12-volt outlets
Sexy outside shot at night

Thanks for sharing your Suburban build, Grady!

Adding a Toilet to a Subaru Forester for SUV Camping

A very common question from people who want to camp or live in their SUV is how/where they are supposed to go to the bathroom. There are a number of different ways to address this problem, and ny personal toilet solution has 3 components:

  1. I use public toilets whenever possible. This includes toilets at Walmarts, gas stations, grocery stores, fast food restaurants, libraries, visitor centers, trailheads, etc.
  2. I have a pee bottle for when I need to pee inside of my vehicle and don’t want to leave. This can be due to privacy concerns (e.g., there are other people camped nearby) or weather concerns (e.g., it’s cold or rainy outside). I use a green Nalgene bottle.
  3. I have a small, portable camp toilet that I made. I use it in conjunction with a privacy tent when I need to poop and there are no public restrooms around.

Excuse me while I get a bit graphic here, but I’ve never pooped while inside my SUV. I’ve never really needed to, and the idea of pooping and creating unpleasant odors in such a small space has never appealed to me. That said, different people have different priorities. For some, the best solution is to rig up a toilet inside of their vehicle so they can use it discretely without having to leave the vehicle. A few months back, SUV RVing reader/viewer Rainwood sent me a couple of photos of the toilet she built into the sleeping platform of her Subaru Forester:

A toilet installed in a Subaru Forester.
Looking at the toilet from the other side. Note the "drawer" that makes the most of the space under the flatform.
Looking at the toilet from the other side. Note the “drawer” (a basket/bin) that makes the most of the space under the platform.

First, Rainwood removed the rear seats. And then here’s what she had to say about the toilet and how she made it:

“Since I want to be able to sit on my toilet, I found an old crock from a crock pot at a second-hand store. It is just the right height and fit where the back seat was. I found an RV toilet seat on line and built it in. Like I said, I’ll use plastic bags (they fit well) and kitty litter. I got the back windows tinted and am going to put curtains in for privacy.”

If being able to go to the bathroom while inside your SUV is important to you, Rainwood’s design looks like a great one to emulate.

She also had this to say about removing the seats:

“When I took out the back seats I had to add some foam to fill the space below the first wooden frame. Before placing the foam, there was a lot of noise from gasoline splashing around as I drove.”

And here are some pics of the seats removed and foam she added:

The rear seats removed
"Seat backs off, foam padding in deeper contours"
The seats and seat backs removed with foam padding placed in the deeper contours
The second layer of foam padding

Thanks for sharing, Rainwood!

Another option for adding a toilet to your SUV is to simply put a bucket toilet on the floor behind the front seats. I show that in this picture here (this is the toilet seat I bought):

A bucket toilet inside of an SUV

Pictured is a 5-gallon bucket, but you could certainly get a smaller one if you wanted more headroom.

If you’d like to share some pics of your SUV camping setup with the SUV RVing community, get in touch using the form here.

[Note: This article contains Amazon affiliate links for products that I use and have paid for myself.]

Bill’s Setup for Sleeping/Camping in a Jeep Patriot

SUV RVing reader/viewer Bill sent me some photos and details about his great SUV camping/sleeping setup. He’s got a 2016 Jeep Patriot Latitude. He bought it this year as certified pre-owned rental. From Bill:

“When I originally starting looking at cars I was thinking of getting something large like a Ford Expedition, I had one before and like it. Ultimately, I chose the Jeep Patriot for pricing and gas mileage considerations. I haven’t  done much or spent any money beyond buying screen and some dollar store items.”

And here are the pics of Bill’s setup. All text in quotes is directly from Bill:

Bill's camping gear stored in the back of his Patriot before the sleeping platform is set up.
Bill’s camping gear stored in the back of his Patriot before the sleeping setup is set up.
Another look at Bill's gear. The green bin is the pantry and holds kitchen supplies.
Another look at Bill’s gear. The green bin is the pantry and holds kitchen supplies. Regarding dealing with his stuff when it’s time for bed: “I usually leave the stuff outside of the jeep next to it or on the roof. I can put everything in the jeep and still sleep in there but it is a little cramped and messy. I’ve done it a couple of times, once when it was raining and I slept at a rest stop one night on the way to the beach.”
The bed and platform.
The bed and platform. “I had a piece of pressboard in the garage so I have been using that [as a sleeping platform]. I push the passenger seat all the way forward and put the pressboard on the armrest. There is a bit of a slope but not too bad. I generally sleep slightly elevated at home for snoring issues. You can’t see it, but there is a self inflating backing mattress under the sleeping bag. I have a warmer (winter) bag as well. The lows were in the 70s on my last trip.”
A side look at the sleeping platform.
"I bought screen for less than $10 at Walmart and cut them to fit my four windows. I sealed the edges with black duct tape. I am currently using painters tape to put them on the windows but will probably get some magnates eventually."
“I bought screen for less than $10 at Walmart and cut them to fit my four windows. I sealed the edges with black duct tape. I am currently using painters tape to put them on the windows but will probably get some magnets eventually. I haven’t had any problems with the tape sticking to the jeep but I didn’t try to put them on when it was raining. I imagine it wouldn’t stick them. I don’t like the tape because of the bright blue color. I would prefer not to attract to much attention.”
“Behind the passenger seat I stow a Coleman stove (my parents bought it around the time I was born), fuel, charcoal (I buy aluminum pans from the dollar store for a makeshift barbeque), and a propane canister (I have a backpacking type burner in the green tub).”
"My kitchen setup and my dollar store makeshift barbeque. I am on the lookout for a cheep non messy portable barbeque."
“My dollar store makeshift barbeque. I am on the lookout for a cheap non messy portable barbeque.”
Bill's stove
Bill’s stove
Home sweet home
Home sweet home

And Bill added one more thing:

“I have found the bottom part of the back seat removes easily. I may do this for longer trips. I allows for a lot more storage. I believe I could put my ice chest or green tub in the space.”

Thanks for sharing your setup with everyone, Bill!