SUV RVing reader/watcher Ted was kind of enough to send me pictures of his camping setup in a 2015 Ford Escape and give me permission to post them here. Thanks Ted!
In the captions of the images below, you’ll see some of Ted’s comments in quotes and my (Tristan’s) comments not in quotes.
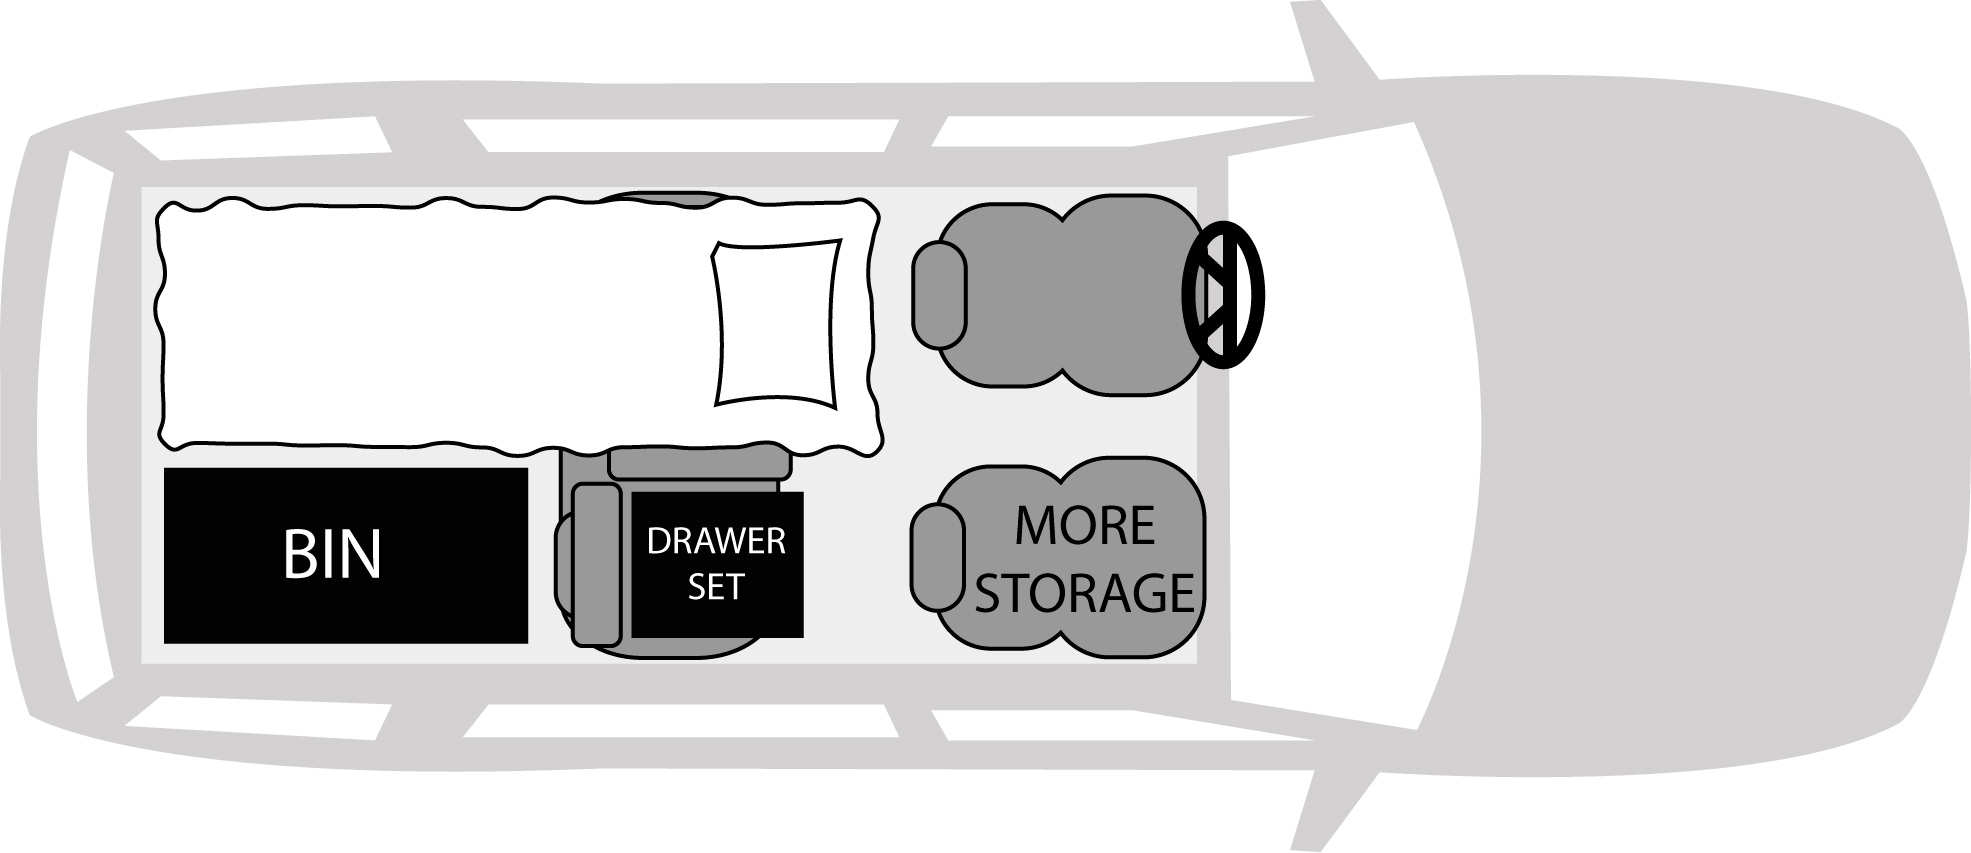
Here’s a rough overhead view of his layout:
A rough overview of Ted’s layout in his 2015 Ford Escape. He’s also made use of the floor space in front of the front passenger seat and in front of the rear seats.
And now let’s start with the front area of the vehicle and move backward:
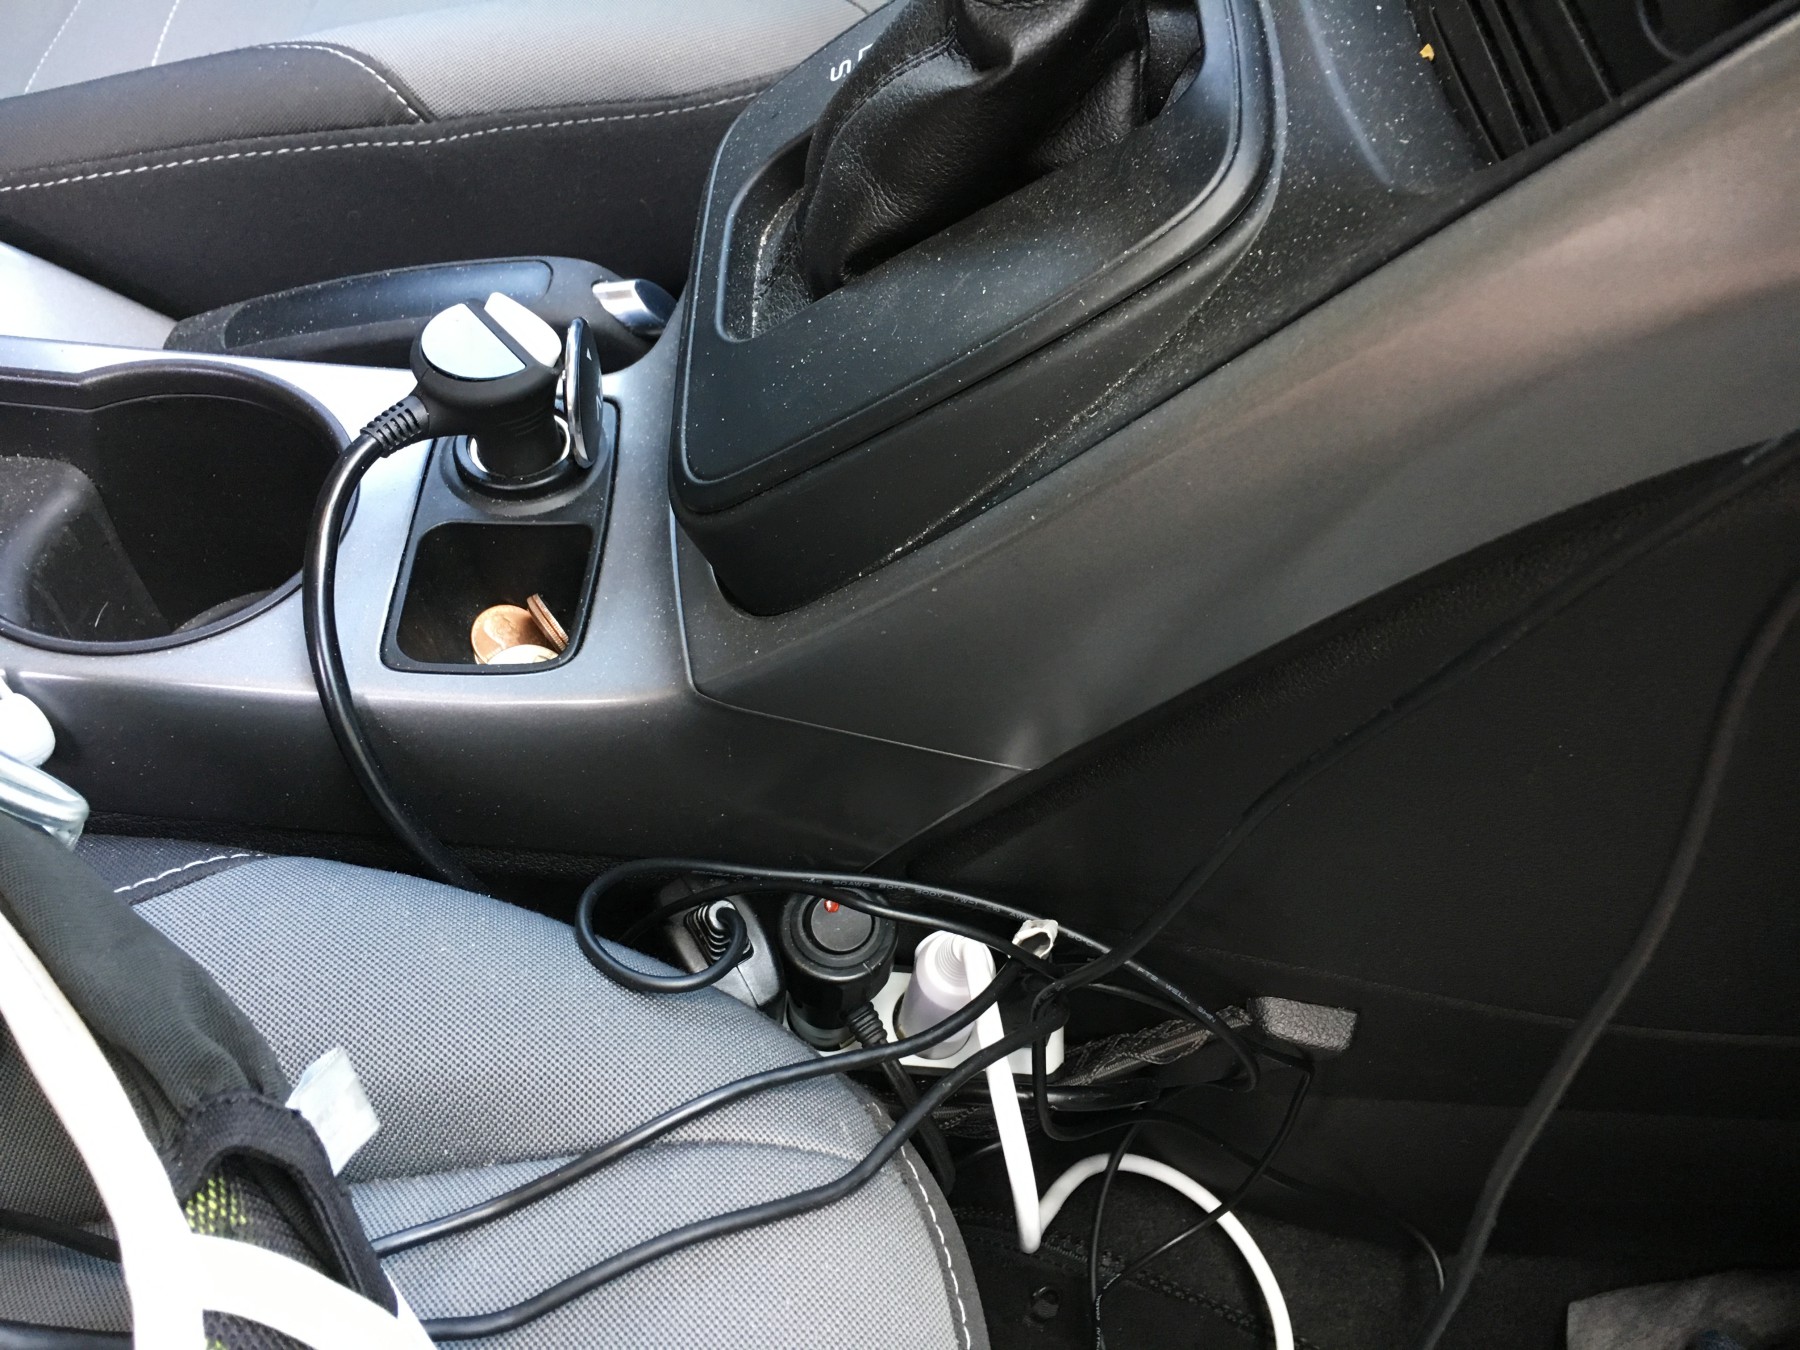
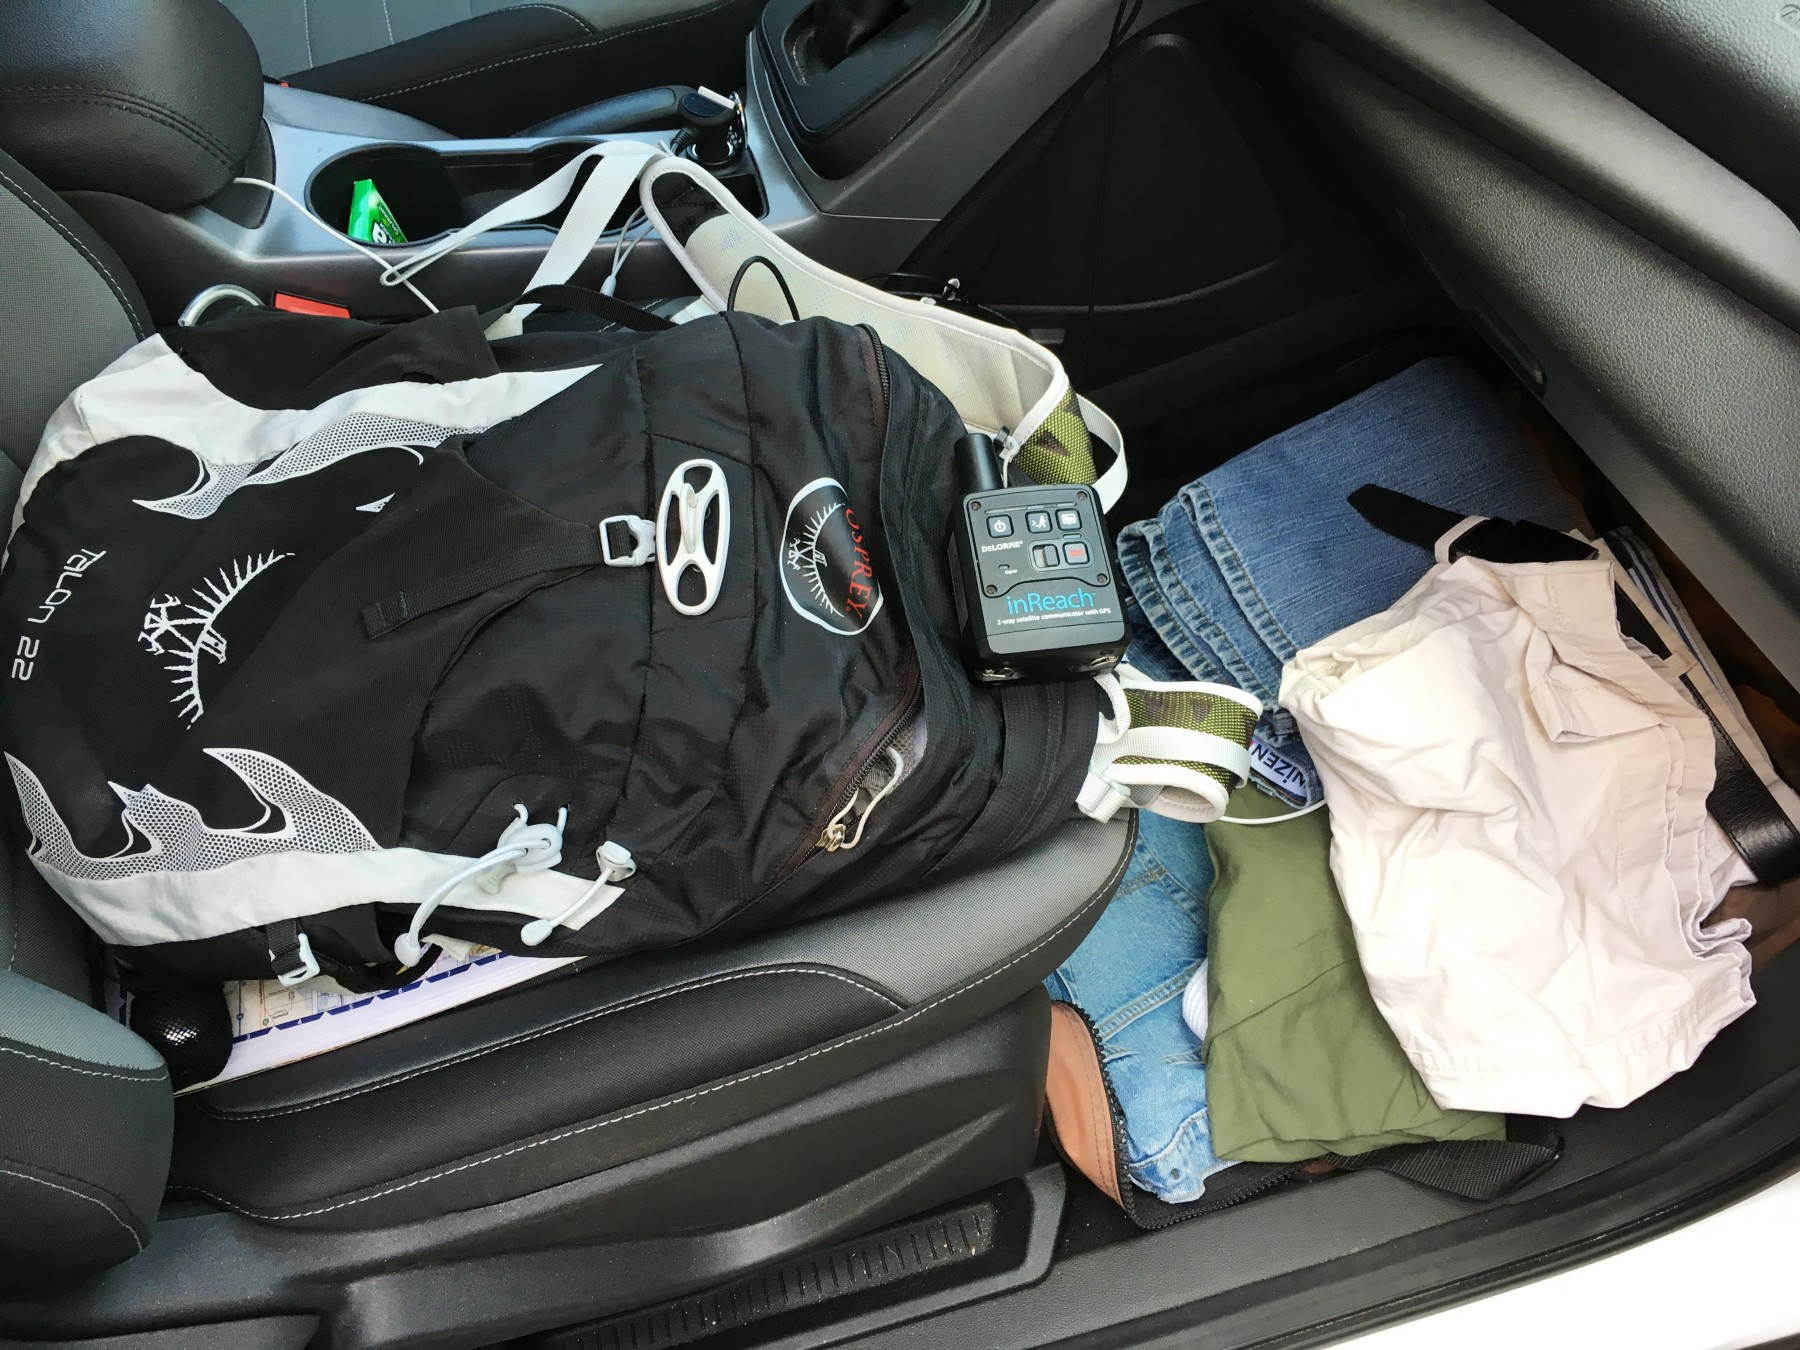
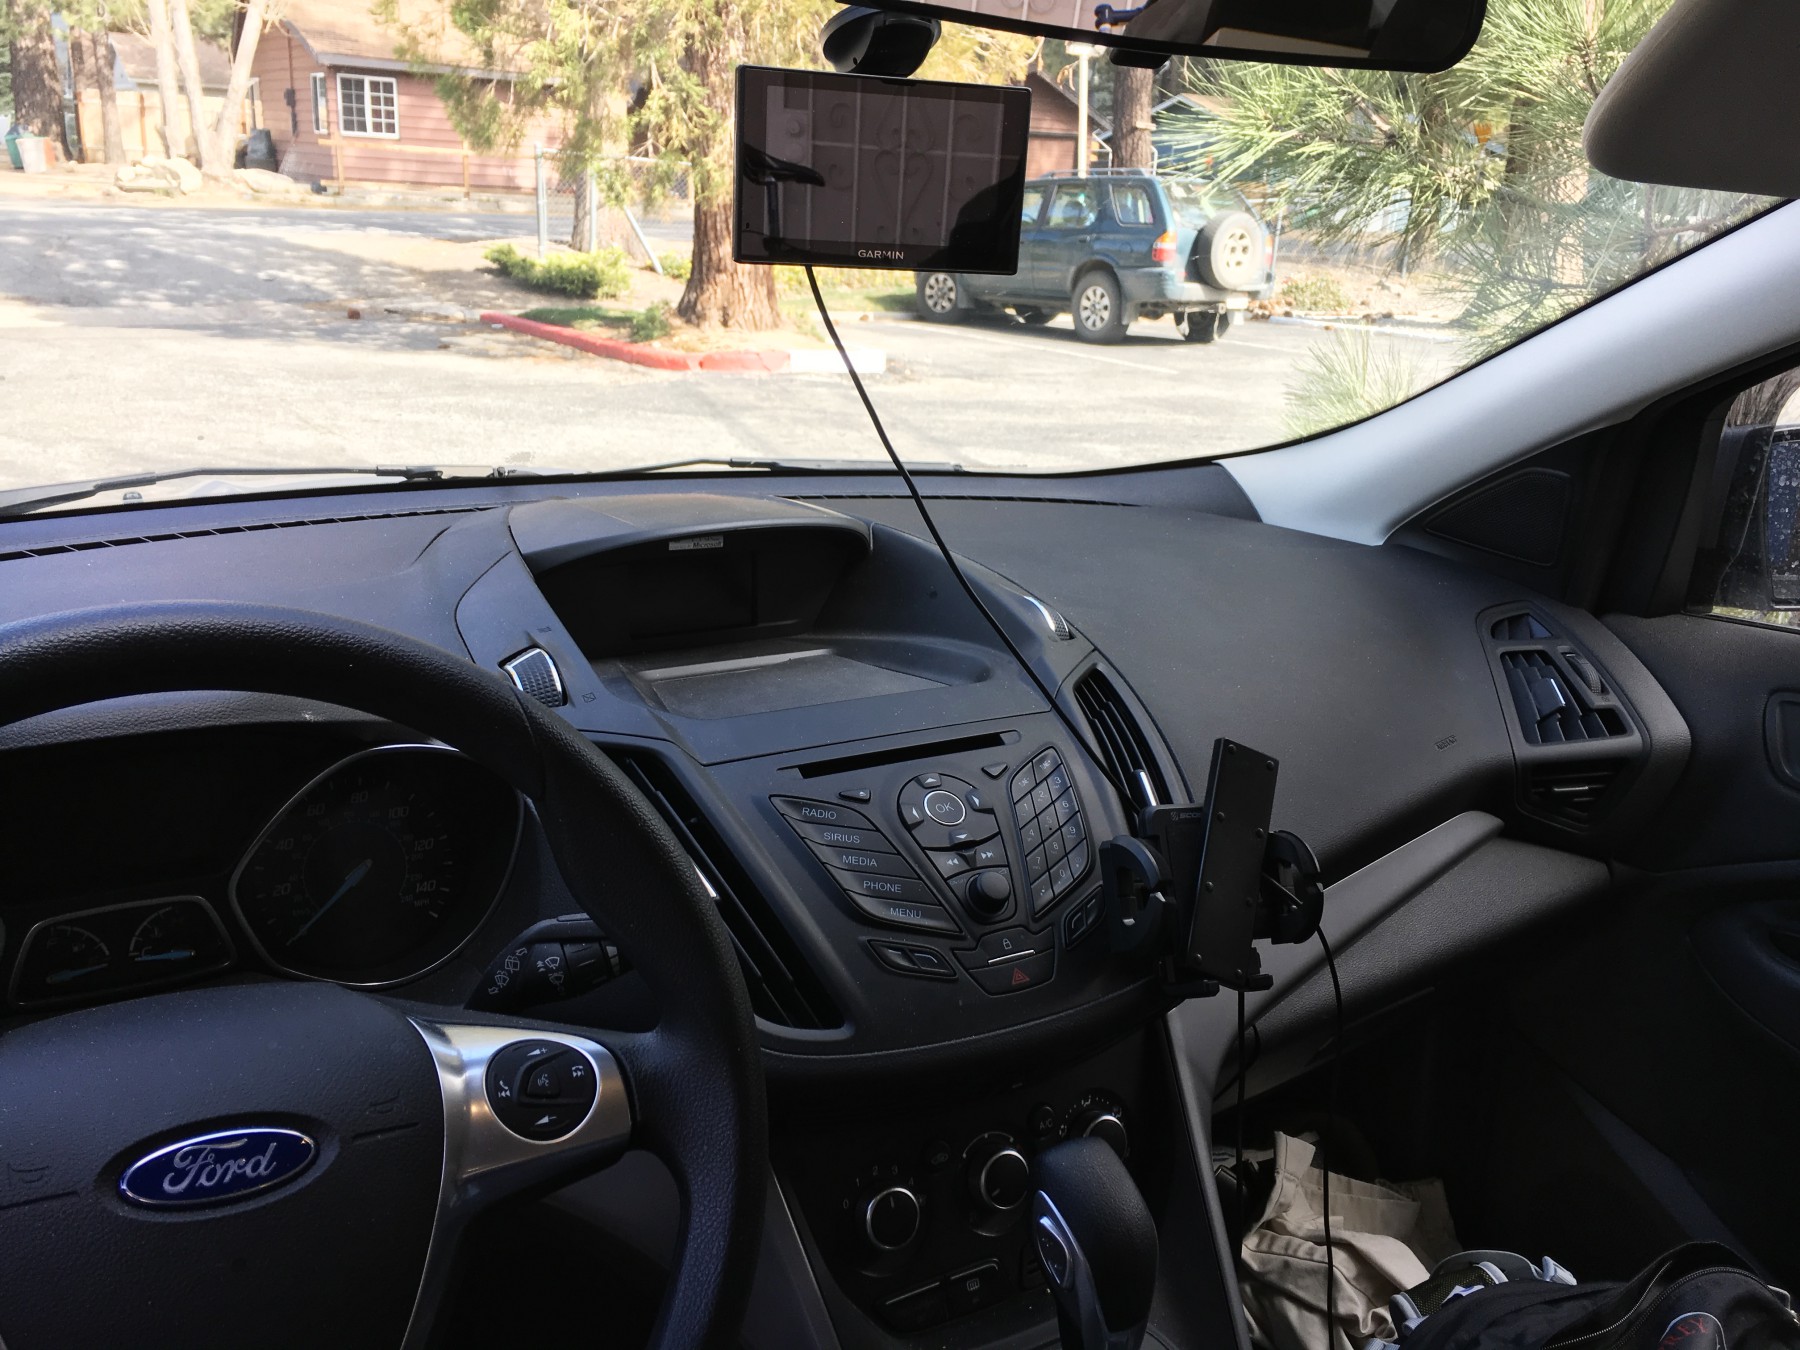
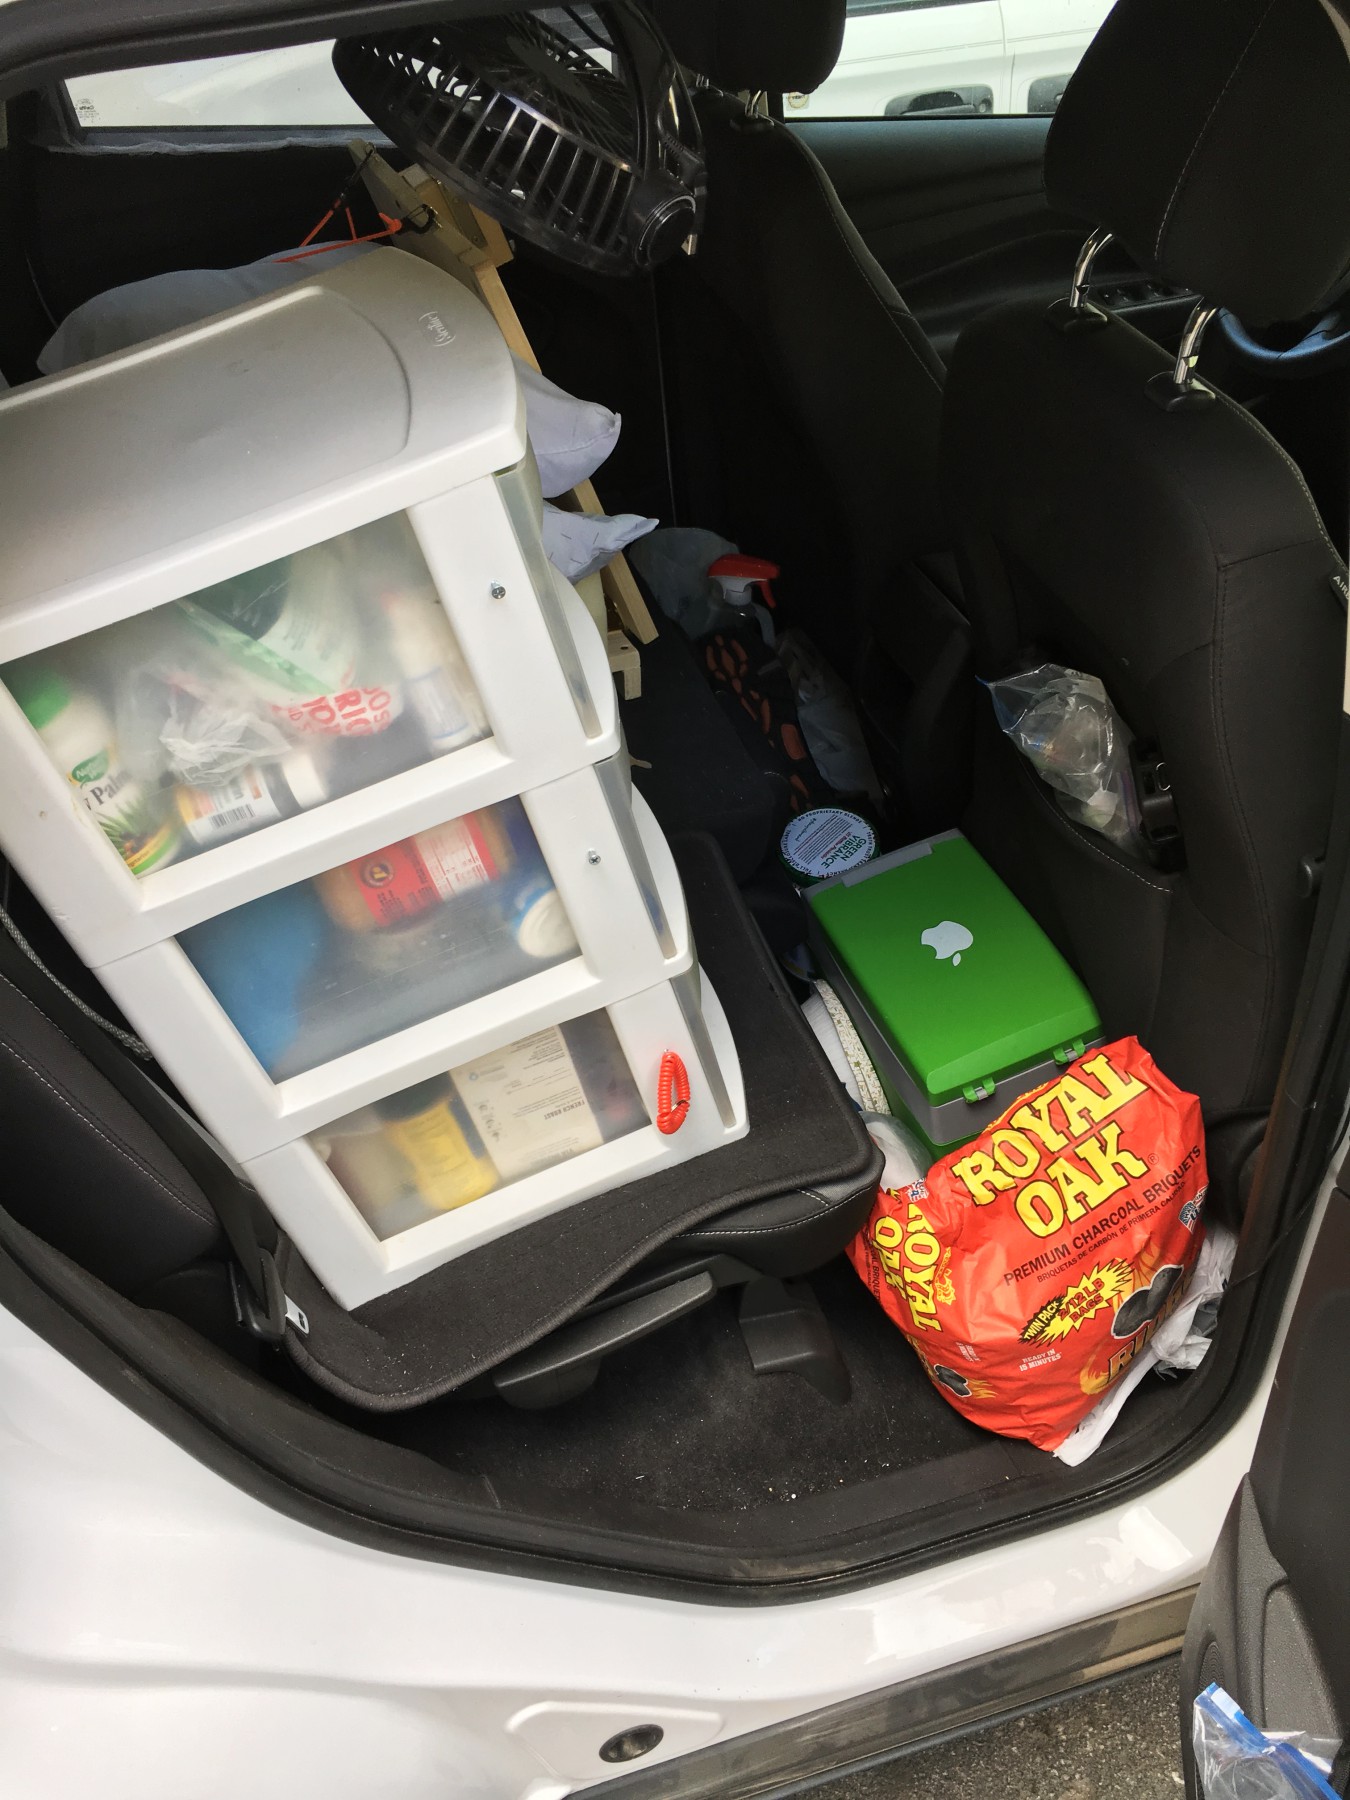
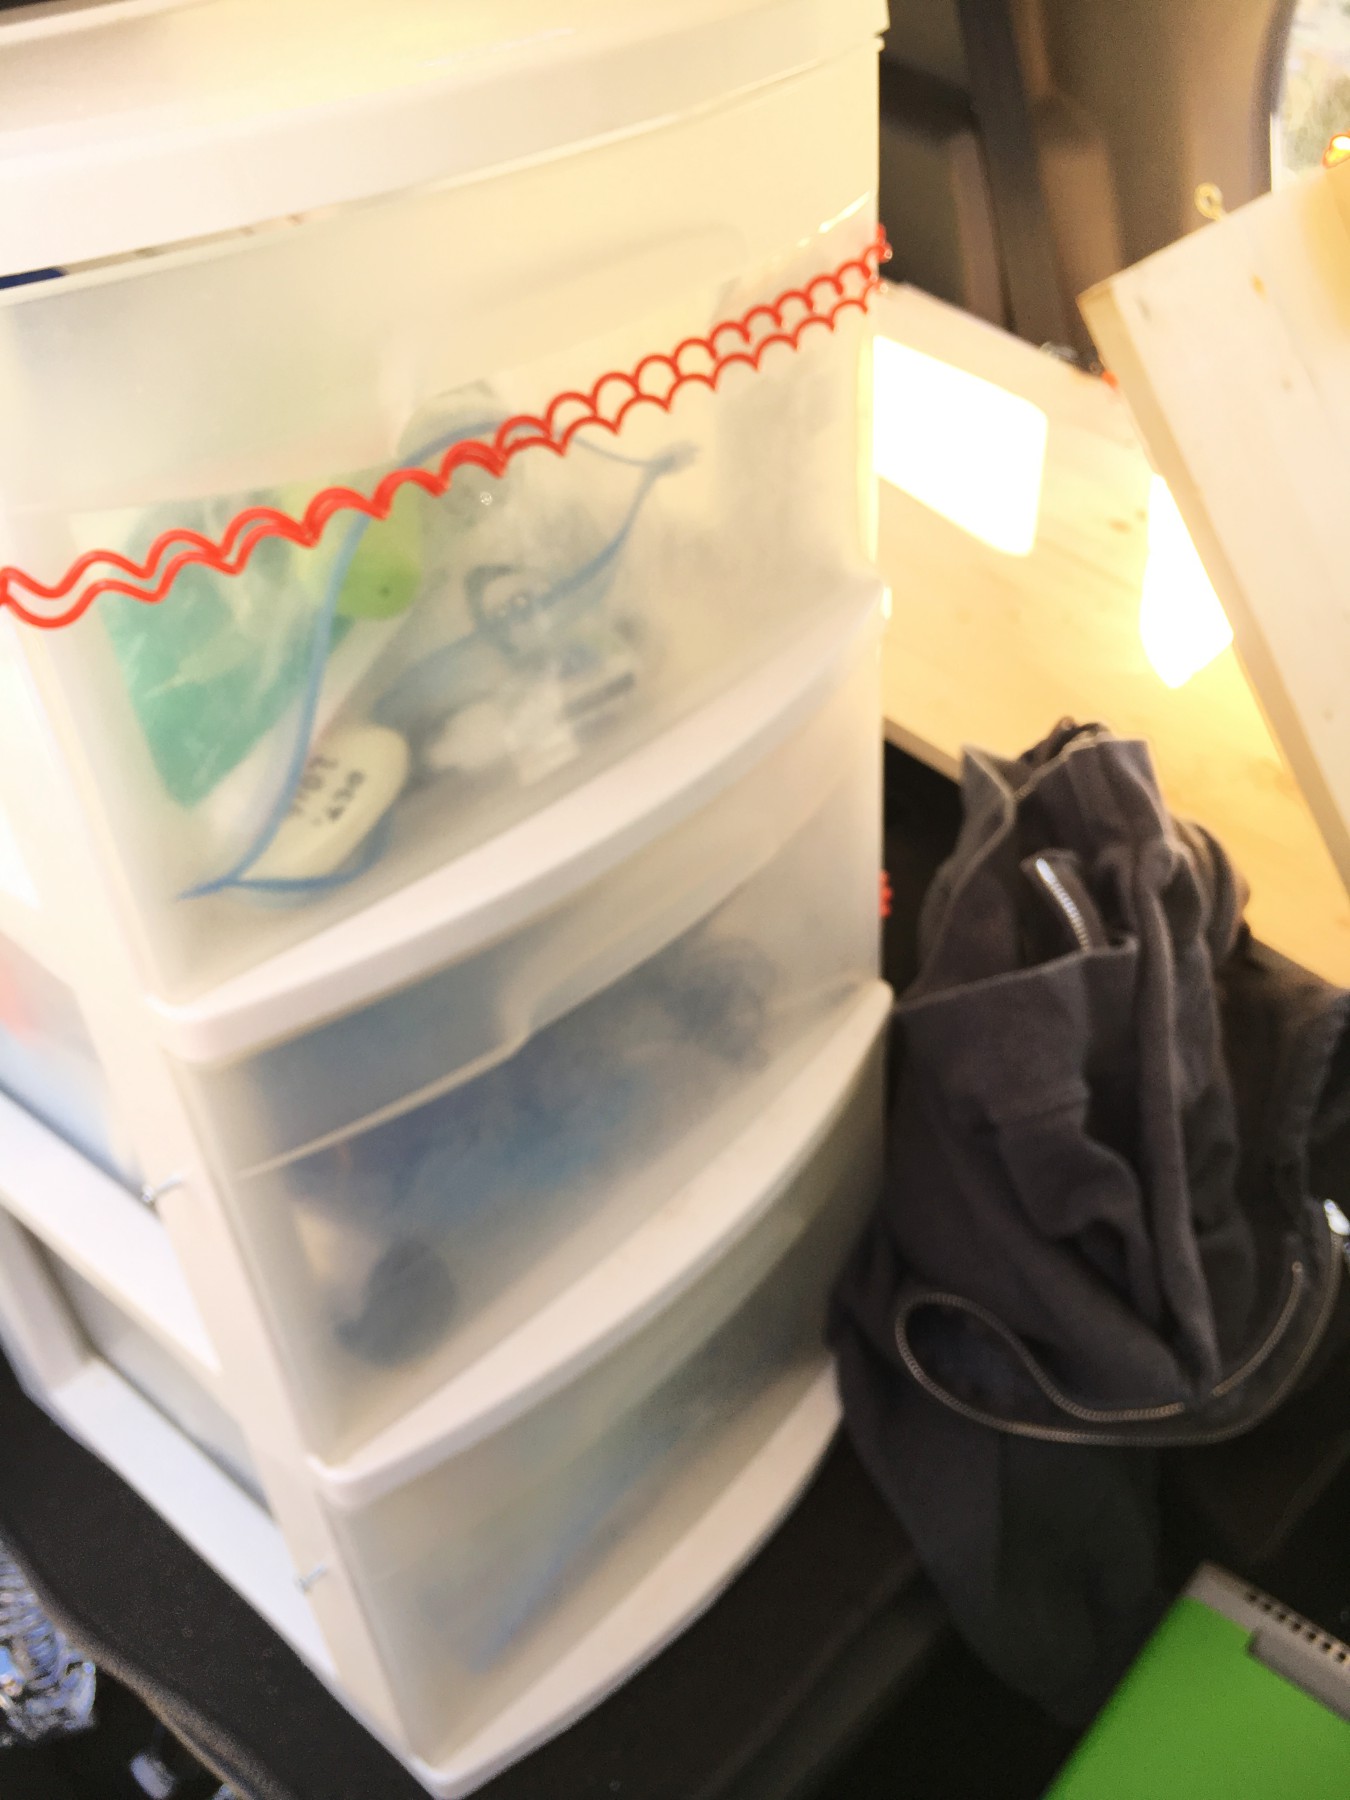
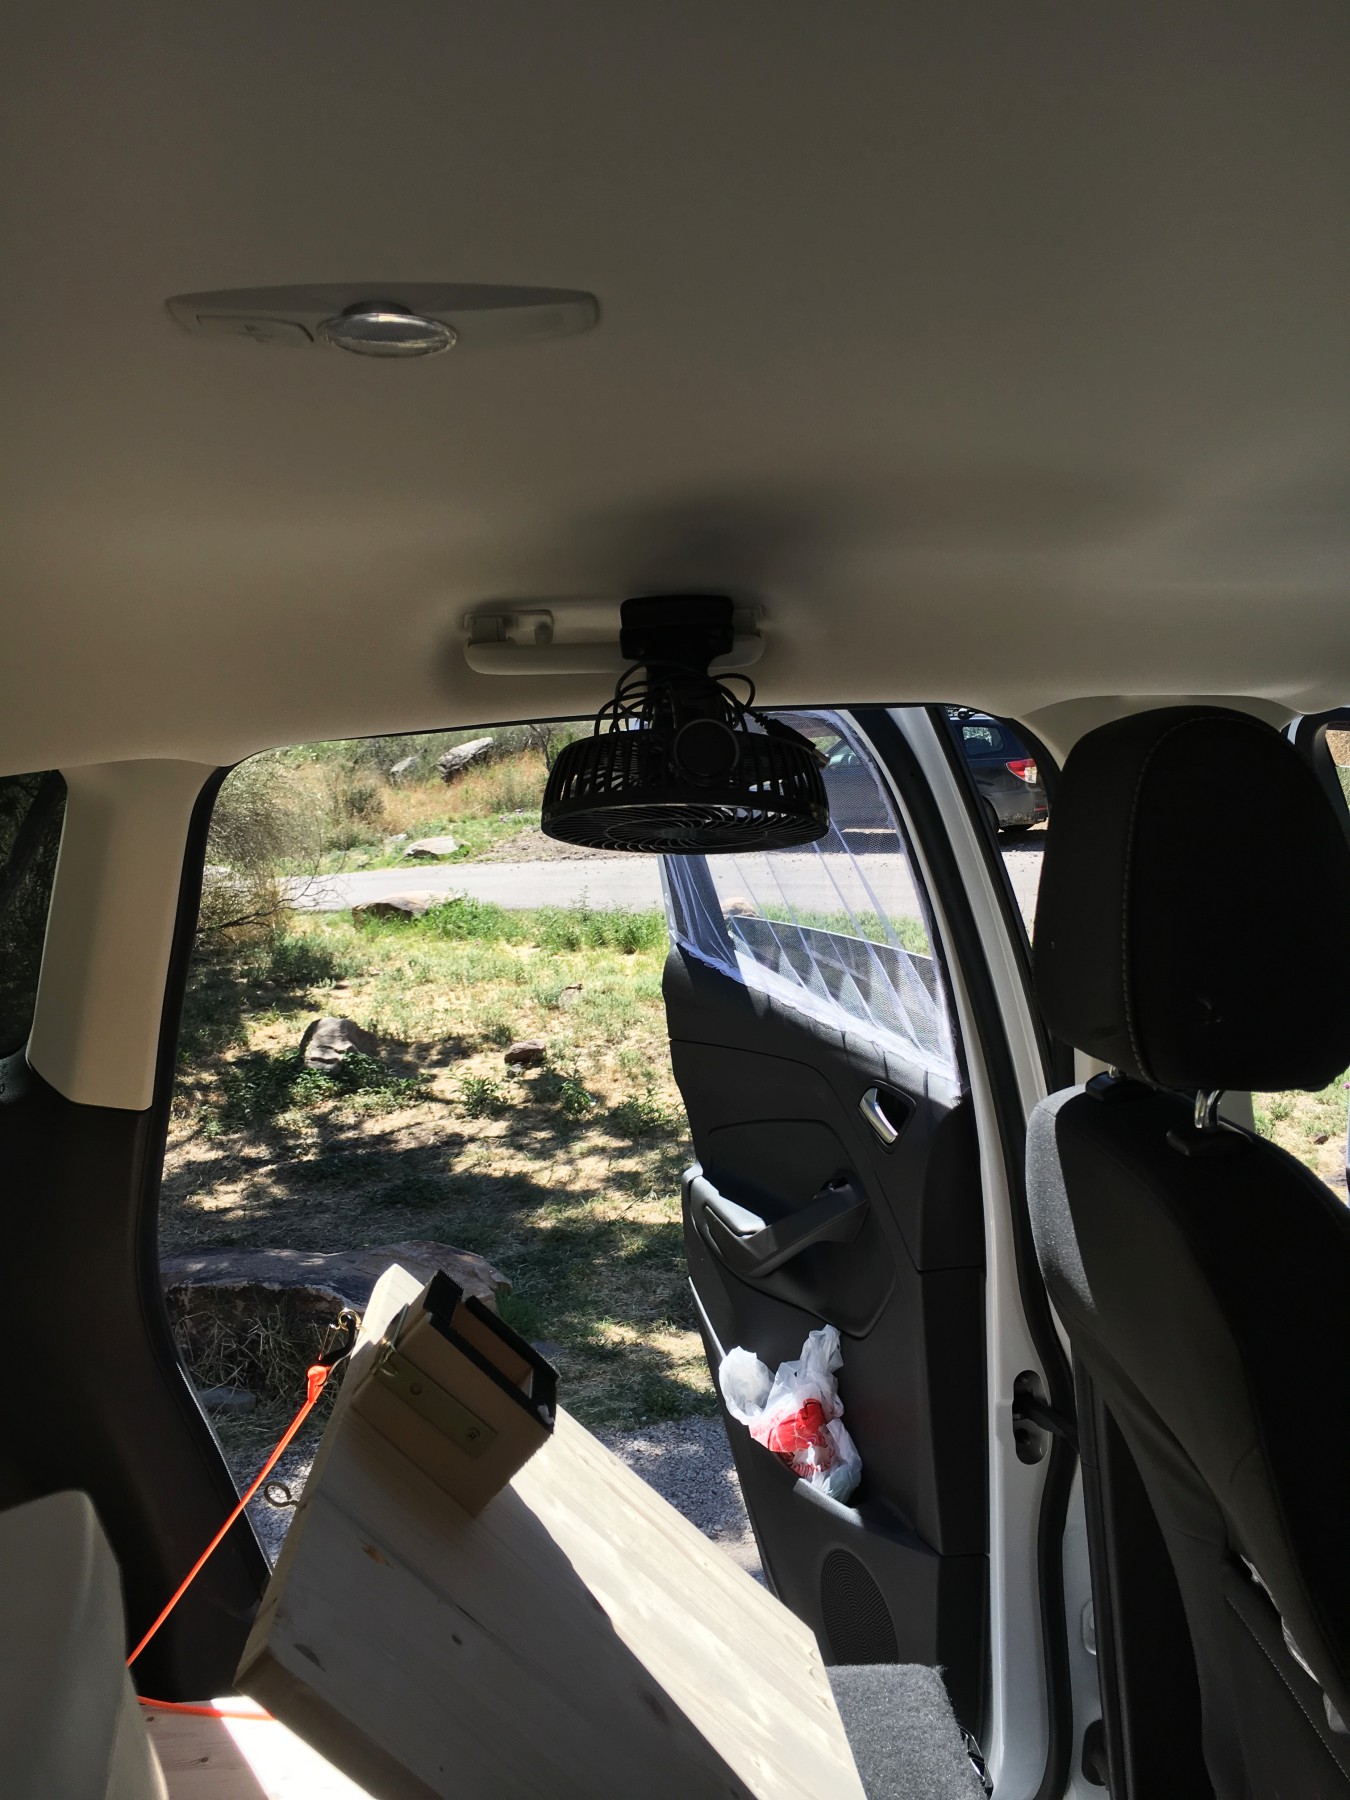
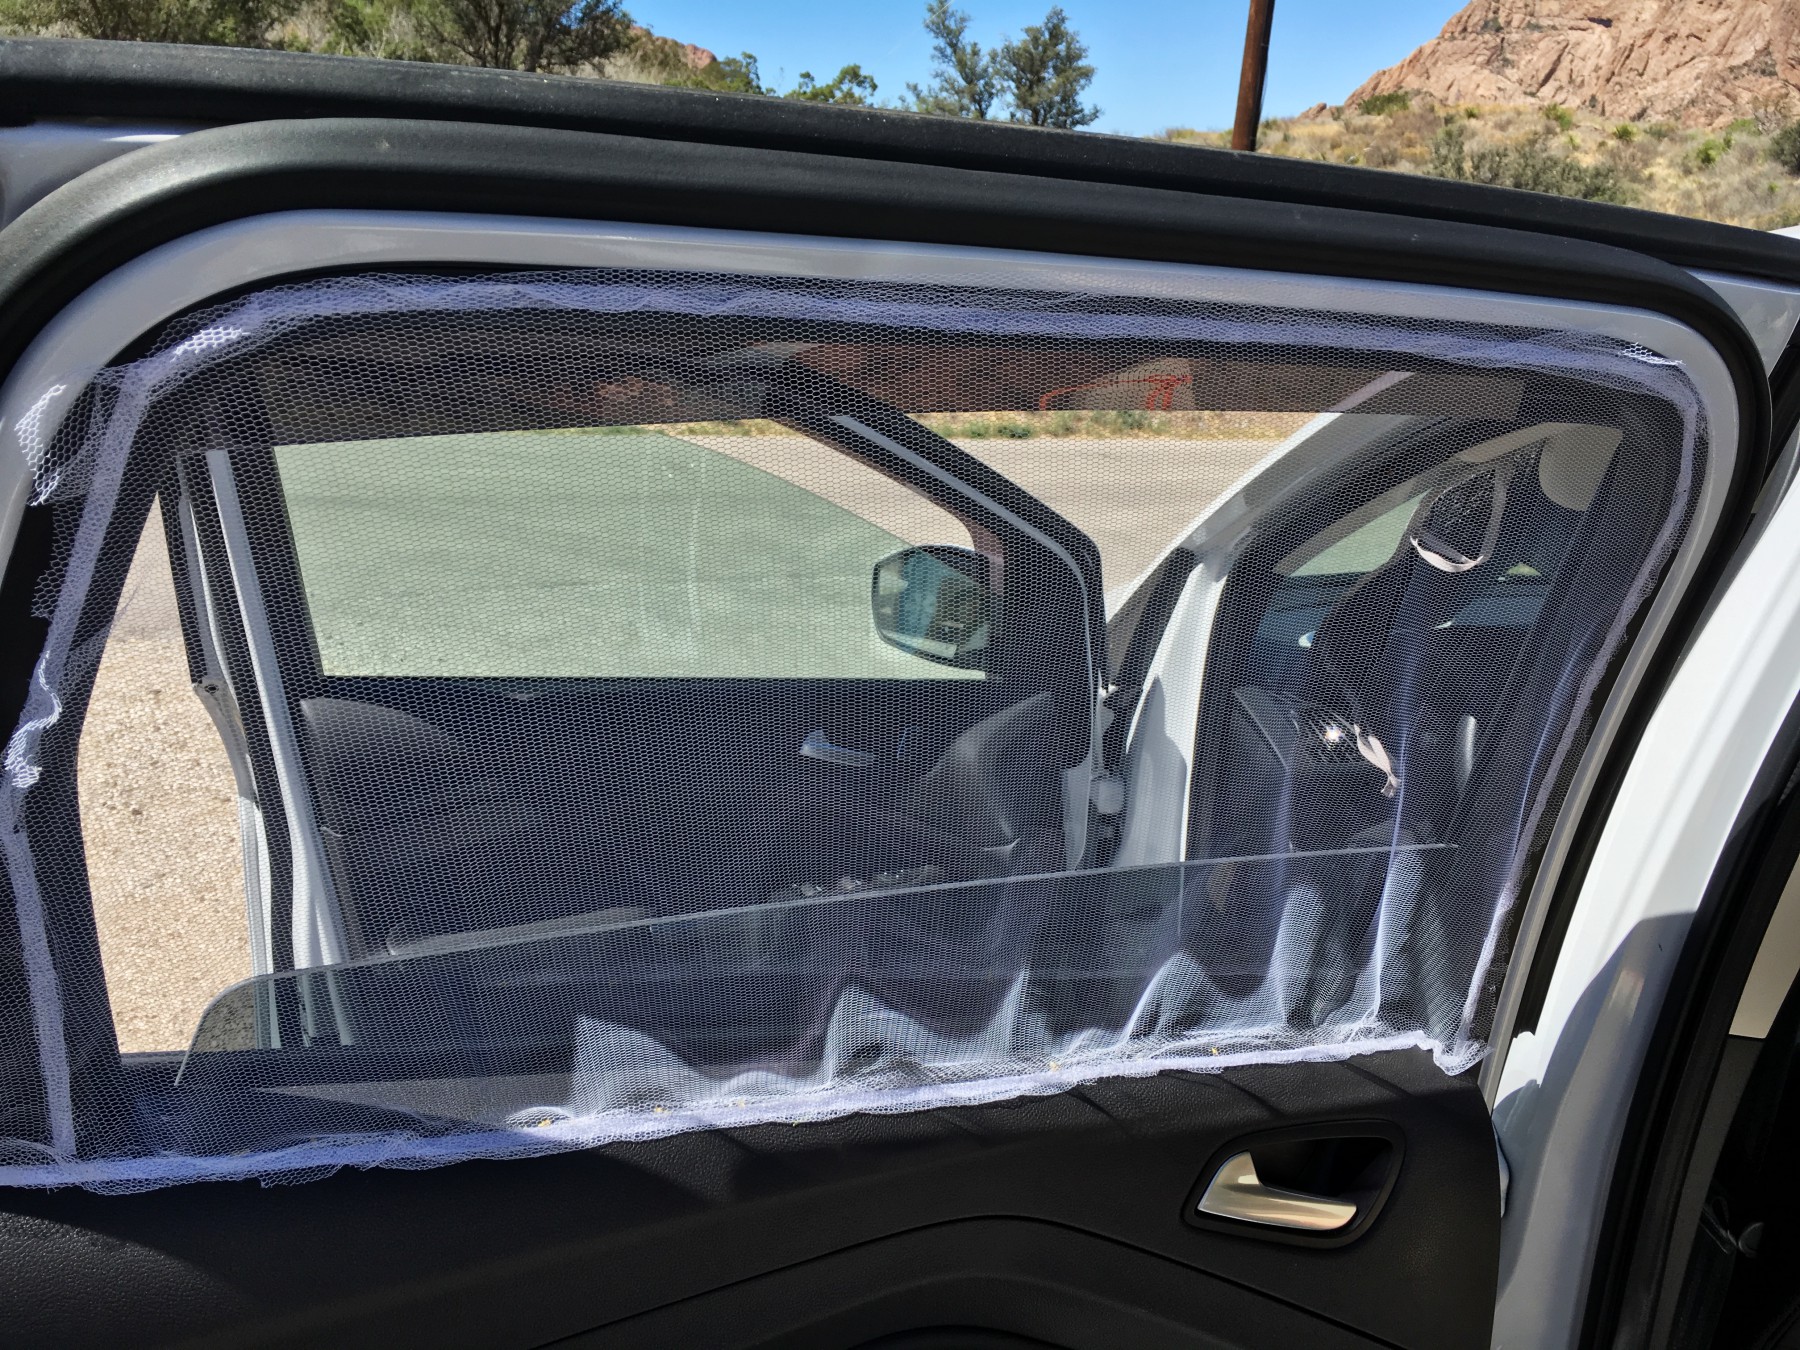
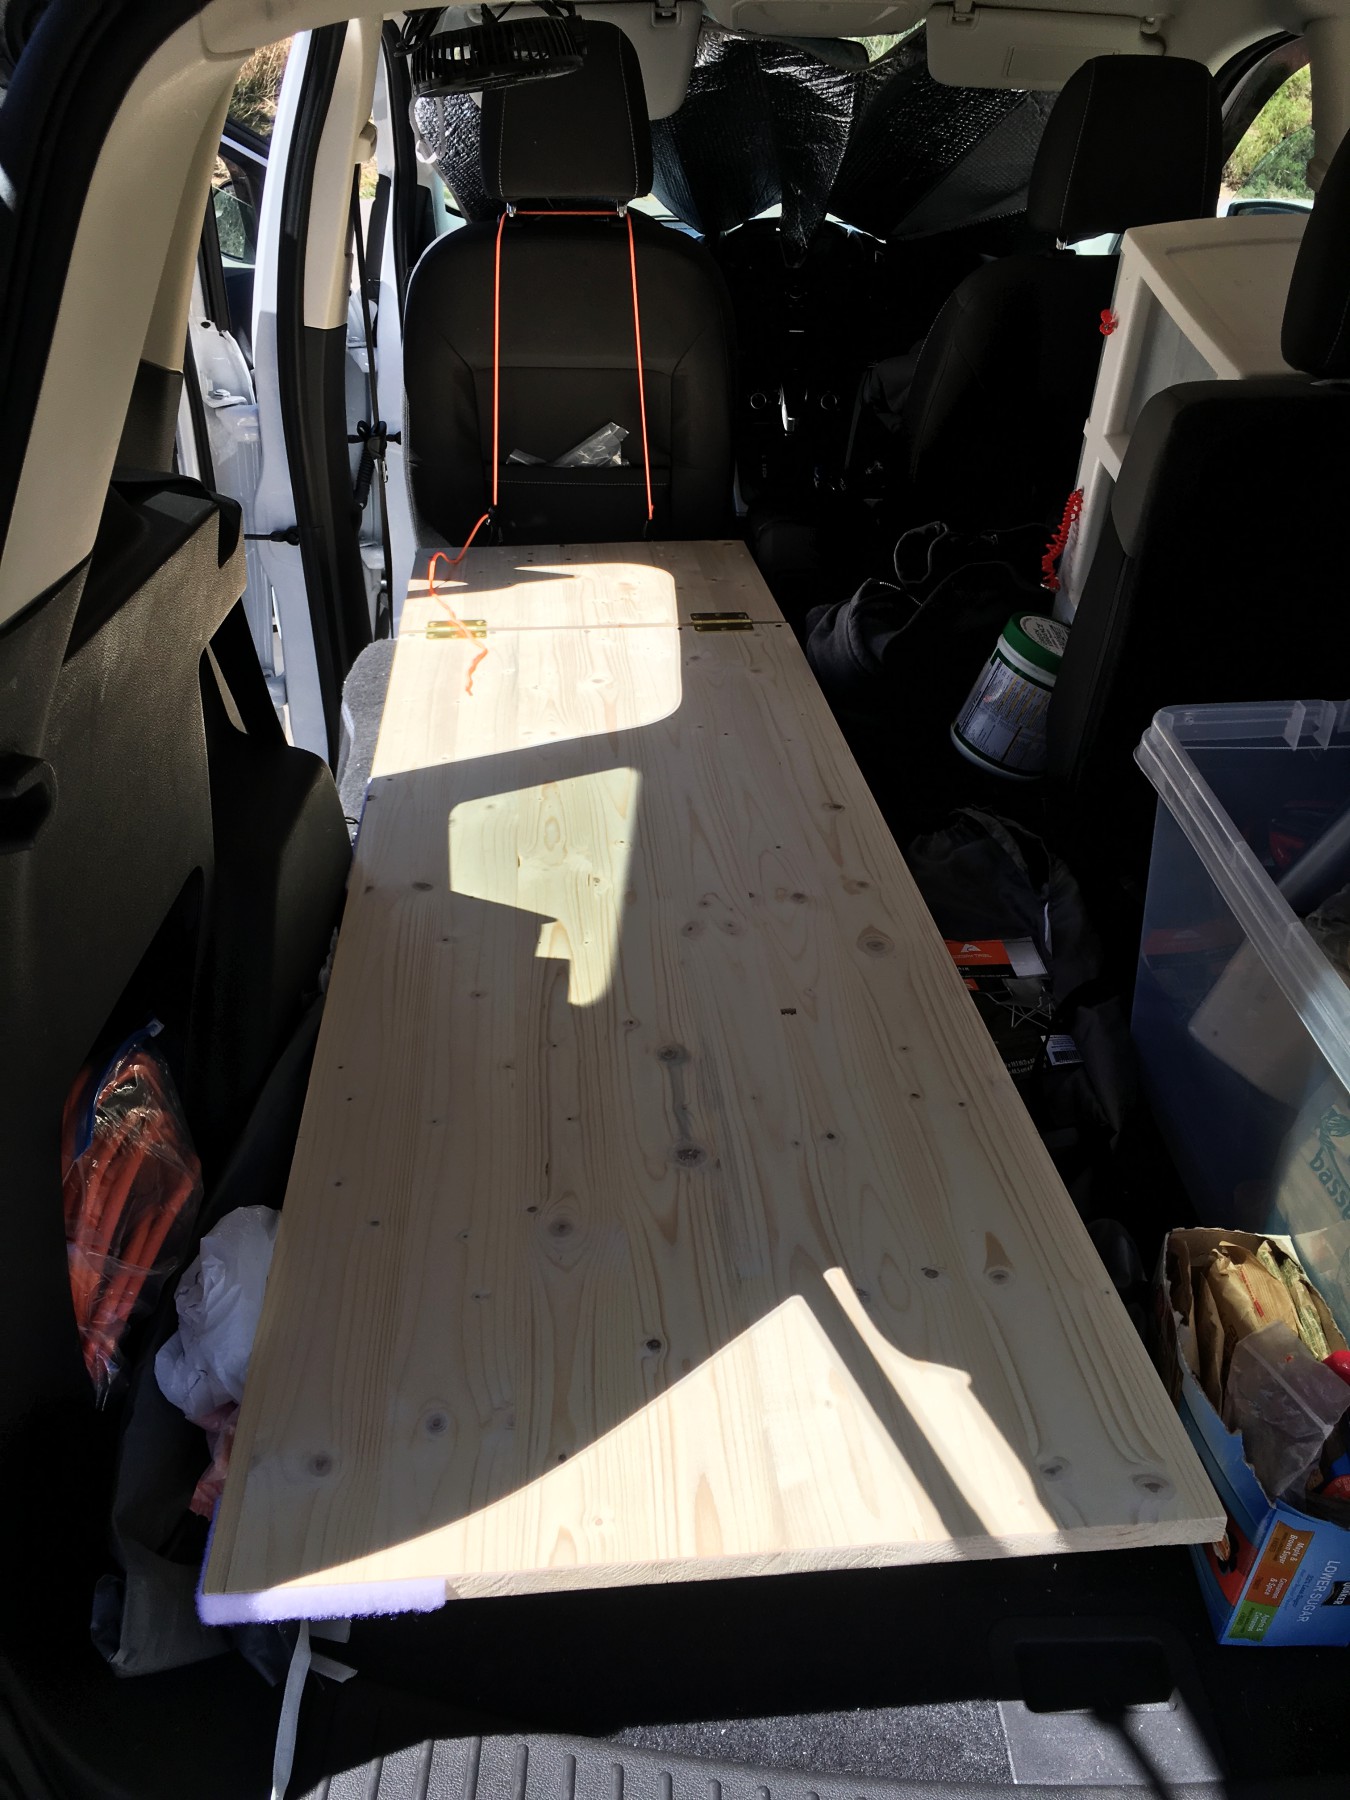
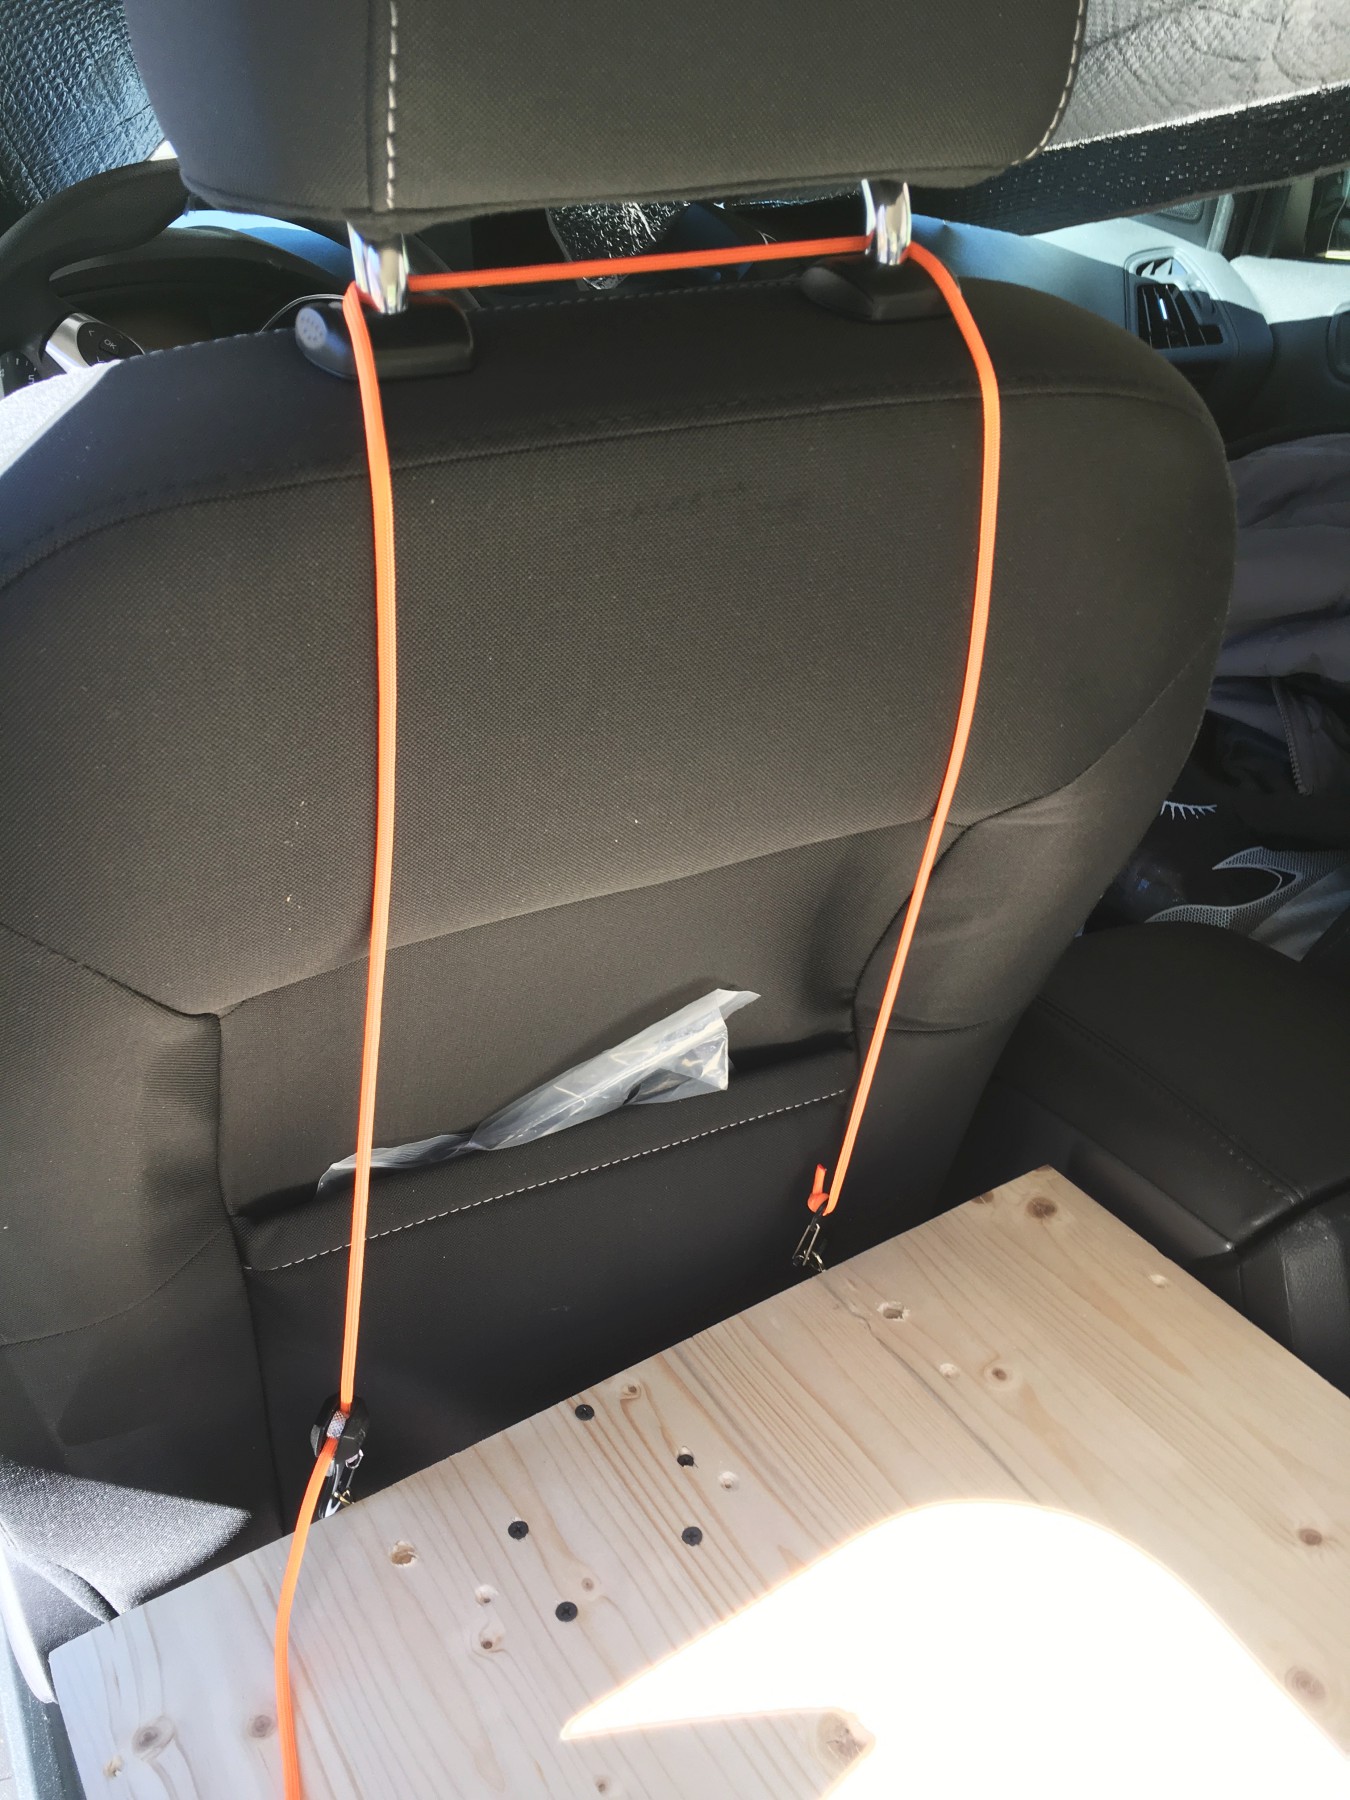
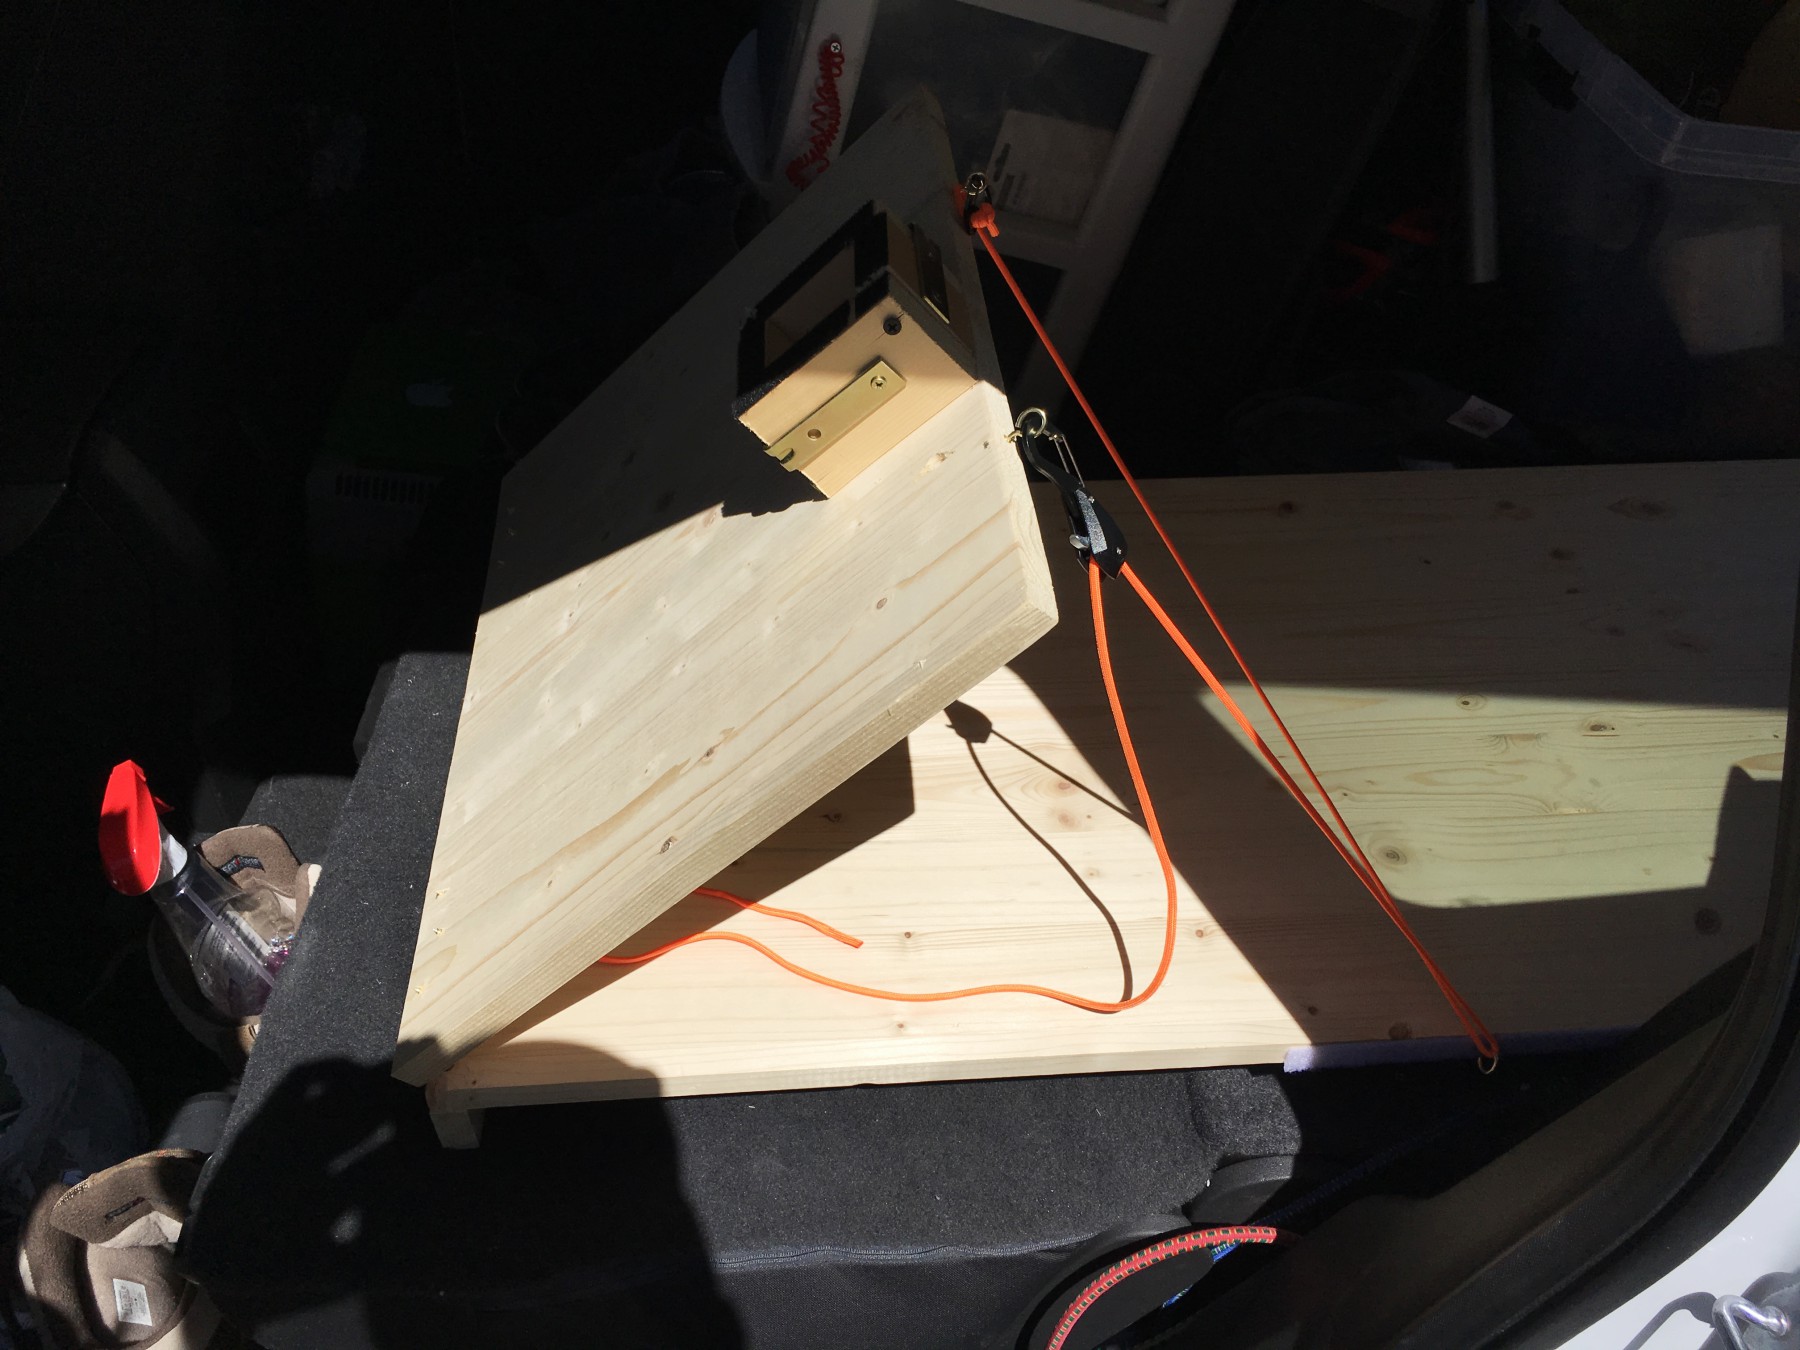
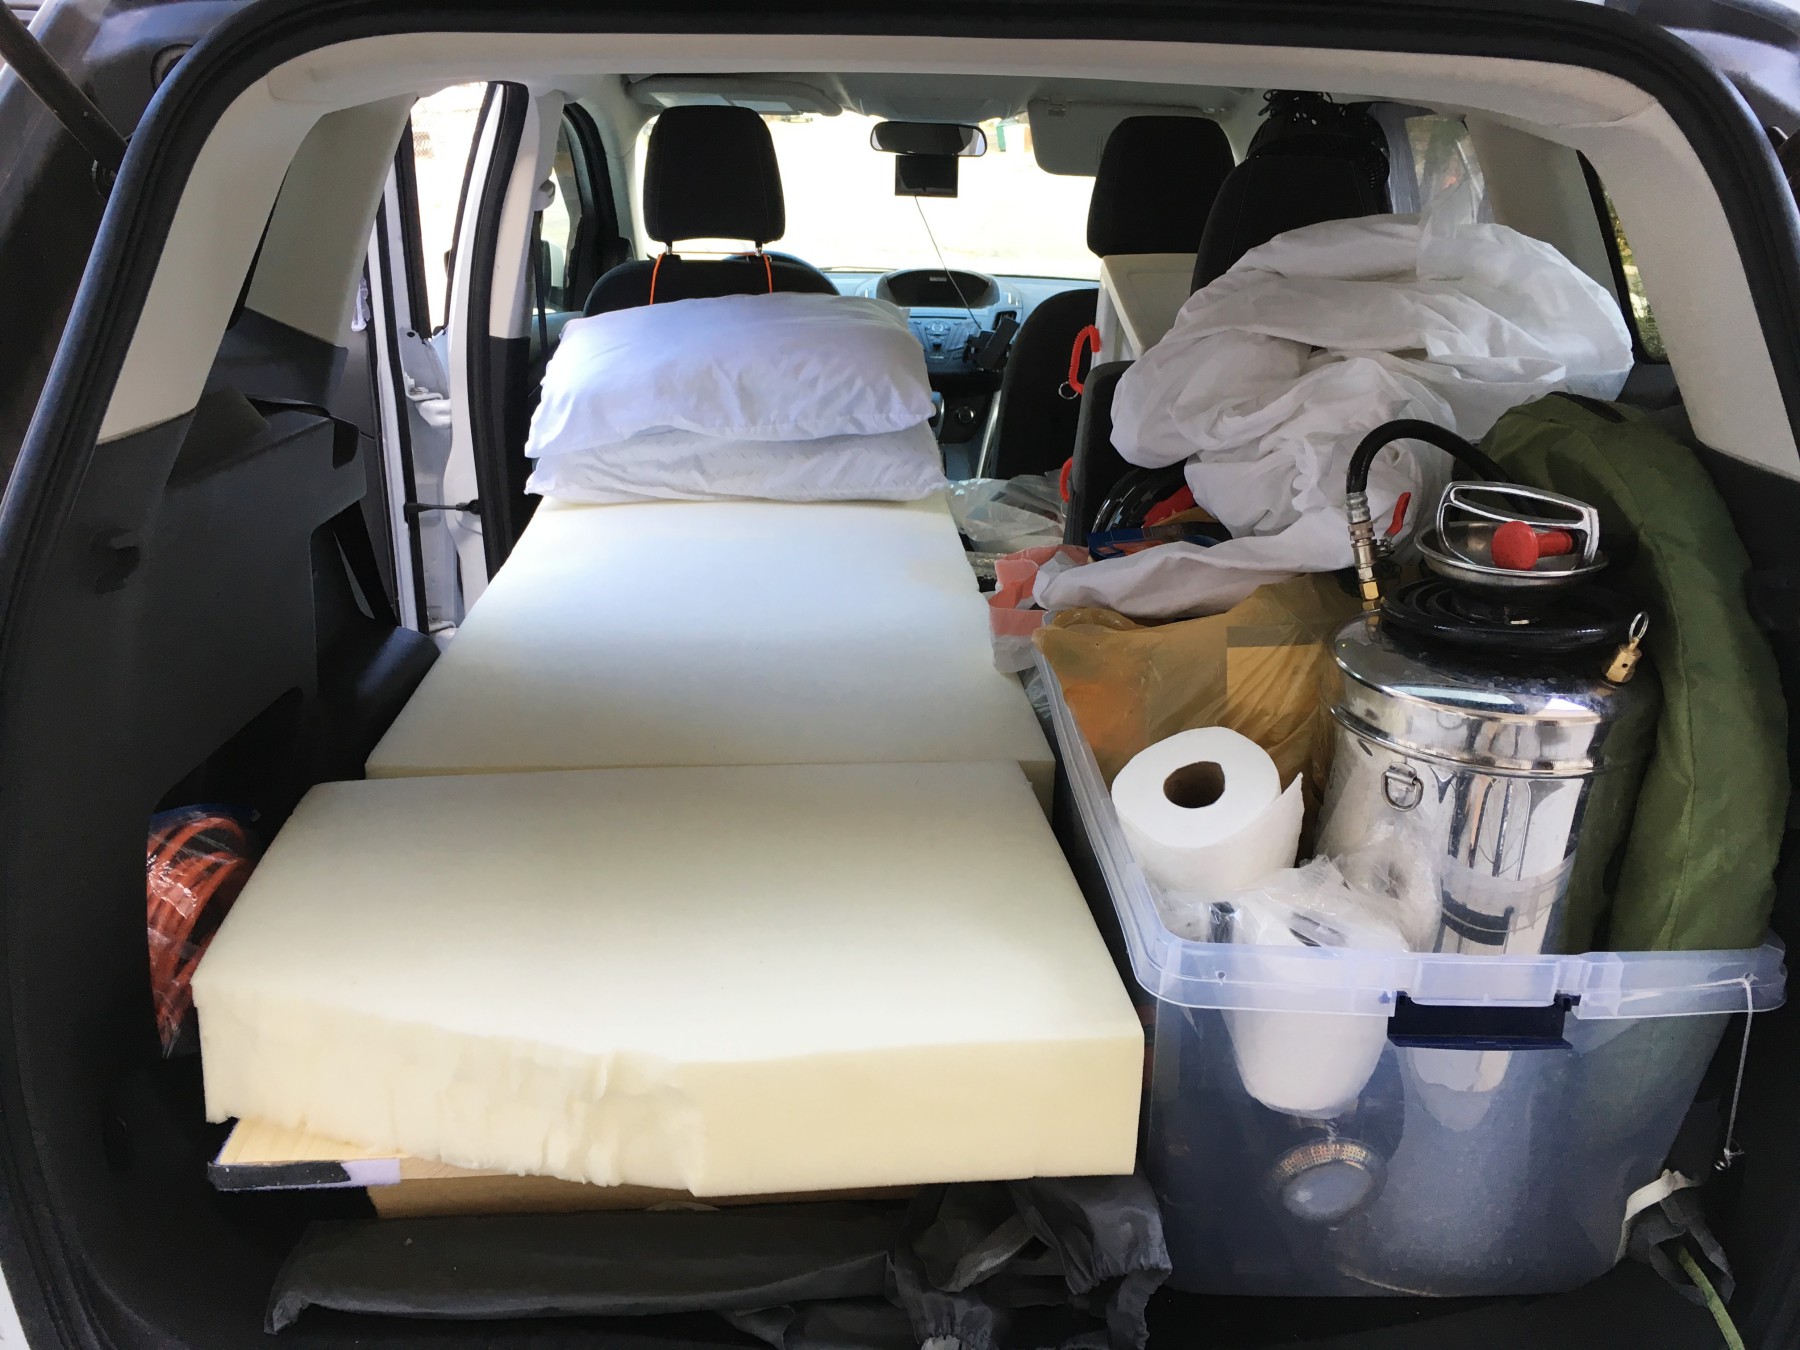
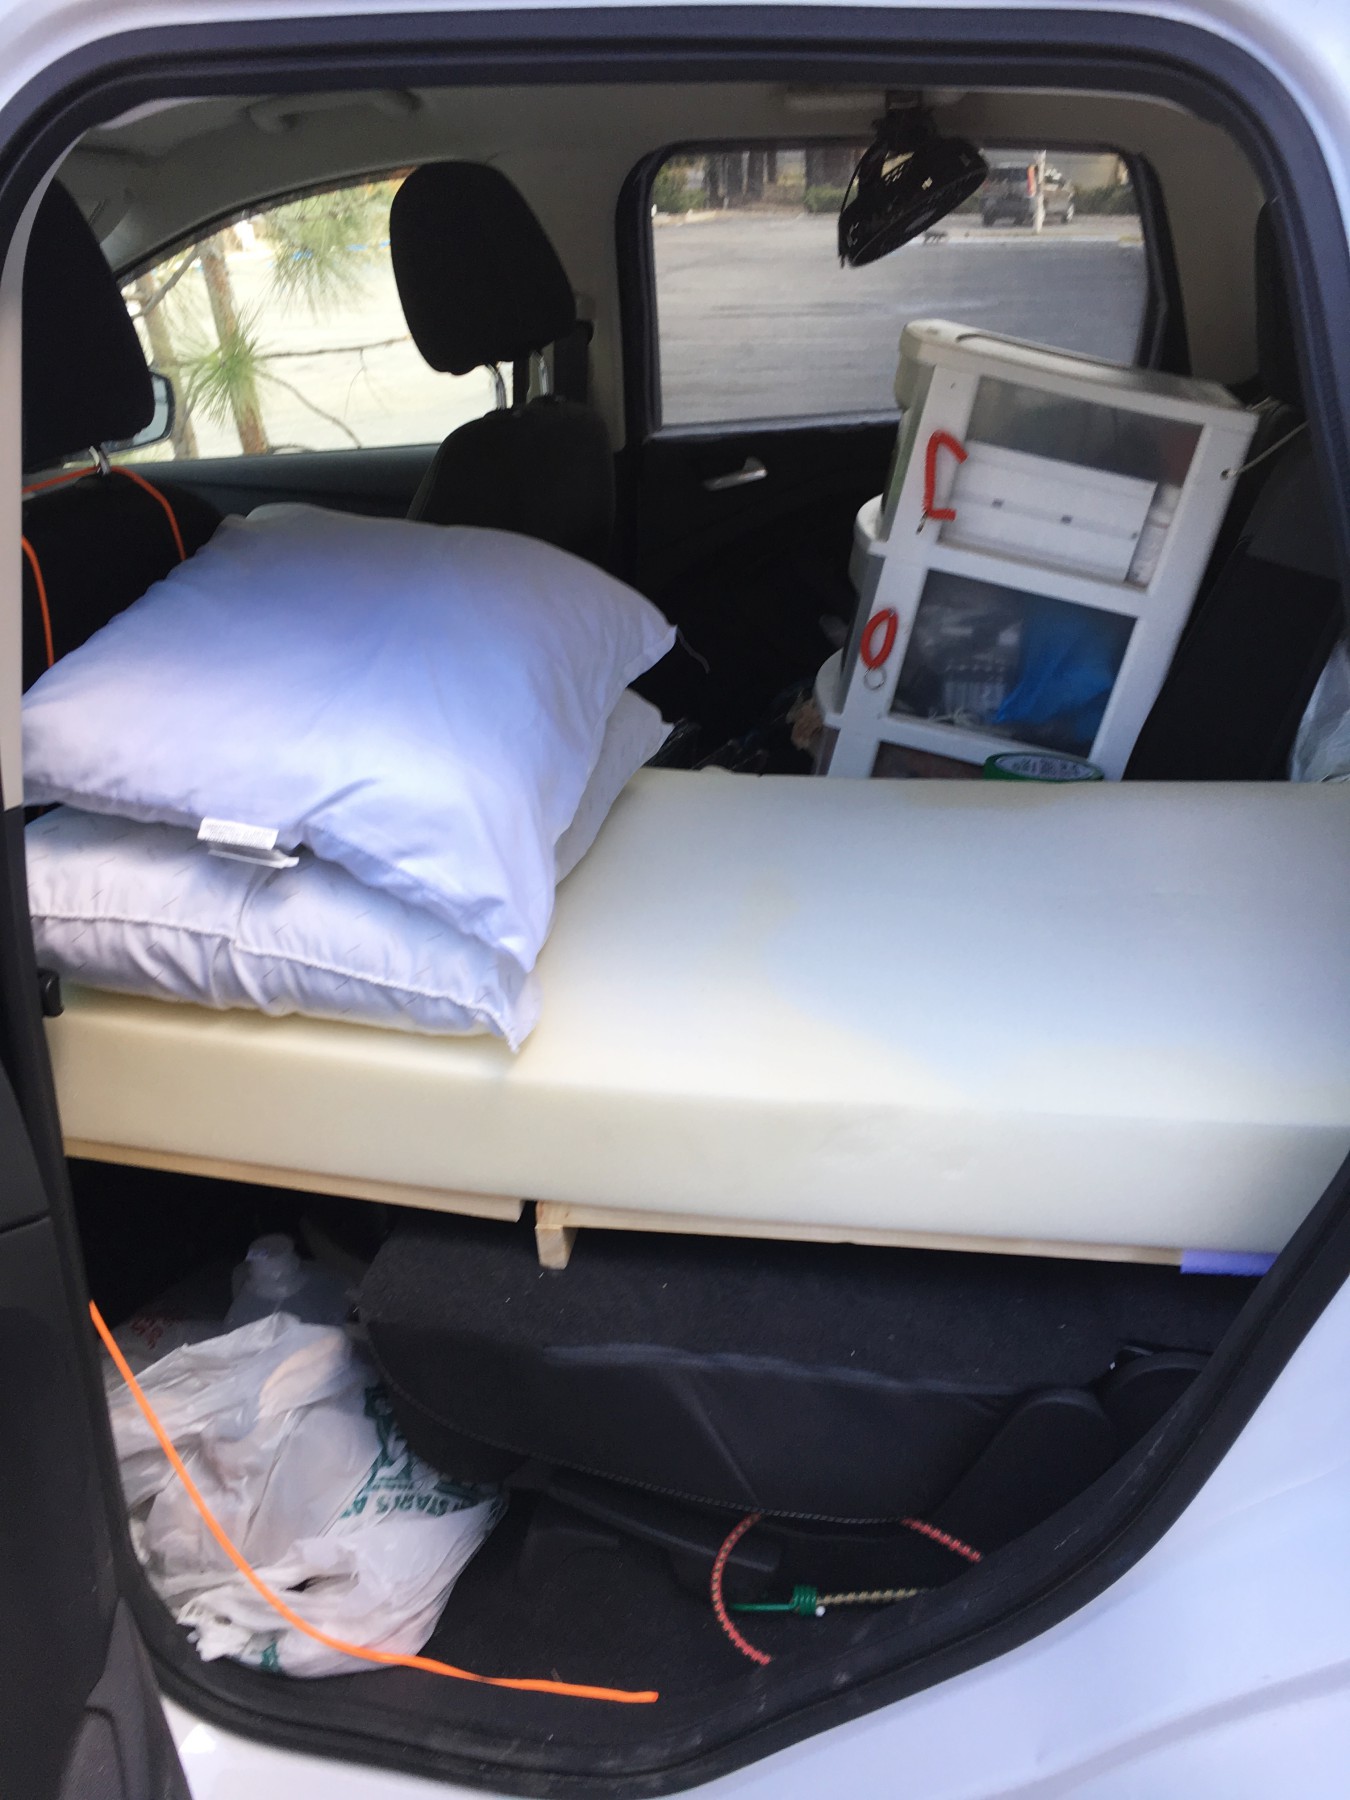
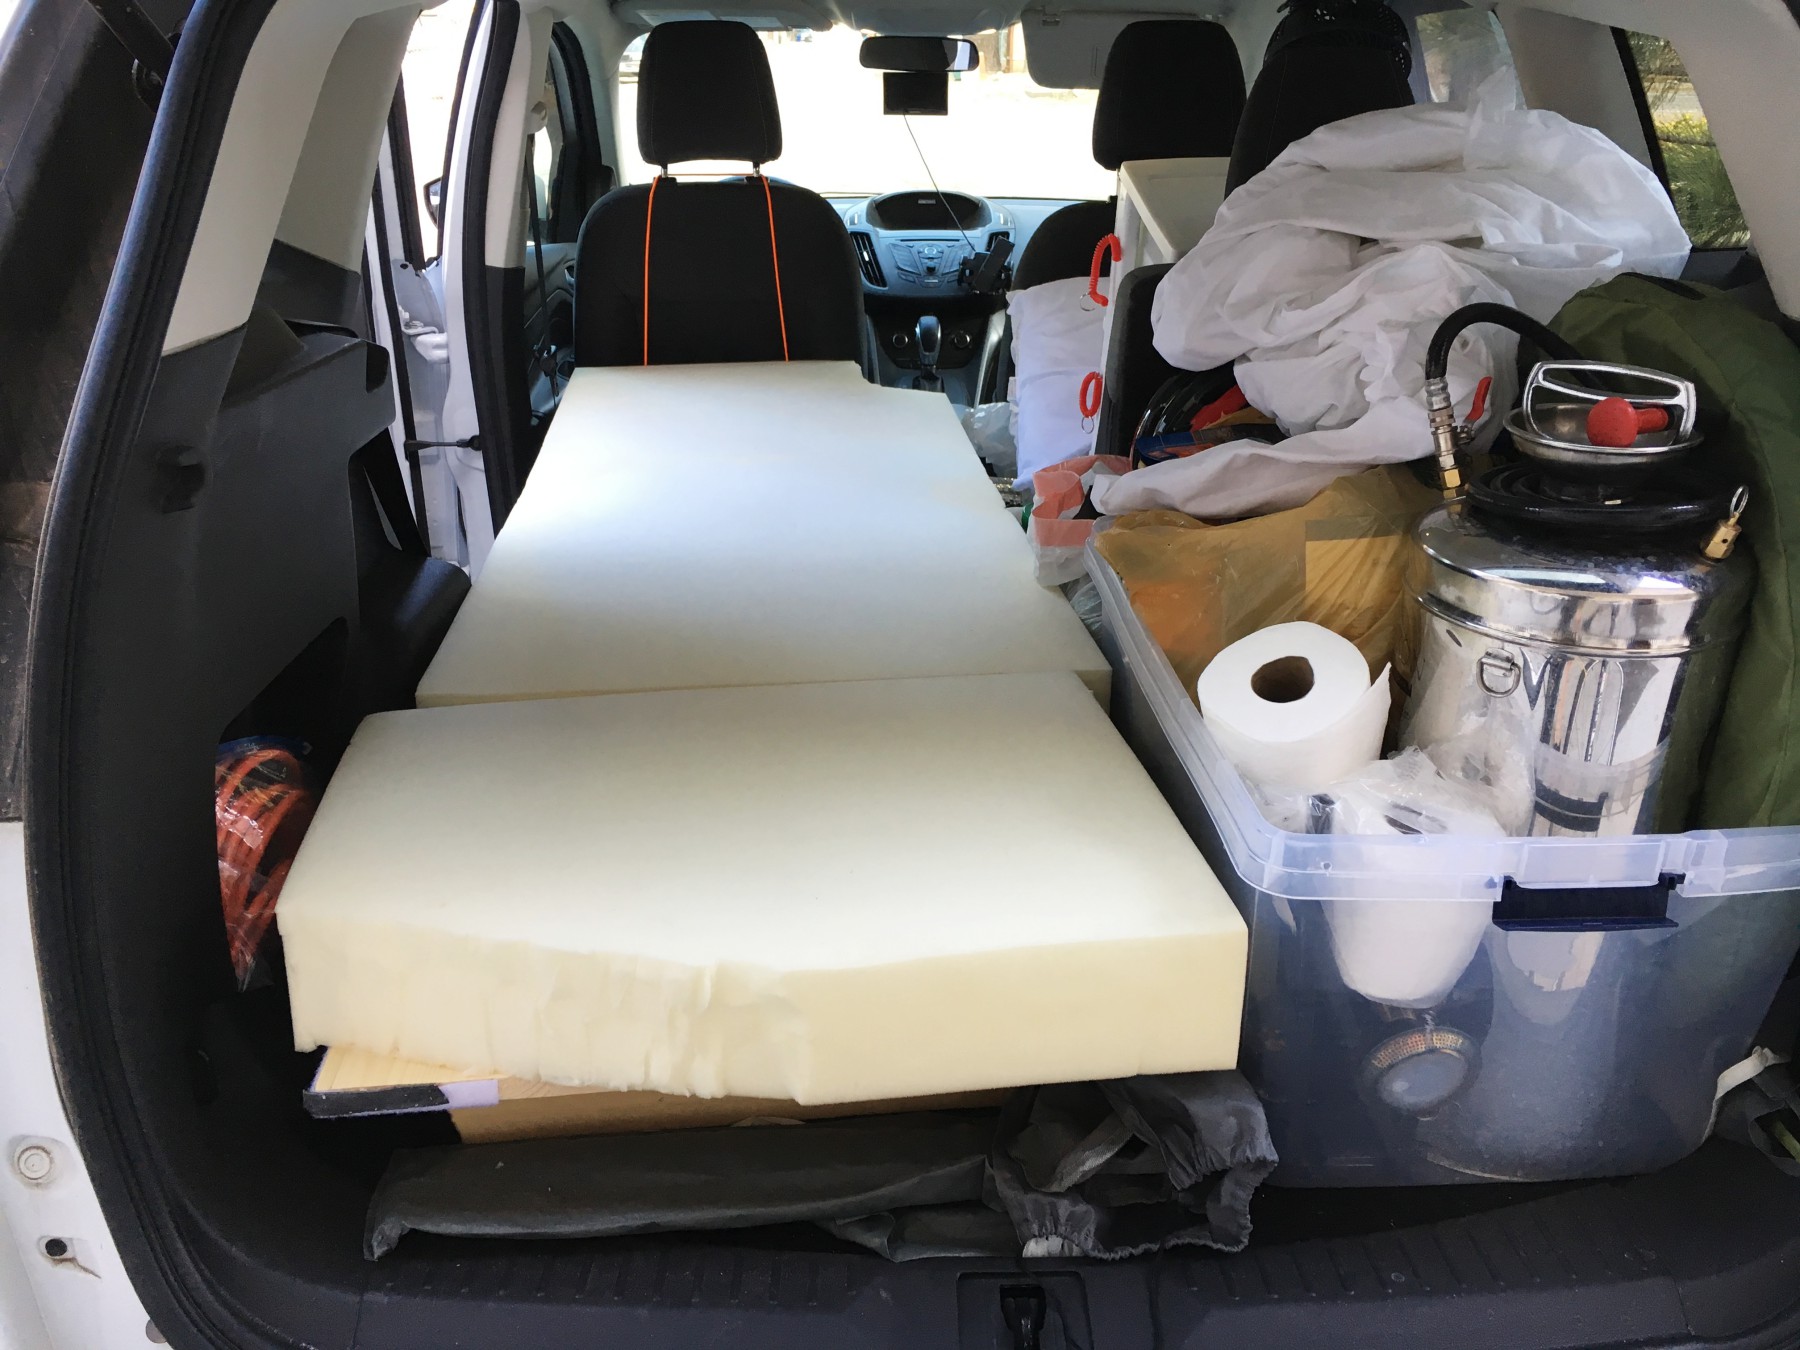
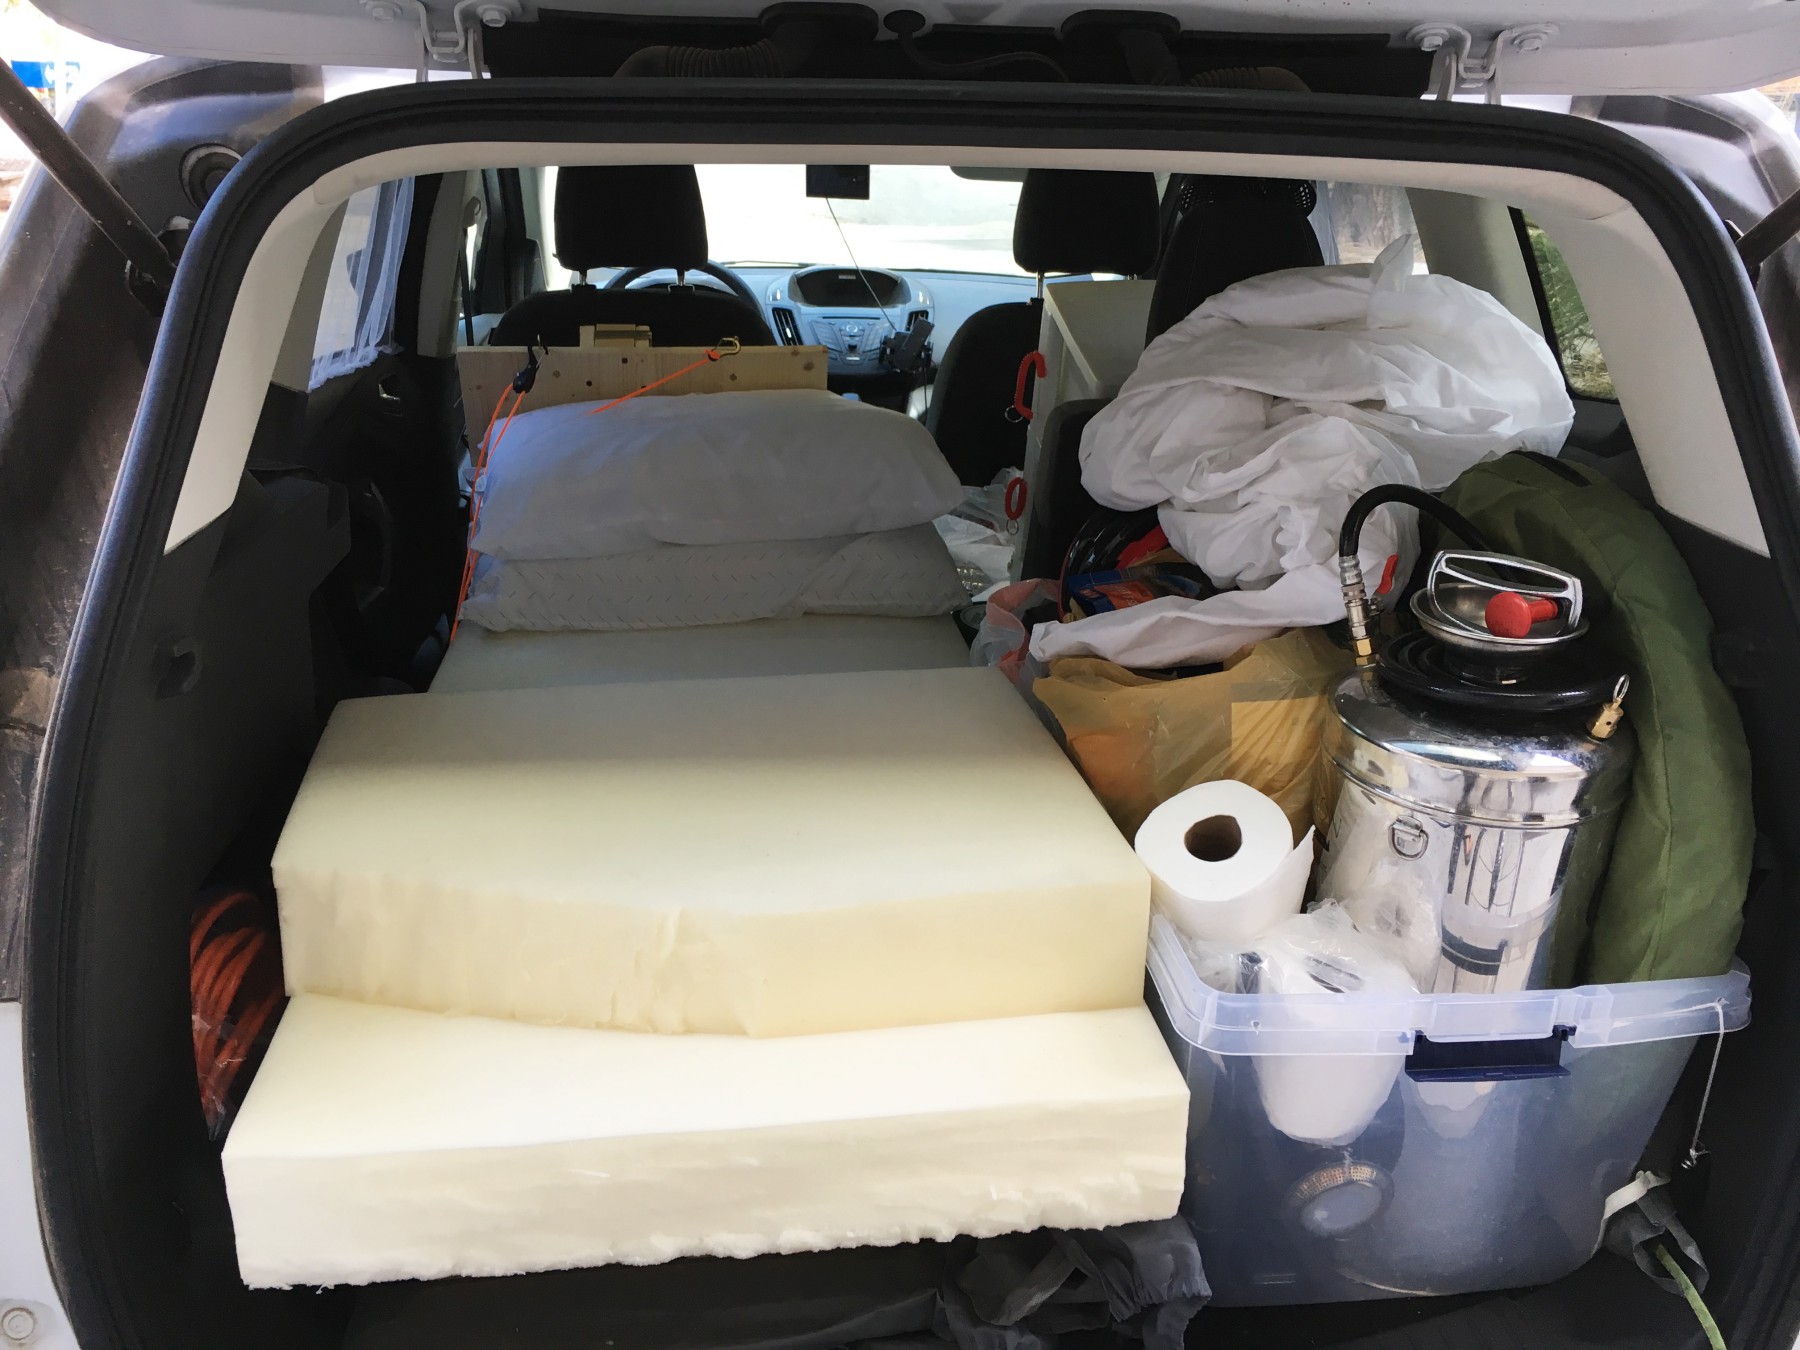
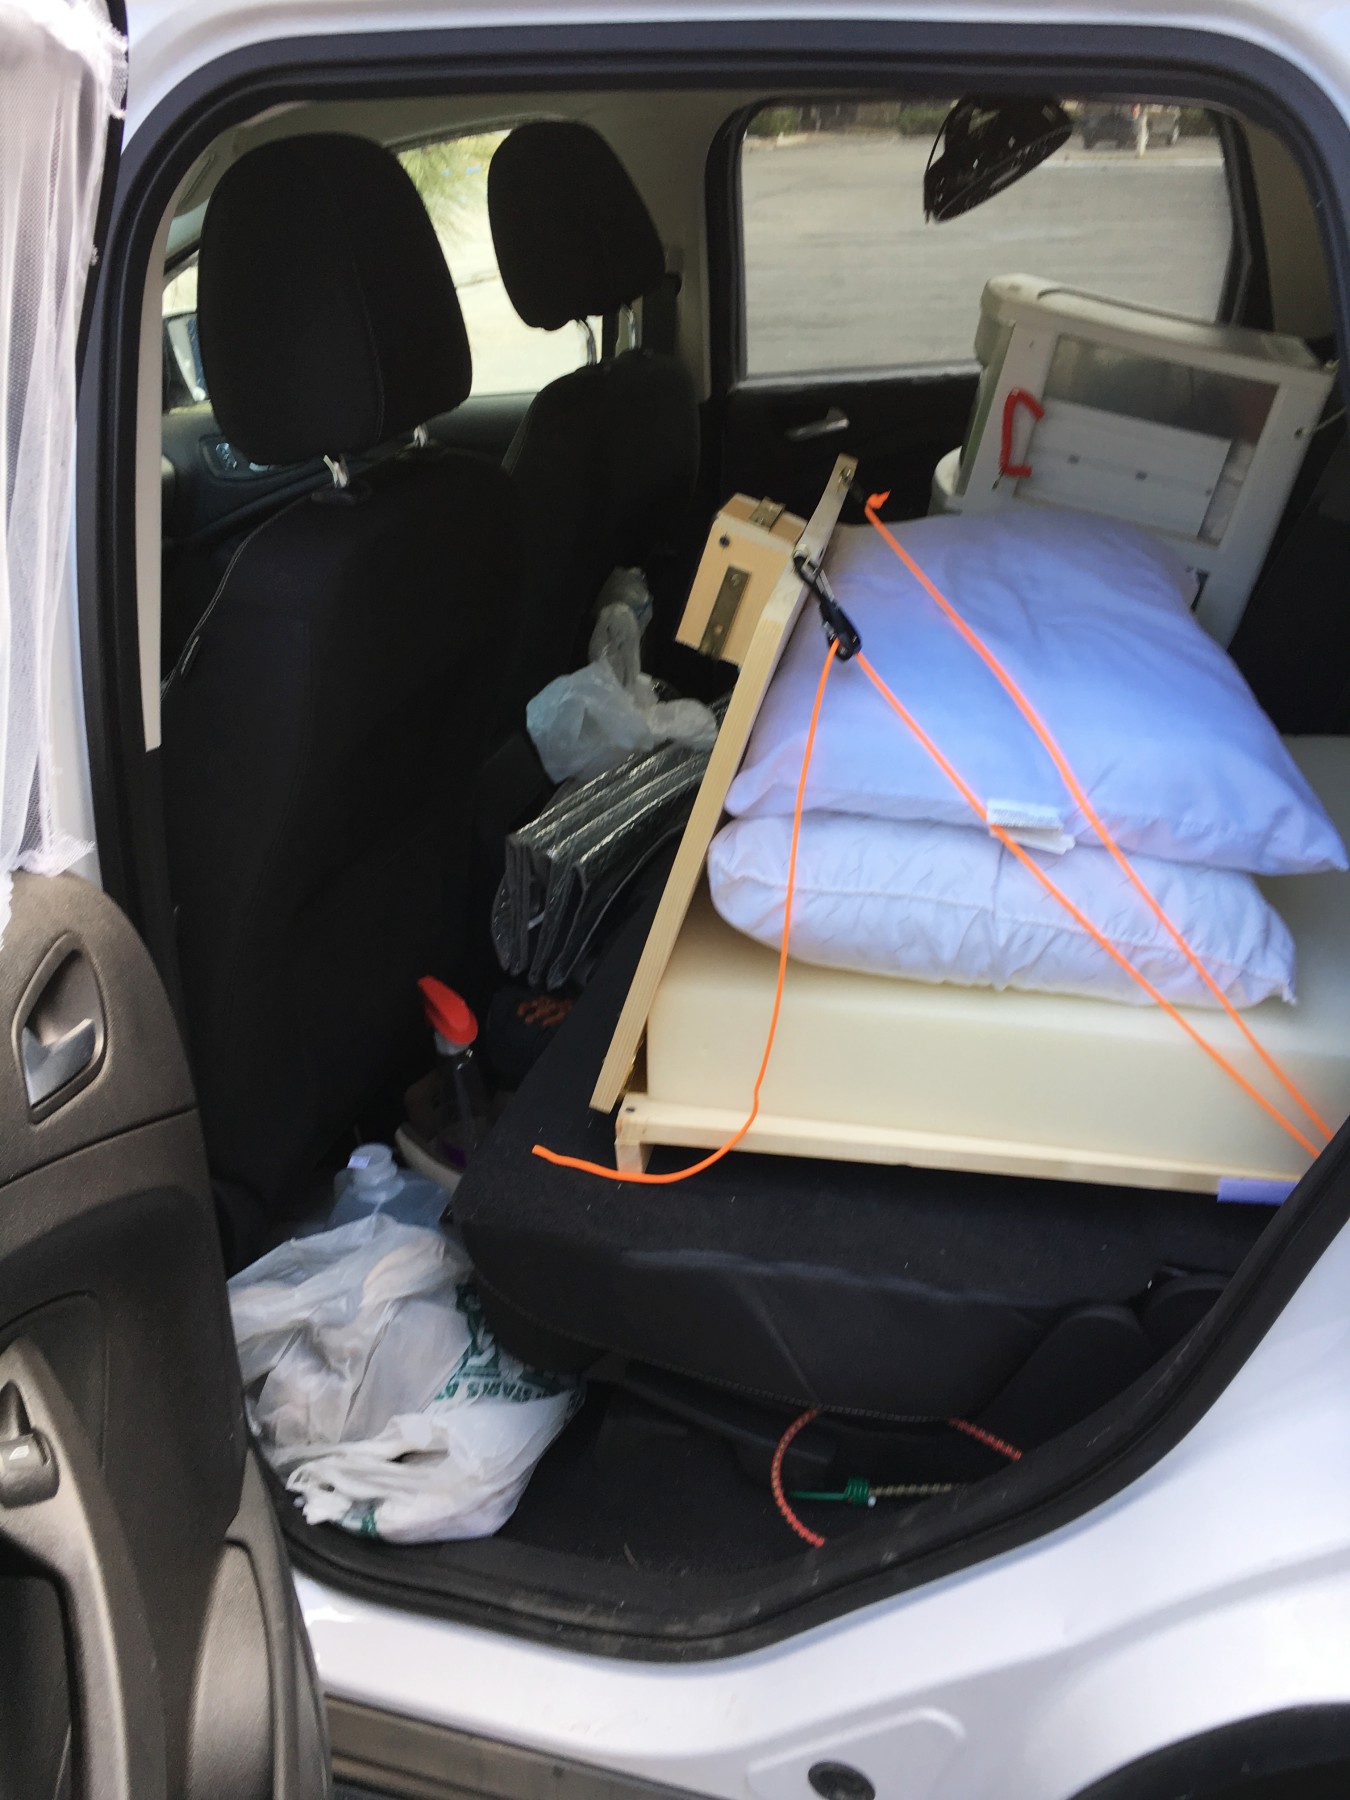
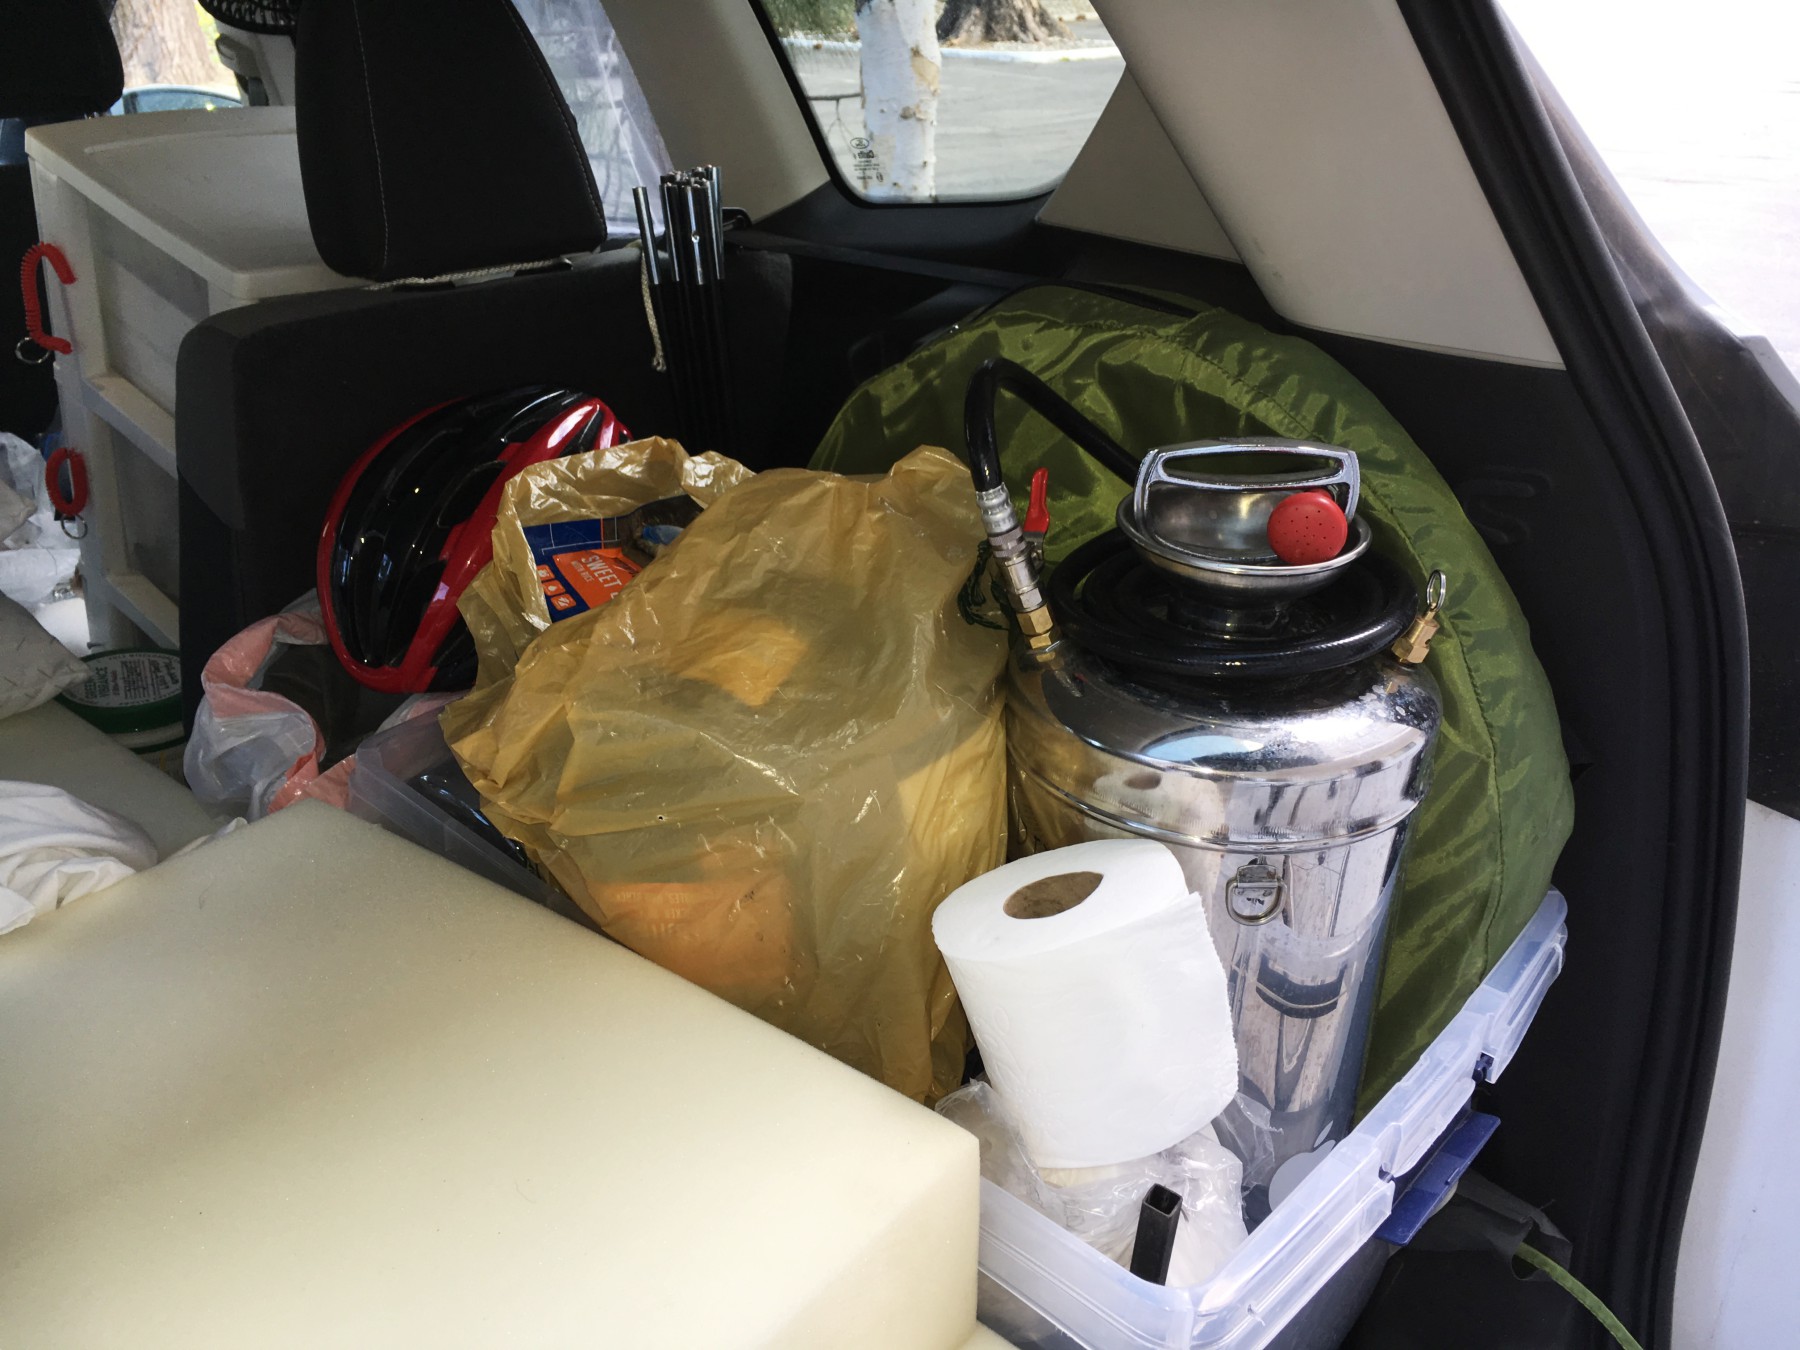
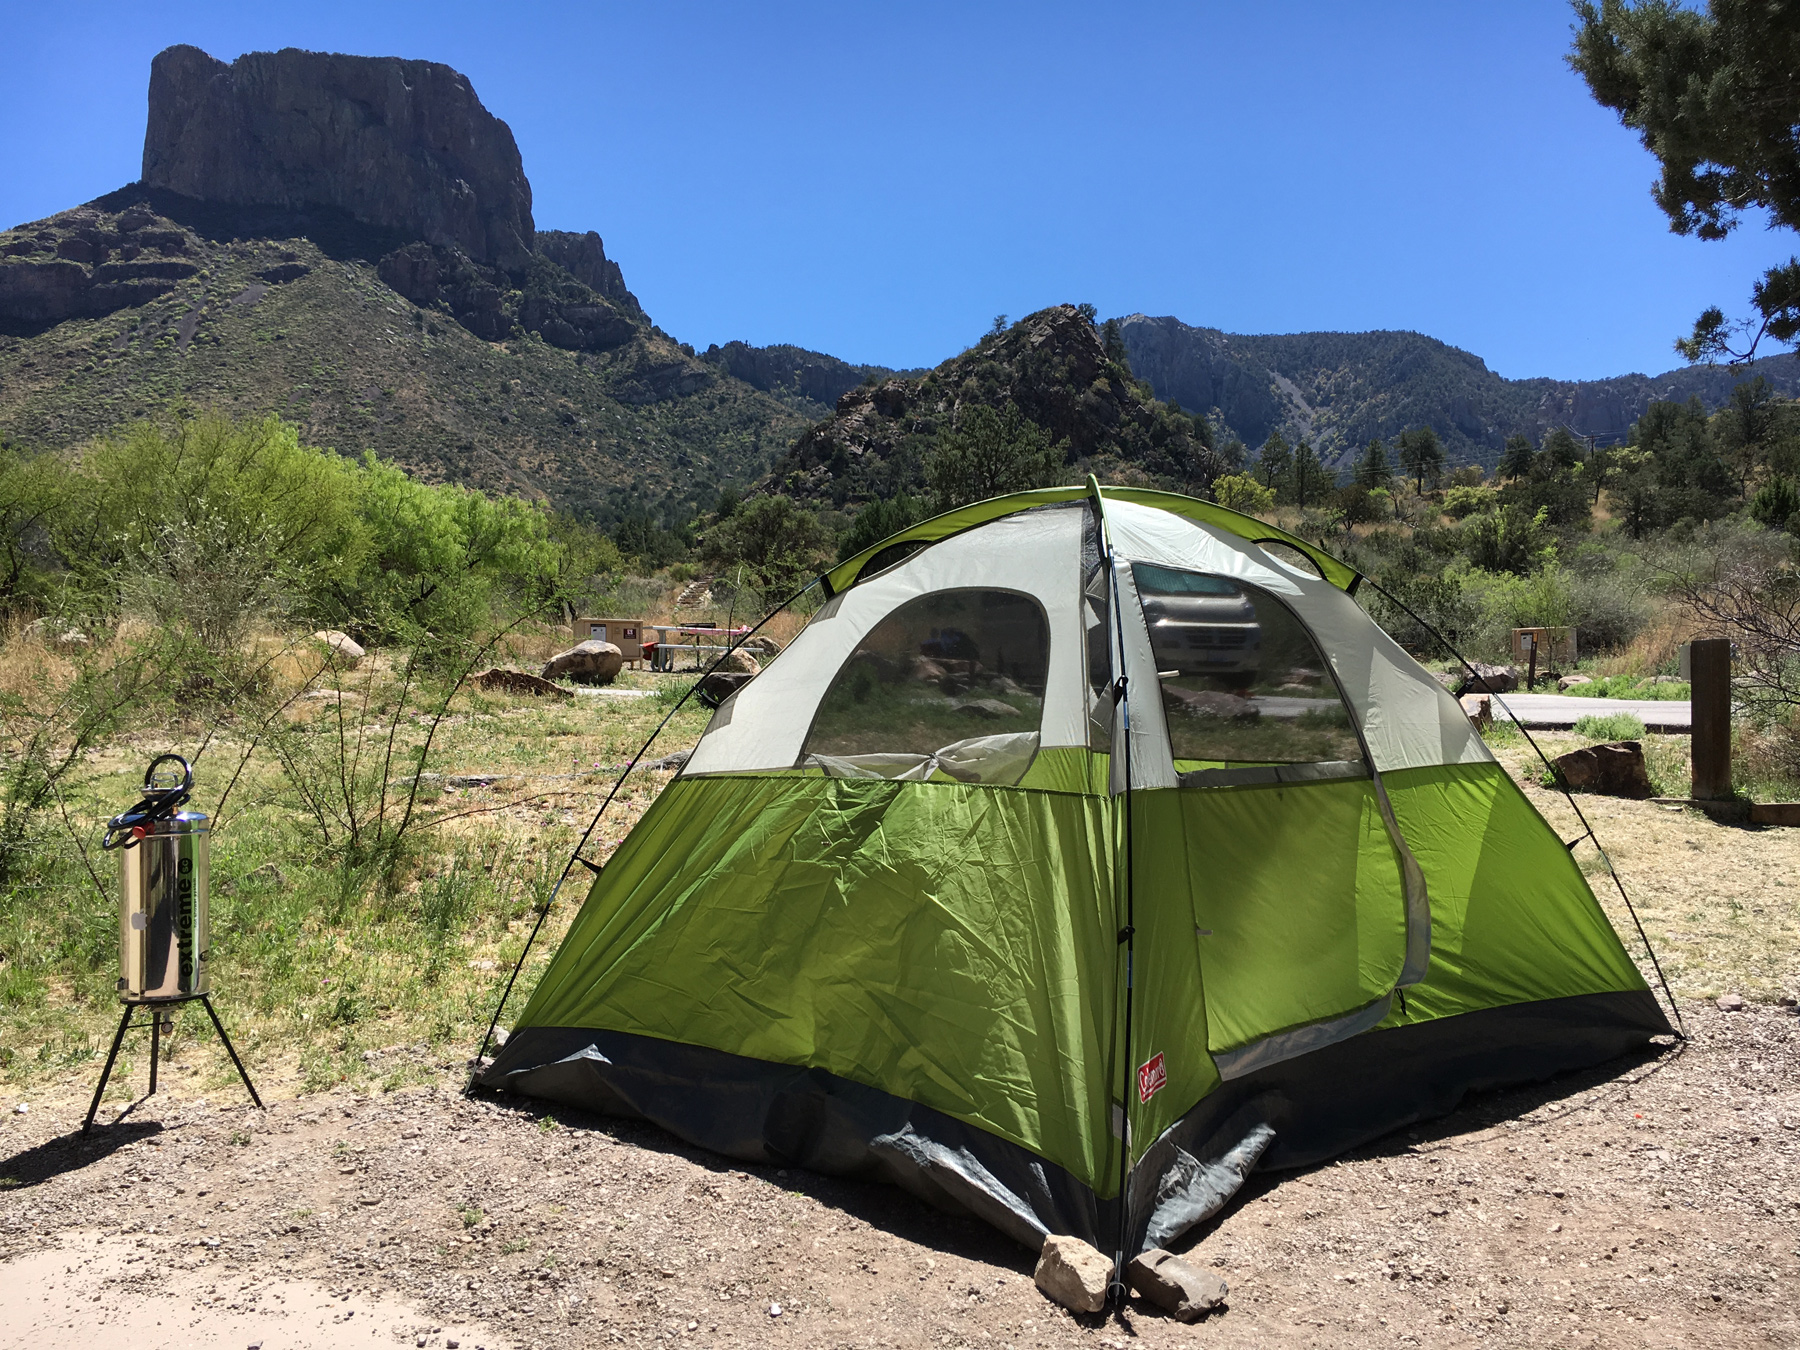
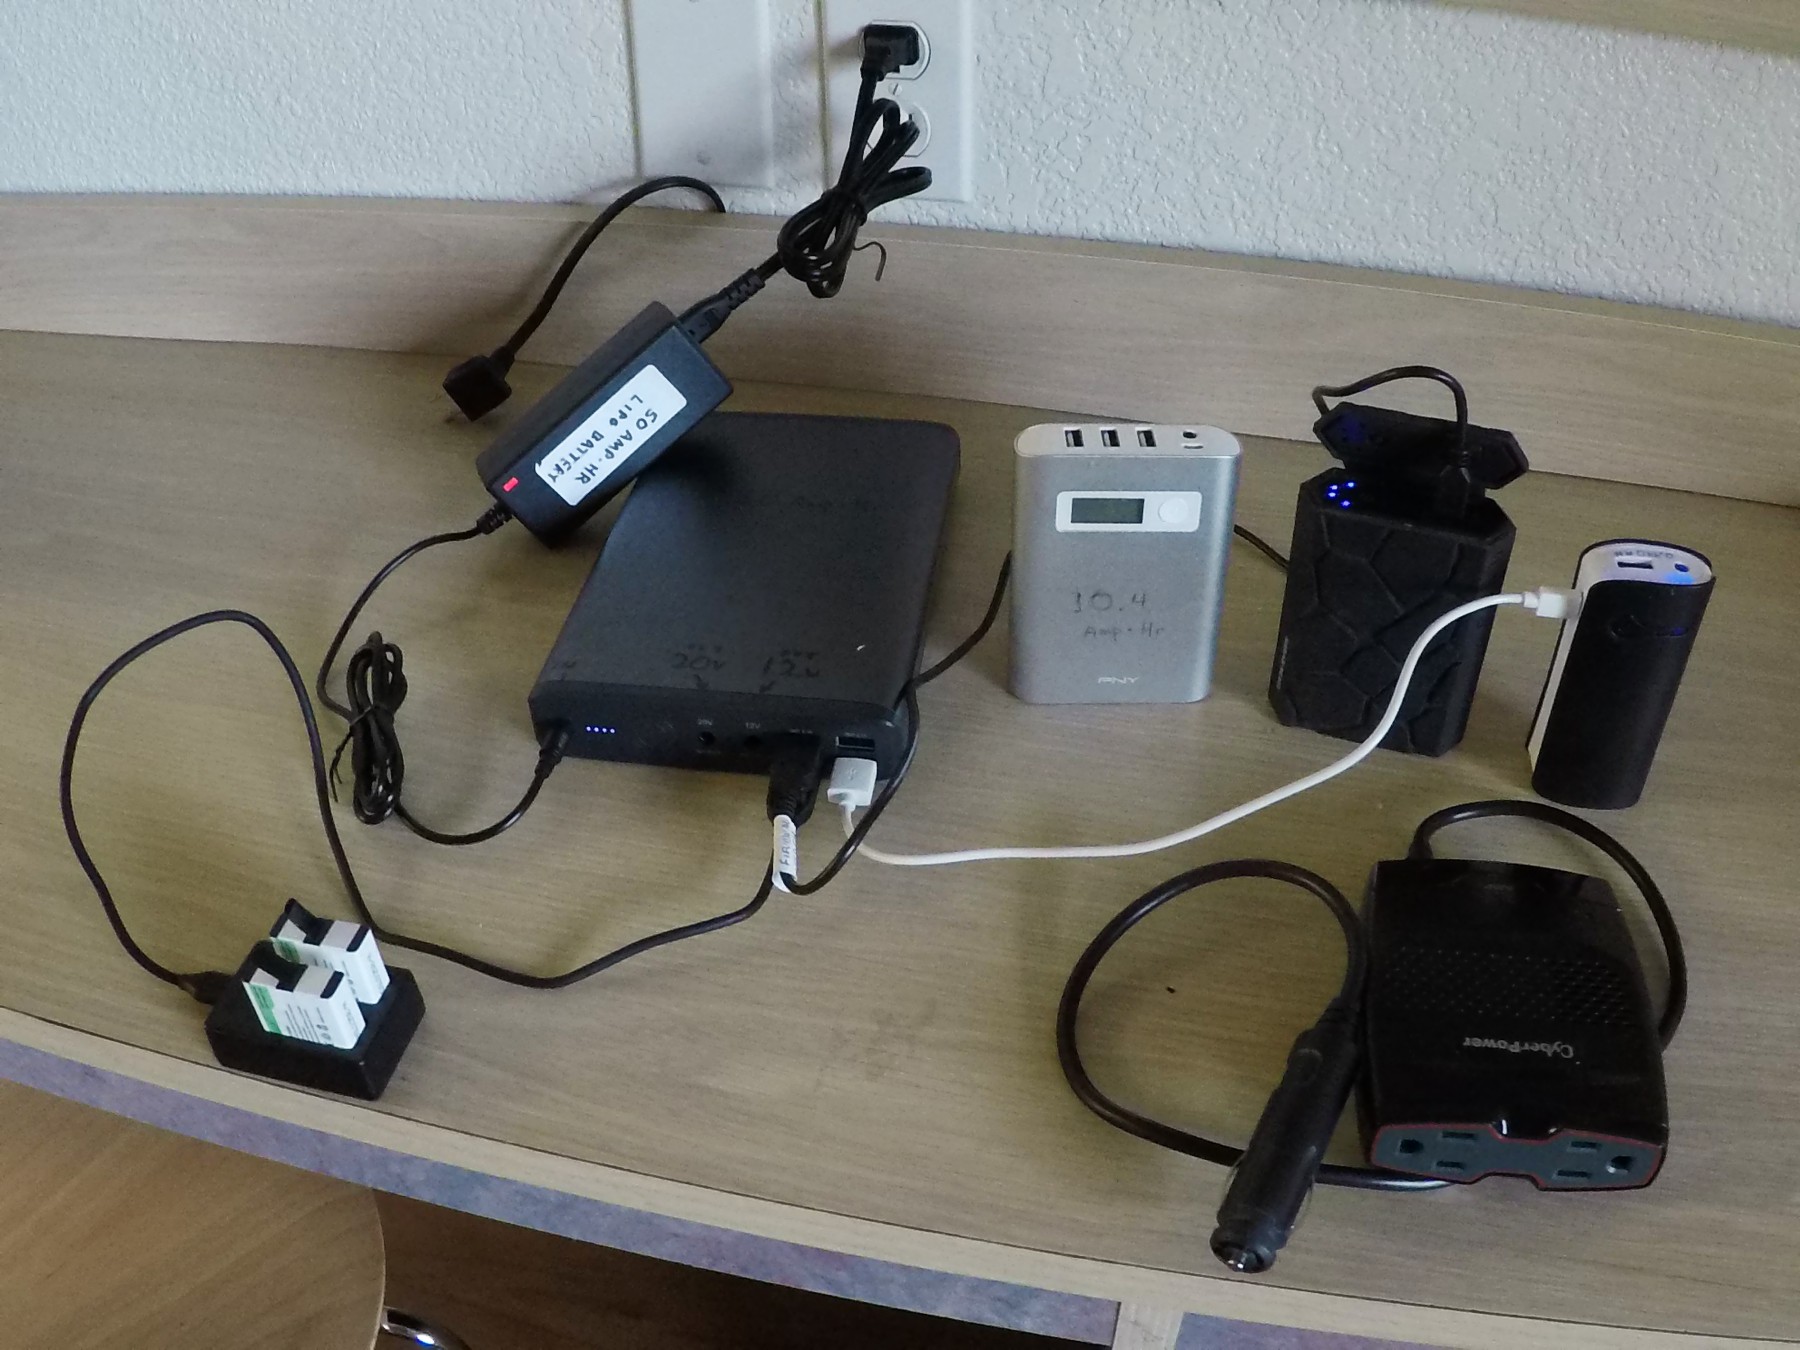
The 12-volt cord management area by the front passenger seat. From Ted: “Here’s the 12 volt splitter I used. It has 3 12VDC outputs and 2 USB outputs. With the 12VDC outputs I power my Garmin NUVI GPS (which records forward looking video too), my Wilson Cellular amp, and a 12VDC to 20VDC adapter to charge my MacBook Pro. I use the USB outputs to charge LIPO [lithium polymer] batteries. I also have a generic 12VDC to 120VAC 150W inverter I got at Best Buy that I used to charge the 50 amp*hour LIPO battery and electric razor. There’s another 12VDC outlet inside my center console as well as in the back of the console so with those I can run the inverter and power the cooler at same time. My SUV also has one more 12VDC outlet in the back but I generally don’t use that.” I have one of those too, and I also never use it.A side look at the two front seats. He’s using the front seat and the floor in front of the seat for storage. Note also the vent-mounted phone holder and signal booster.Using the front passenger seat and floor in front of it for storage. Clipped onto the top of the backpack is a DeLorme inReach (first generation, I think). This is a 2-way satellite communicator that makes it possible to get in touch with the outside world even when you are in the middle of nowhere and have no phone reception. It’s especially great to have in case of emergencies.A Garmin GPS is mounted to the windshield below the rearview mirror. Standalone GPS units are great to have while on the road because they do not require any cellular signal. Great for driving through those remote areas. Again, note the vent-mounted cell phone holder and Wilson signal booster. Regarding the booster, Ted says, “It’s great – it’ll pull in a good LTE signal where the phone itself otherwise has nothing.”Looking at the back seats through the rear passenger side door. A plastic bin on the seat provides a bunch of great storage. The space on the floor in front of the seat is also being used for storage. The green thing with the Apple sticker is an electric cooler (Dometic 7L TC-07US TropiCool cooler), and a red bag of charcoal briquets is next to it. Note the pad underneath the plastic bin that protects the seats. Also note the fan clipped to the grab handle above the door and the red springy thing attached to the side of the bottom drawer. The red stretchy thing is stretched across the front of the drawer and secured to the other side to keep the drawer from opening by itself. It looks like food and first aid supplies or toiletries are in the drawers. From Ted: “I actually only have one USB fan and I have not needed it yet. But when I do, the 50 amp*hour battery will easily run that all night. It will also run the cooler for a long time.”Red stretchy thing in place across the top drawer. Bungee cords, shock cord, and even static paracord could also work here.Another fan clipped to the grab handle above the rear seat. The fans are USB-powered and can be clipped into any USB battery pack.Windows screens help keep the bugs out. This is the window screen that Ted bought. He also told me: “It comes with an adhesive backed ‘male’ side of velcro that the screen mesh sticks to. So I cut strips around the perimeter of the windows (clean with isopropyl alcohol first) then cut the mesh to fit. So far it’s working well.”The sleeping platform for Ted’s bed. It consists of two main sections joined by a pair of hinges: the longer bottom section and shorter head section. Folding the head section back means that the overall structure takes up a shorter space when not in use, allowing Ted to move the driver’s seat back into the space that would otherwise be taken up with the head end of the sleeping platform. My RAV4 is similar in that I move the front seat all the way forward when it’s time to sleep, but I move it back when I drive. Ted is using orange paracord suspended from the front headrest to keep the top end of the sleeping platform at the desired level and to keep it from dipping down into the footwell space.The bed platform with the top section folded up and secured when not in use. Ted had this to say about making the platform: “For the sleeping platform, I bought a 20” x 7’ sheet of lengthwise lamented 3/4” finished pine from Lowes (comes precut and shrink-wrapped for hobbyist). I can’t find a link for it but one can probably find it in any Lower or Home Depot. I used a handheld power jigsaw to cut the pine board to length then used the leftover to make the two vertical pieces. I used my iPhone to find level and establish the heights for my car – the front was roughly half the height of the back. I used metal corner brackets with wood screws to secure the vertical pieces to the horizontal. That is a Nite Ize Camjam from Home Depot – basically using your idea to suspend the head of the bed from the headrest.” That idea to use a level to for the platform is brilliant. Regarding the use of the Velcro you can see on the bottom left corner and sides of the sleeping platform: “The velcro on side of platform is actually there just to prevent the platform from potentially scratching side of SUV. But I did put some “male” velcro on bottom of vertical risers and it actually clings really well to the SUV’s carpet to help secure the platform.”A close-up of the suspension system at the head of the sleeping platform. A Nite Ize Camjam on the paracord makes it easy to adjust or remove the suspension system.The head of the sleeping platform is pulled back and secured when not in use. From Ted: “At bedtime, I move the (electric) drivers seat all the way up and incline it forward a bit. That gives me about 74” front to back distance in my SUV (I’m 71”) with a little room to spare so my feet don’t touch the back (and get the heat sucked out of them if I do LoL). While driving or working on my computer like right now, I have to remove the small piece of foam at the rear, push the mattress backward then fold the head of the platform back on it’s hinges and move the drivers seat back to a normal position. It only takes a minute.”The sleeping platform with foam pieces used as a mattress. From Ted: “I bought the mattress foam on Amazon. While I have a Select Comfort bed at home and I’ve slept on plenty on air mattresses while camping, for this trip I wanted something a little more substantial so went with this. It’s very comfortable and I used a utility knife to cut it to size.”Side view of the completed bed setup. Again, note the red stretchy things on the side of the plastic drawers.The bed with the pillows placed off to the side and in front of the plastic drawers.The foam pads and the pillows are in place, but the head end of the sleeping platform is folded up.Looking in from the side when the sleeping platform is folded up.The bin next to the bed in the rear cargo area. It’s got a shower, food, toilet paper, and other provisions. In front of the bin is a bike helmet and another storage bag. The big green circle thing is a shower/privacy tent. I have the same one, and it’s the Leapair Instant Pop-Up Privacy Tent. The big silver cylinder is the ZODI Outback Gear Extreme SC Hot Shower.The shower set up at camp in Bed Band National Park. From Ted regarding the shower: “The Zodi shower is awesome and has already paid for itself in terms of increasing the amount of time between needing to stay at a motel. I’ve found that water doesn’t need to be that hot for it to still be incredibly refreshing (average about 6 minutes of heating). After a long hike, it’s so nice to rinse off the soil, sunscreen and DEET and I can get a lot of water pressure out of it to help do that. You don’t need the full 3 gallons though I usually do since getting water hasn’t that much of a problem and I’ve even used stream water. The only thing I would do is the mod. to replace the sprayer with a kitchen sink sprayer spliced in.”The “low yuck” sunscreen that Ted recommends.
But wait, there’s more!
After sending Ted a draft of this blog post to look over to make sure I got everything right, he sent me a few more info and photos with some updates to his system:
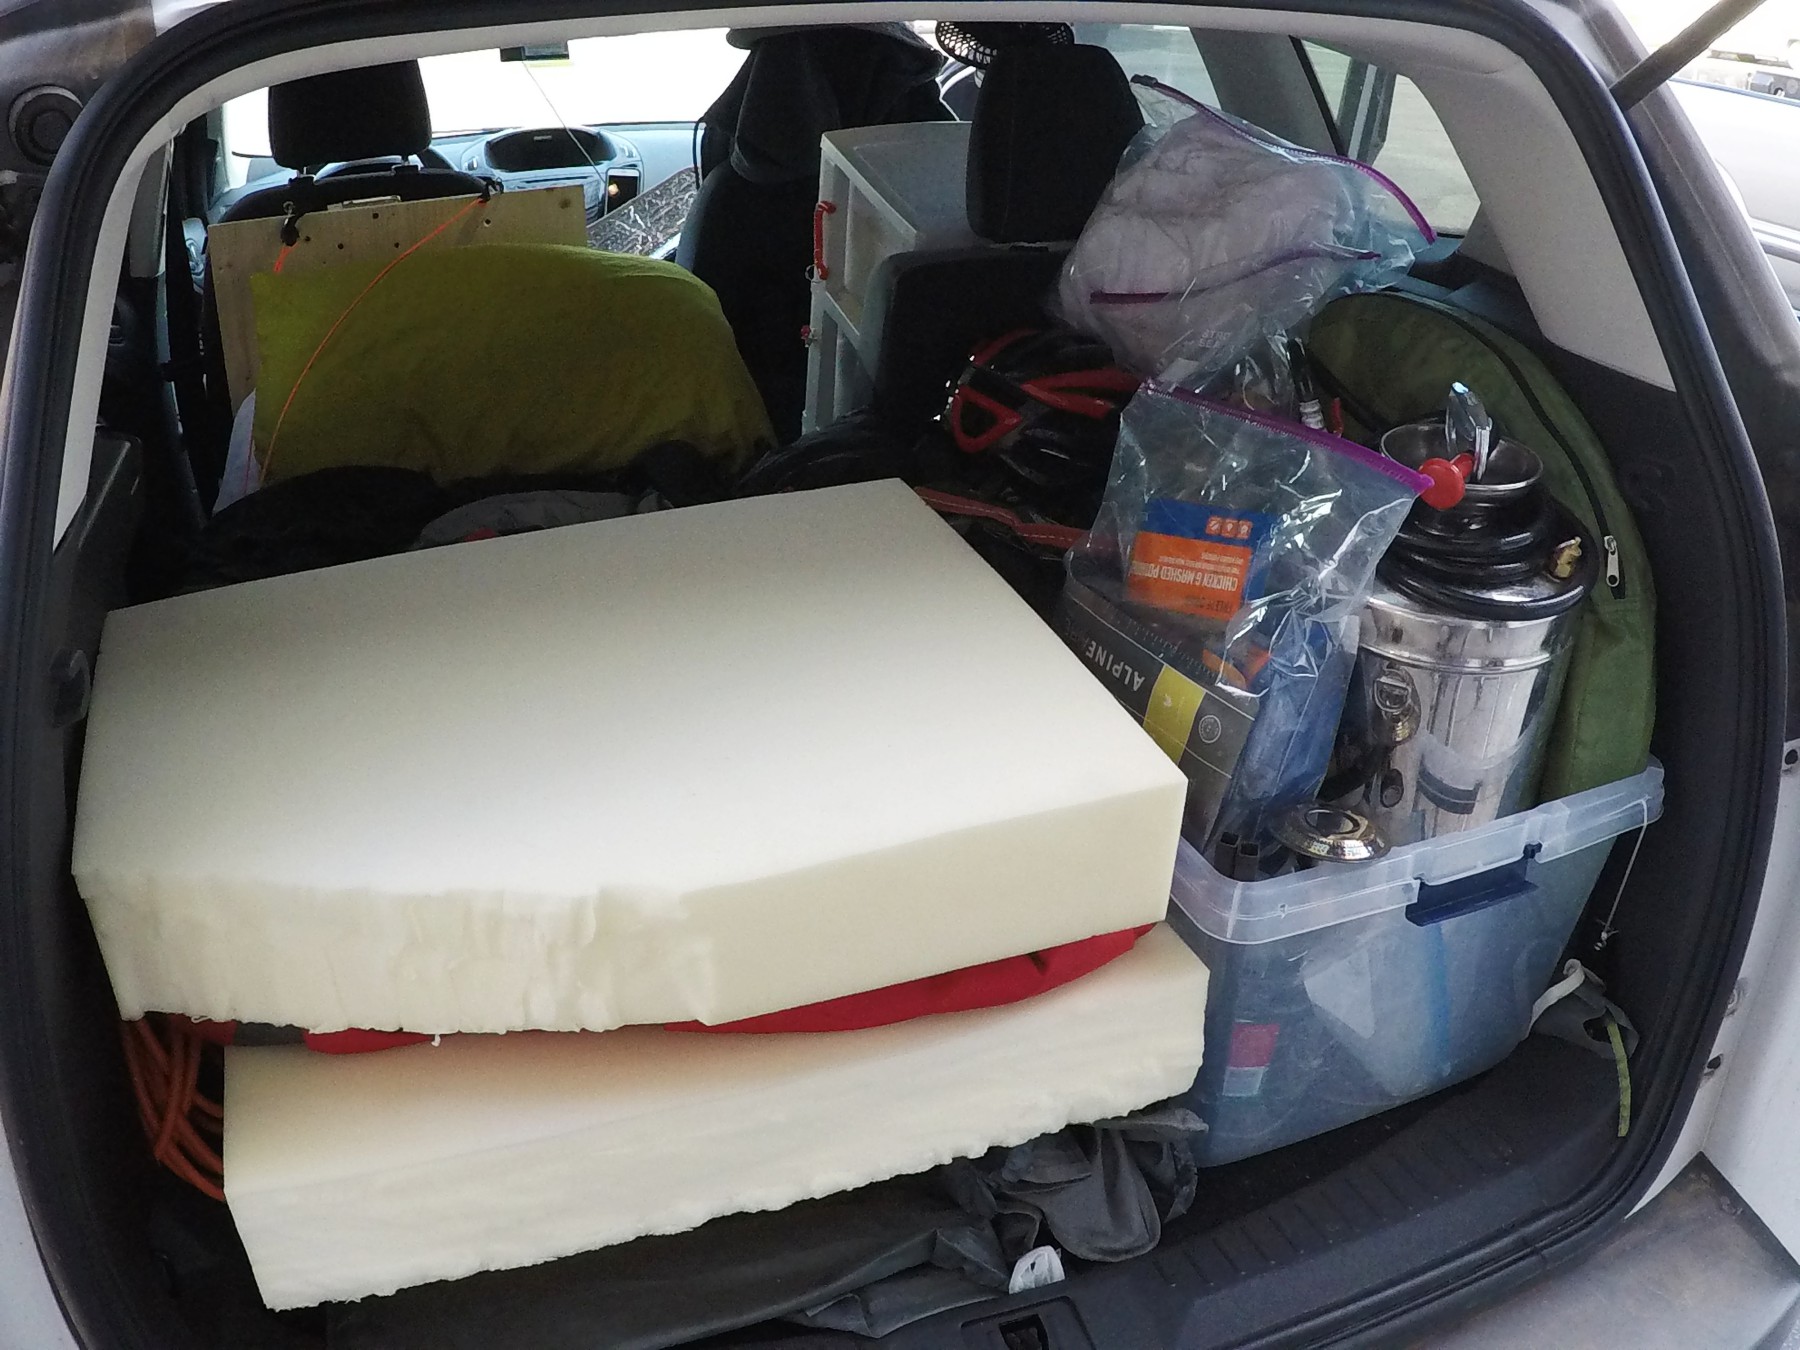
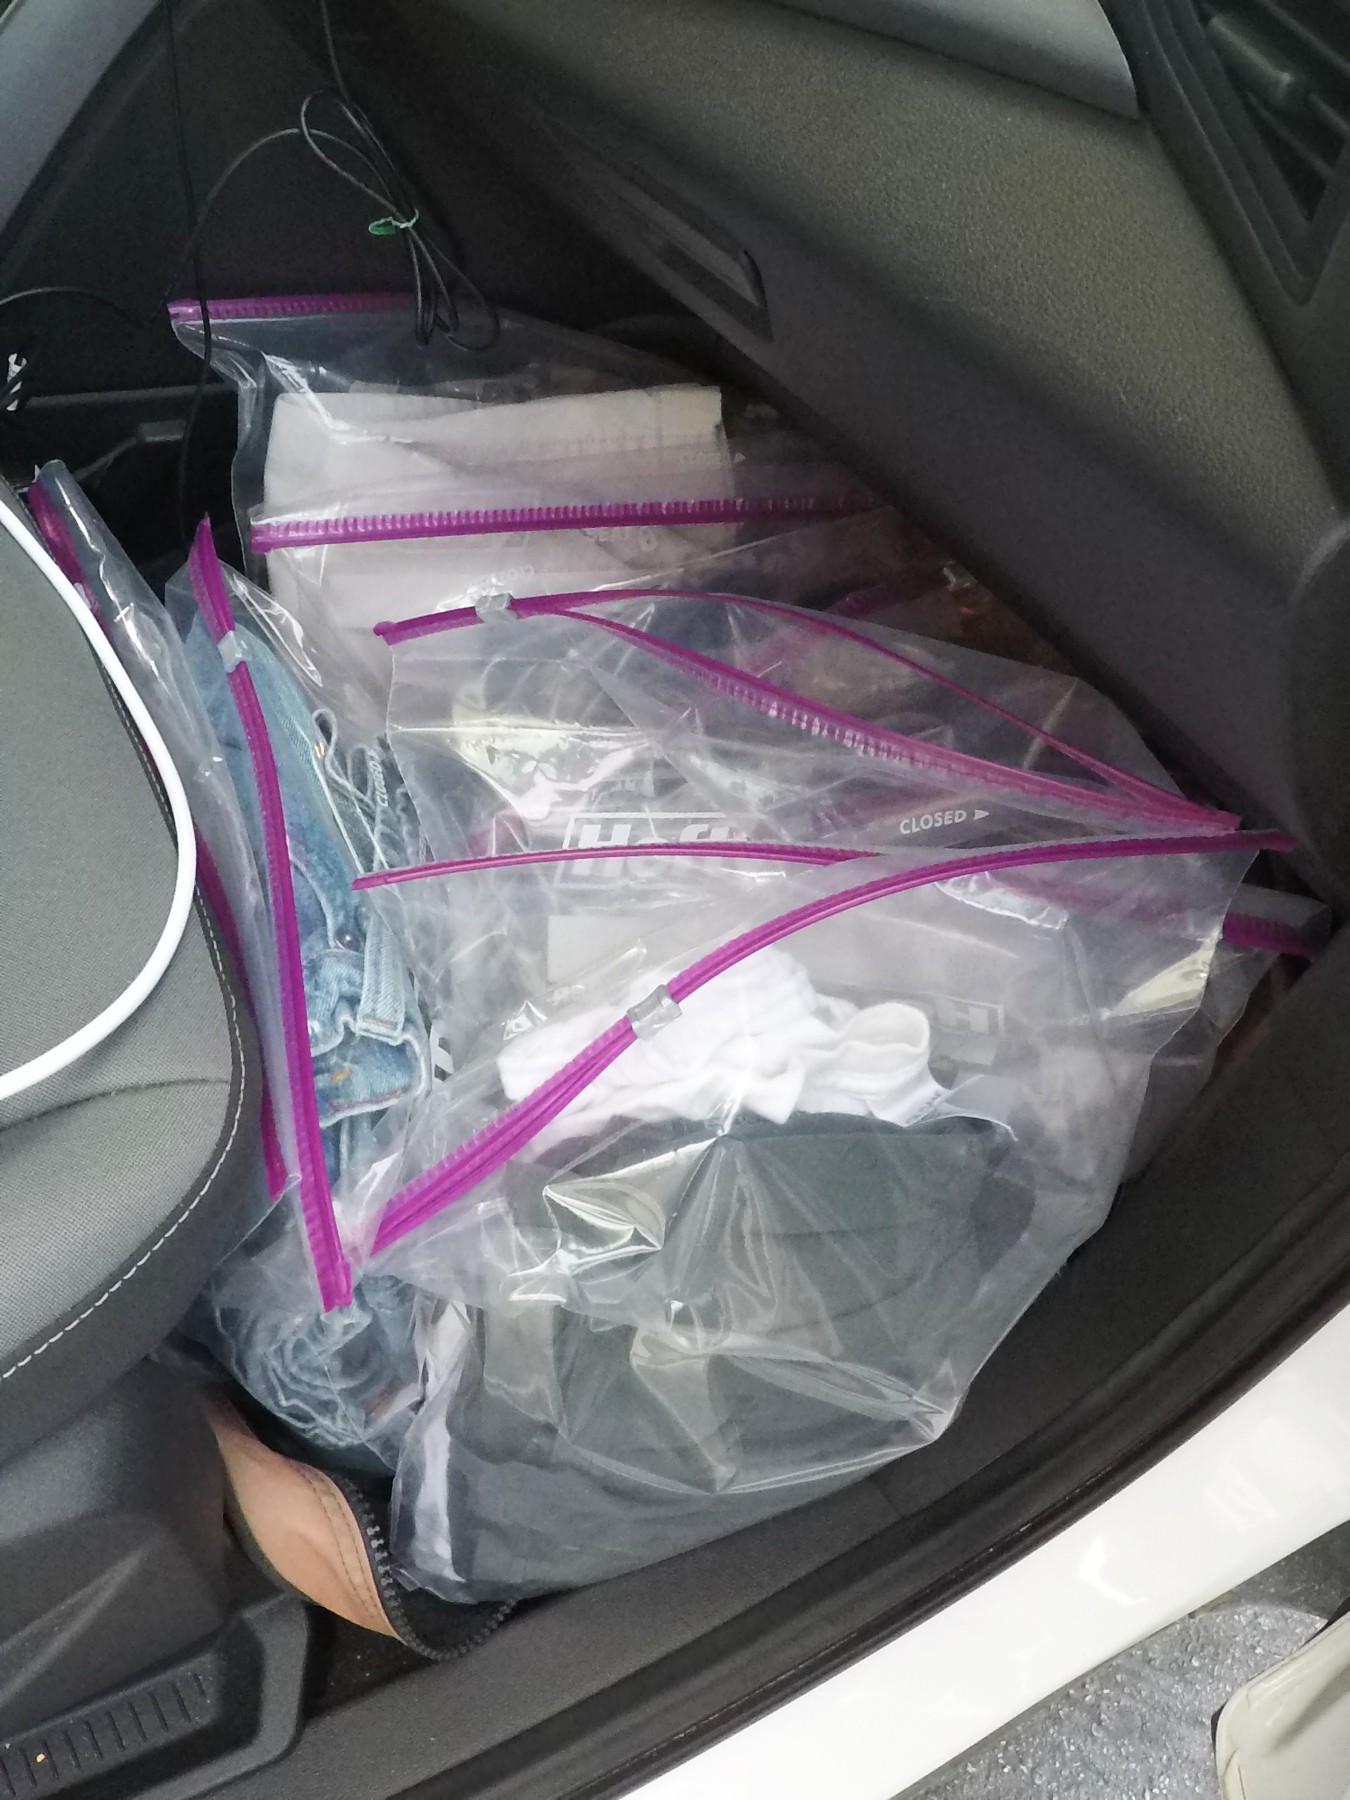
“You can see from the updated photos [below] that I ended up organizing my clothes by type into separate 2.5 gallon zip lock bags (socks in one, underwear in another, t-shirts, shorts in others etc.) on the front passenger side floor. I’ve found by doing that I spend less time rooting around, have a better idea how long until I need to do laundry again, and also eliminate the risk of moths getting into my clothes. I also ended up getting a plastic container from Target to hold backpacks vertically in front seat which has reduced some clutter there.”
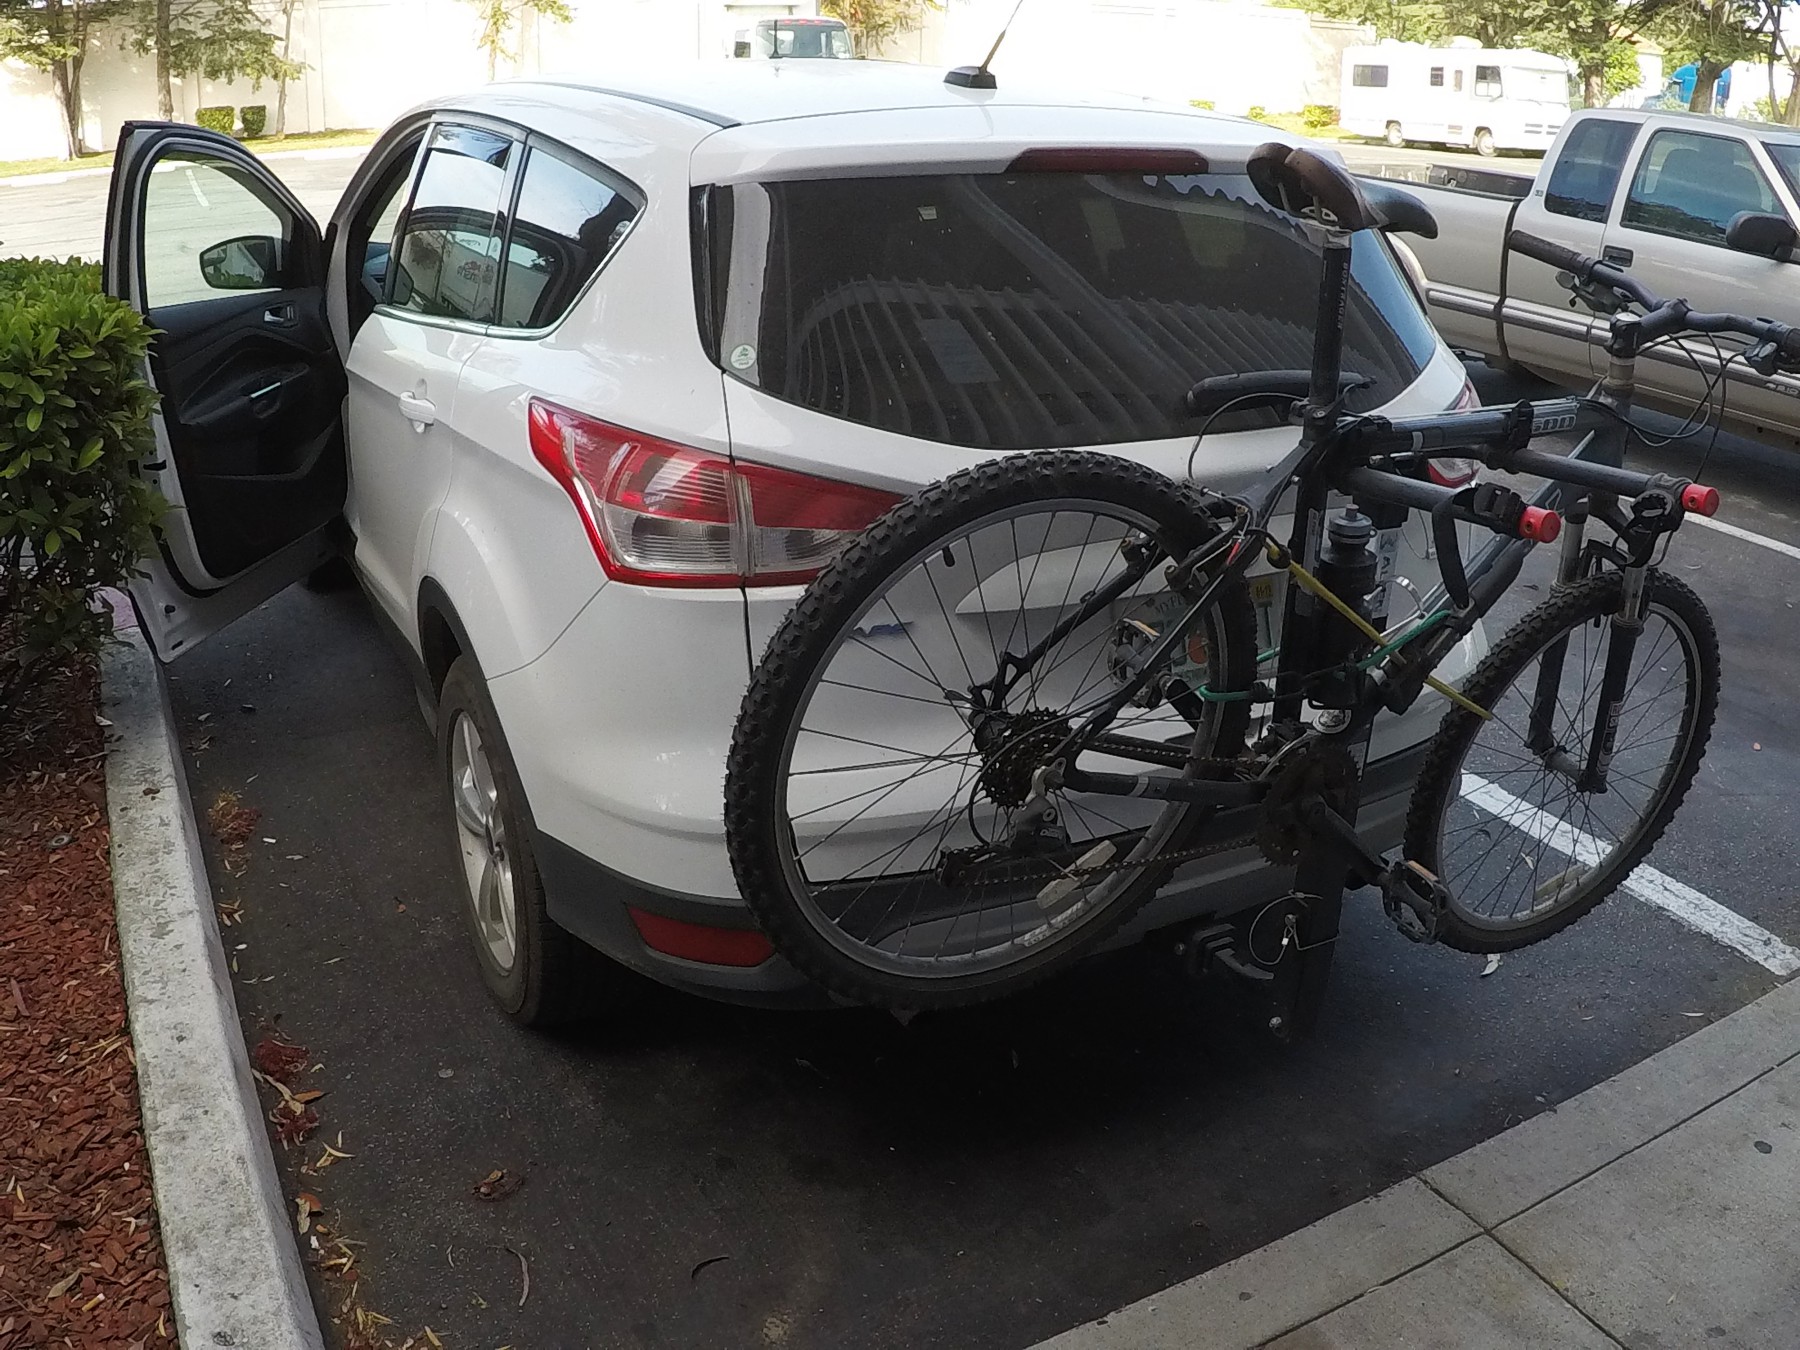
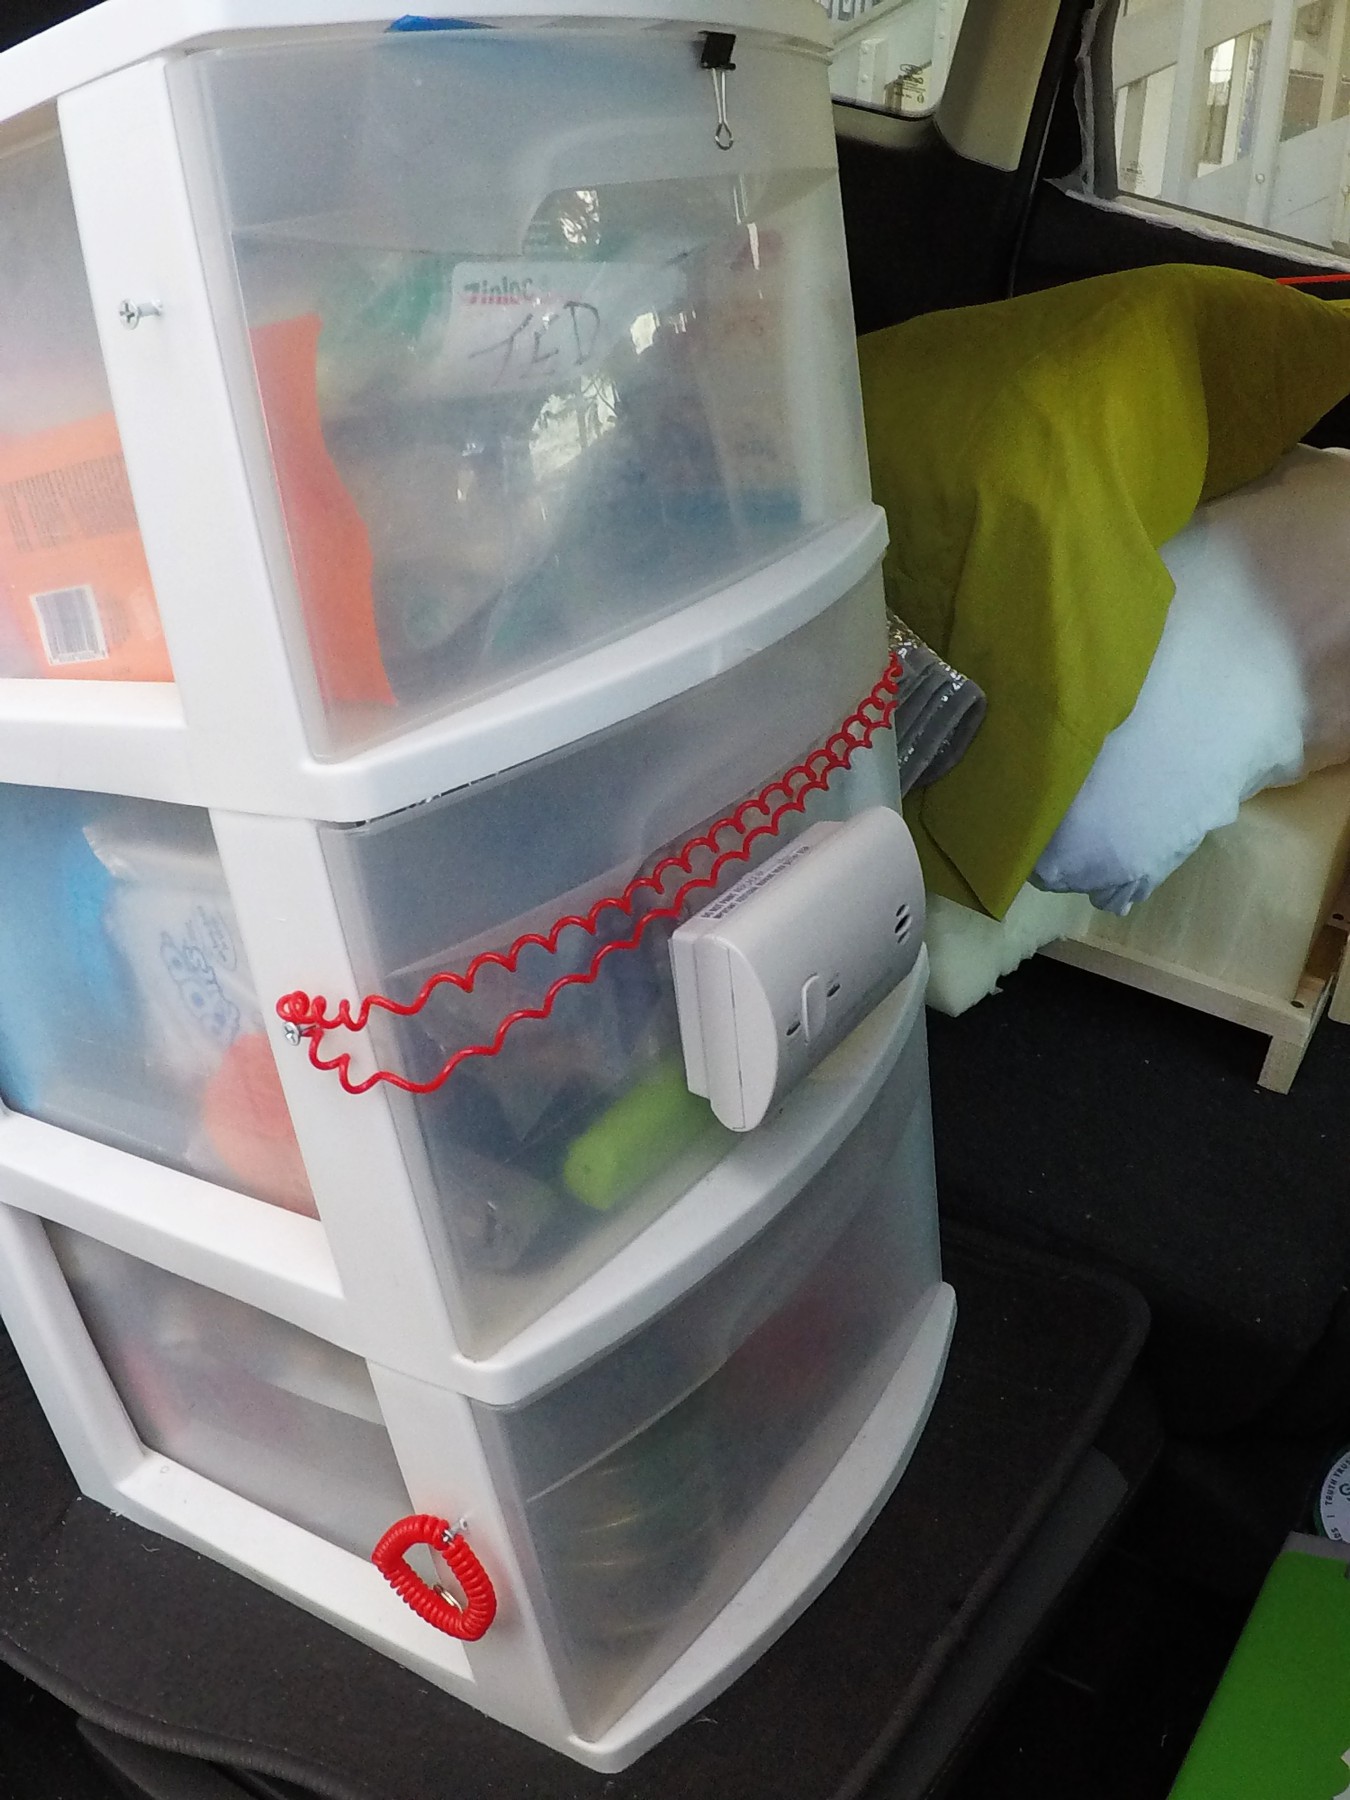
The back container is now more organized.The hitch-mounted bike carrier.Ted’s “cheapo” pee bottle is an old water jug.Ted has used large (2.5 gallon) plastic Ziplock bags to help organize his clothes better.The carbon monoxide detector is attached to his plastic drawers. Great idea!The cooler, stove fuel, and shoes stored on the floor behind the front passenger seat.A plastic bin on the front passenger seat helps Ted organize his backpacks.Ted’s batteries and charging setup.
***
Huge thanks to Ted for sharing his setup with us. This is now one of the best-documented SUV camping setups online, and I’m sure people will find it very helpful. If you have any questions or comments, ask away in the comments or in an email to me, and I’ll forward them to Ted.
Do you travel, camp, or live in your SUV? I’d love to see pics of your setup! Shoot me an email to get the ball rolling.
Note: This blog post contains Amazon affiliate links.
11 thoughts on “Sleeping and Camping in a 2015 Ford Escape”
I have a 2006 ford escape. I intend to take both back seats out. Will a twin mattress fit in back? I’ve seen some set ups with a platform and storage underneath. Is there enough room to do that?
so after much thought, I have decided to take out both back seats. Place a platform with storage underneath for a twin bed and leave the front passenger seat with an organizer and desk space.
I am a starfish sleeper and that sleeping position is the only one I can deal with. I can not see how you used half the space for a bed it is coffin sized!
If you leave anything plugged into it, it will continue to charge, even with the engine off. A phone is no problem but I once ran mine down with only a small USB fan. It’s better to use a jackery or similar to charge up your accessories. Recharge the jackery from campsite electricity or as you drive.
Wonder…….how would this work….put a days worth of underwear in smaller bag and outerwear in larger bags or bag up entire days of clothes in a bag. Would keep you from rooting around in so many different bags. Or rolling a day of clothing together then into big bag. That way you just select a roll. Can still keep tabs on clean vs dirty. Assuming you have a dirty laundry bag somewhere. Love all the info.
That is how my mom packed our clothes for camp and vacations. It worked great if we knew what weather to expect. Might need to tweak the system if you need to layer for unstable temps.
Thank you for this pin. I have a similar setup in my 2004 Nissan XTrail.
I recommend putting a piece of pipe insulation foam on the end of the bed board to protect the back of front seat.
I like without taking rear seats you creat very simple and use less money. I like it . I ‘ve never seen like this. I was looking for this plan. Helpful very much and thank you.


Fascinating !
Thanks for sharing
I have a 2006 ford escape. I intend to take both back seats out. Will a twin mattress fit in back? I’ve seen some set ups with a platform and storage underneath. Is there enough room to do that?
so after much thought, I have decided to take out both back seats. Place a platform with storage underneath for a twin bed and leave the front passenger seat with an organizer and desk space.
I am a starfish sleeper and that sleeping position is the only one I can deal with. I can not see how you used half the space for a bed it is coffin sized!
I will post a pick when I am done.
Hi I was wondering how do I keep my car battery from dying overnight because my car is a 2014 ford escape Ecoboost
If you leave anything plugged into it, it will continue to charge, even with the engine off. A phone is no problem but I once ran mine down with only a small USB fan. It’s better to use a jackery or similar to charge up your accessories. Recharge the jackery from campsite electricity or as you drive.
Wonder…….how would this work….put a days worth of underwear in smaller bag and outerwear in larger bags or bag up entire days of clothes in a bag. Would keep you from rooting around in so many different bags. Or rolling a day of clothing together then into big bag. That way you just select a roll. Can still keep tabs on clean vs dirty. Assuming you have a dirty laundry bag somewhere. Love all the info.
That is how my mom packed our clothes for camp and vacations. It worked great if we knew what weather to expect. Might need to tweak the system if you need to layer for unstable temps.
Starting to live out of my 2004 Ford Explorer with my dog
Thank you for this pin. I have a similar setup in my 2004 Nissan XTrail.
I recommend putting a piece of pipe insulation foam on the end of the bed board to protect the back of front seat.
Or a cut pool noodle!
I like without taking rear seats you creat very simple and use less money. I like it . I ‘ve never seen like this. I was looking for this plan. Helpful very much and thank you.